
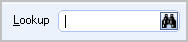
Quick Lookups are available from many areas in WinTeam. Quick Lookups are used to find specific records. Each master file contains a primary Quick Lookup field in the upper part of the screen.
If you are on a master file screen
- Press ALT + L to place your cursor in the Lookup field
All other screens
- Press F4 to set the focus on the Lookup screen to the Number/ID field
- Press F5 to set the focus on the Lookup screen to the Description/ Name field
- Press ALT + S to Search
- Press ALT + A to Select All (only available on screens that allow more than one selection)
- Press ALT + L to Select
- Press ALT + C to Cancel
Master File Lookups
In addition to the master file Quick Lookups, there are Quick Lookups available for:
- AP Invoices
- AP Payments
- AP Recurring Invoices
- AR Invoices
- AR Payments
- AR Recurring Invoices
- Contacts
- Compliance Codes
- Customer Contacts
- Deductions
- Drop Shipment
- GL Accounts
- HR: Benefit Setup
- INV Activities
- INV Adjustments
- INV Drop Shipment
- INV Request
- PAY Other Compensations
- Paychecks
- Physical Count
- Purchase Orders
- QA Checkpoints
- QA: Areas
- QA: Items
- Scheduled Queries
- Received Purchase Orders
- Tax Codes
- Tasks
- Tickets
- Tax Codes
- Usage / Resale
- WS: Schedules
Lookup fields can be used with numbers or names, or both. If you enter an exact match on the ID you enter, tabbing from the field will automatically load the record. If you enter a name (or number) and the name (or number) matches an existing record ID or Description, a list displays. You can then select the record you want to use. Even if there is an exact match on the Description, we do not assume you want to load the record. In this case, once you tab off the field the list displays. You can either use the arrow keys to select from this or type in the ID of the record you want to choose.
You can type over any value in the Quick Lookup field to start over. The system either loads the record (if the ID exists) or re-queries and presents a new list of records.
Notice that the first line is highlighted and the ID value (11) from the first line is populated in the Lookup field. Then you can select from the list to load the selected record.
In this example the word "Backpack" was typed in the Lookup field.

Since there are 5 records that have Descriptions that begin with "Backpack", those records display. Then you can select from the list to load the selected record.
- To search for a record in a list, select the Quick Lookup button
- To search for a record in a list with the focus set to the Number/ID field, press F4.
- To search for a record in a list, with the focus set to the Description/Name field, press F5.
If you are on a master file screen, you can press the shortcut key ALT + L to place your cursor in the Lookup field.
When the Lookup screen opens, the Search button has focus and is the default button.
Once you press Search, the focus shifts to the first column in the grid, and the OK button becomes the default button.
If you do not know the name or the ID of the record you want display, leave the search criteria blank, and then click Search.
Filters
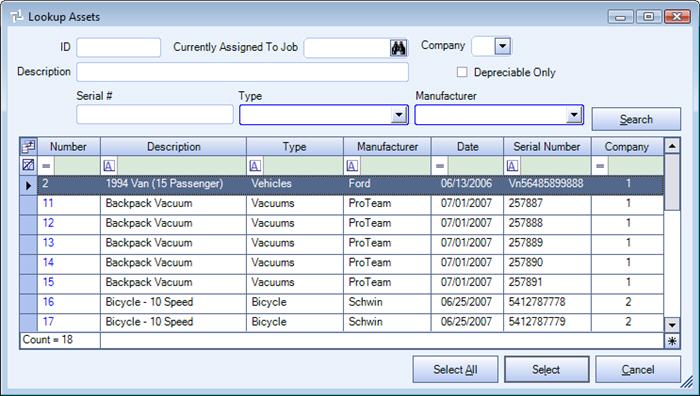
The header area of all Quick Lookup screens contain filters that can be used to limit the number of records that display in the grid.
Fields that have blue borders indicate that you can double-click in that field to display a specific list of search criteria depending on the field type.
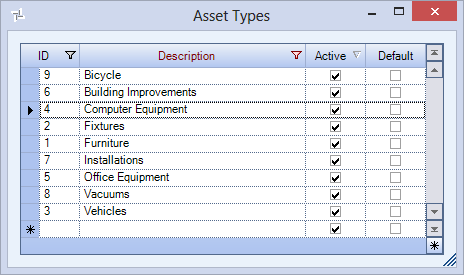
Double-clicking in the Type field on the Lookup Assets screen opens the Asset Types add/edit list. For more information, see Add/Edit Lists.
Wildcard Characters
When using Quick Lookups, the % key acts as a wildcard character.
Example: If you were trying to find a name that has the word "school" in it, type %school. The system finds all Customers with the word "school" within its name. This functionality works in all filtering fields on Lookup screens.
Grids
The first column in each grid displays with blue text, which indicates that you can double-click on a record in the grid and the system automatically selects that record. This is a great shortcut you can use instead of having to go to the grid row and then click OK.
Note: If the record you are currently on is not editable for some reason, the number/text in this column will not have blue text, indicating that the field of information is not available for changing.
For complete information on grid functionality see Understanding Grids.
Selecting Records
To open a single record, select the record and then click the OK button.
To select consecutive records, click the first item, press and hold down SHIFT, and then click the last item.
To select nonconsecutive files or folders, press and hold down CTRL, and then click each item.
To select all records, click the Select All button.
Note: The Select All button displays only when applicable on the Lookup.
Example: If you are on an AR: Asset Master File record and looking up a Vendor, the Select All button does not display on the Lookup Vendor screen. In this case it is not applicable to have more than one Vendor assigned to an asset record.

Once you click Select All or Select, the system begins creating the record set.
Note: If you select more than 10 rows in the Quick Lookup, you will receive this warning message:

Click No to reselect the rows to include.
Click Yes to continue with the filter.
The 4 items we selected in the Lookup Assets screen are now in this record set.
You can continue to limit records in your record set by right-clicking from any field and using the Filter By Selection or Filter By Exclusions options. You can navigate through the recordset by using the Record Selector. For additional details, see Record Selector.
Closing the Quick Lookup screen
Pressing the Escape key will act as Cancel and will close the Quick Lookup screen.
Special Note for Lookup Usage / Resale screen
The Find Usage / Resale screen opens with the Starting Date field populated. The Starting Date defaults to "Today's Date" minus 45 days.
When the system filters the records, it first looks for records that have a Shipped Date that meets the specified date criteria. Those records then populate the Details grid displaying the Shipped Date in the Activity Date column.
If the Shipped Date is blank, only then does the system look at the Issued Date for additional records to include in the results.
For more information, see Sold/Usage.