Overview
You can access the Review Checks screen from the Payroll Menu and through the Check Processing Wizard. Using the Check Processing Wizard allows you to view information for any check that has been processed.
Up until the time the check batch is printed, you can Edit a Batch and make changes to any check record. Once it is printed, the batch is no longer available under this option. You can still view the batch though through Show All Batches. If you are viewing a check record through Show All Batches, all fields of information are locked with the exception of assigning an Escheated Date to a payroll check. For more information on assigning a Date Escheated, see Complying with State Escheat Laws.
There are special handling rules when adding direct deposit checks to a batch during the Review and Edit process. For more information, see Adding Direct Deposit Checks during the Payroll Review and Edit Process.
WinTeam tracks the users editing or printing payroll batches to prevent one user from printing a batch while another user is editing the same batch. Warning messages display if a user attempts to edit a batch that is being printed or attempts to print a batch that is being edited.
You can also manually clear the locks on a batch. For more information, see Clearing Locks.
When you access the Review and Edit Paychecks screen from the Payroll Menu, you can enter an Employee Number, and the paychecks issued to that employee display in the list to select from. If you click the Lookup icon you can find paycheck records using various filters. The Lookup Paychecks screen displays on top of the Review and Edit Paychecks screen.
When you access the Review and Edit Paychecks screen through the Check Processing Wizard, you can filter the batch by Negative Checks, Duplicate Checks, Rate Limit, OT Hours Limit, Terminated Employees, Max Check Amount, Subcontractor Checks, or Minimum Wage.
Select a filter from the list and then click the filter button to display the results.
Use the Negative Checks filter to find checks where deductions are higher than the net pay amount. Select Negative Checks from the filter, and click the filter button to display the results. Once the filter has been applied, the text "Credit Bypass" displays on any records with a negative Net Pay. The system restricts you from printing a batch with a negative check. These checks must be corrected.

Use the Duplicate Checks filter to check for employees that have multiple checks in the batch.
Use the Rate Limit filter to verify if you have any hourly or salary rates above a threshold. When you select the Rate Limit from the filter drop down, a Hourly Rate Limit and Salary Rate Limit filter fields display. Enter the appropriate values in the entry fields and then click the filter button to display the results.

Use the OT Hours Limit filter to verify if any employees have overtime hours over a specified limit. Select the OT Hours Limit from the filter drop down and an Overtime Hours Limit field displays. Enter the appropriate value in the entry field and then click the filter button to display the results.

Use the Terminated Employees filter to identify if there are any employees who have a pay check in this batch with an inactive date in the pay period dates. Select Terminated Employees from the filter drop down and click the filter button to display your results. Results include both inactive and LOA employees.
Use the Max Check Amount filter to verify if there are any checks where the net amount exceeds a limit. Select Max Check Amount from the filter drop down and a Max Check Amount field displays with a default value of $3,000. Edit the value if appropriate and the click the filter button to display the results.
Use the Subcontractor Checks filter to identify if there are any subcontractor checks in the batch.
Use the User Defined Wage Limit filter to set your own wage limit and see employees who are not meeting that minimum based on their gross wages and hours works. The Min Wage Deficit value is the total amount the employee needs added to their gross wages in order to meet the minimum. This filter is beneficial when you have employees with other compensations that you want calculated as part of their minimum wage. Enter the value in the Wage Limit field and then click the filter button to display the results.

The following calculation takes place to figure the Min Wage Deficit (how much the employee is owed):
- First the straight wages are figured. Premium dollars are not included (the extra ½ time for overtime pay or extra ‘time’ for double-time pay).
- Any Compensation* being paid that is set up to Include in User Defined Wage Limit calculation is added in also.
- Total Hours being paid (all hours types) = straight wages + compensations* / total hours
-
Then it will figure the deficit by using the following calculation:
Wage entered on the filter - straight pay rate = amount owed per hour.
Amount owed per hour X the number of hours being paid = Min Wage Deficit
Use the Duplicate Comps filter to identify checks in the batch that have the same compensation included multiple times on the check.
Use the Minimum Wage filter to find any employees who are earning below the minimum rate for any job they worked. See Checking Minimum Wage Compliance for more information.
Note: When using this filter, you can click the drill down to the right of the Wages field to access the Minimum Wage tab in the Exceptions panel of the Timekeeping window. When accessed this way, Minimum Wage is the only tab visible in the Exceptions panel, and all other tabs and options in the panel are hidden.
Use the Pending Addresses filter to identify employees who have submitted an address change through eHub but the new address has not been imported into the Employee Master File by using the eHub Employee Requests button.
Note: An employee’s address change could require new tax forms to ensure their withholding is correct.
Use the Duplicate Deductions filter to identify checks in the batch that have the same deduction included multiple times on the check.
Use the Nondisc Bonus Limits Filter to filter out additional amounts owed that are over the default limits set in Payroll Defaults. This filter multiplies each weekly bonus amount by the default limits. If the additional amount owed is equal to or greater than that amount, that nondiscretionary bonus is flagged as an exception and should be reviewed.
Tip: See Review and Edit Checks for more information.
The employee’s current Paycheck Company is populated by default. If you need to change it to a different paycheck company, the Can Change Emp Company check box must be selected in User Security. Only the companies that you have security rights to manage display in the Paycheck Company list.
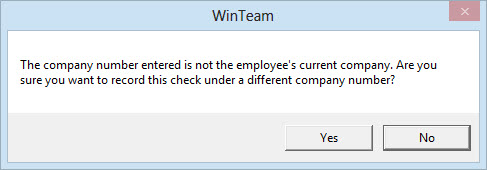
A message box displays when you change the Paycheck Company. Click Yes to record the check under a different Company number. Click No to cancel the Paycheck Company change
To prevent Users from changing the Company Number when processing Automatic Checks, use the Payroll AutoBatchLockCompany custom setting.
Key Functionality
The PAY: Review Checks screen has five tabs:
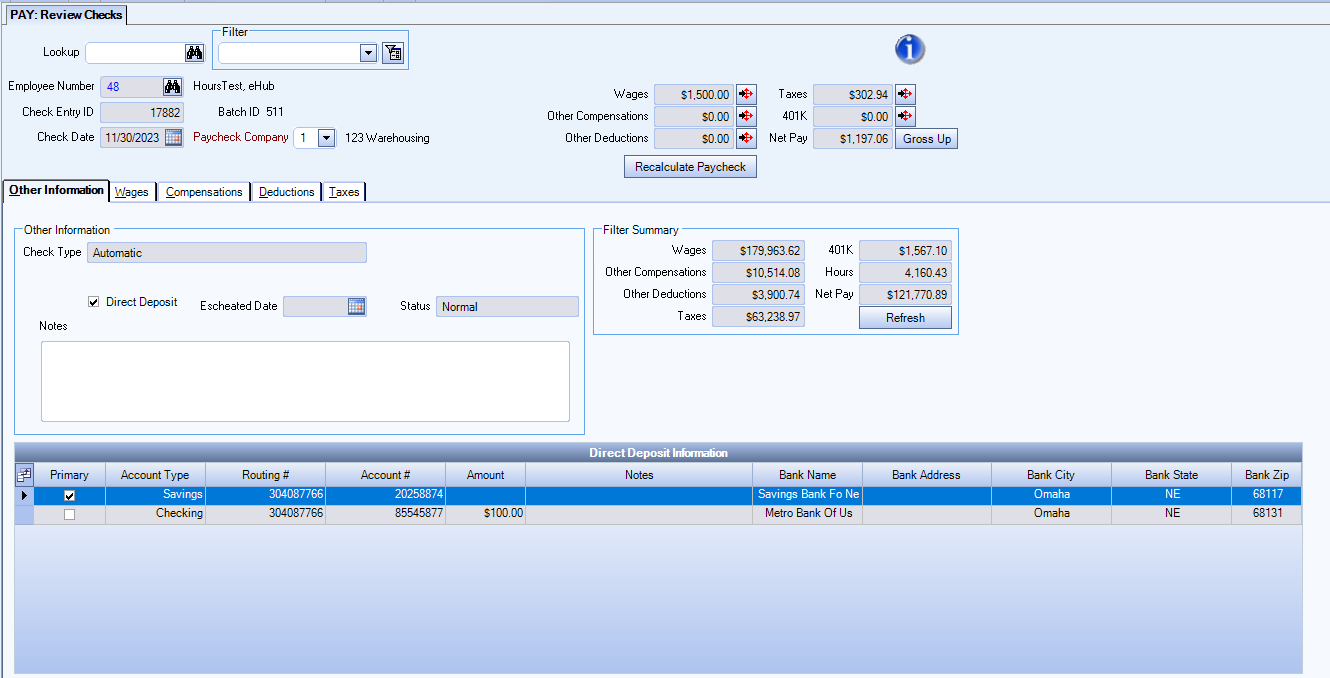
When you first access the Review and Edit screen the focus is on the Other Information tab.
Check Type
Displays the type of check (i.e. Automatic computer generated and printed, manually entered and printed, or manually entered and computer printed).
Cleared
This check box displays once the check has been updated to the General Ledger.
Displays the bank status of the check. If this check box is selected, the check has cleared the bank.
Direct Deposit
Displays whether this check was direct deposit. If this check box is selected, the check was distributed via direct deposit.
Bank Statement Date
This field is visible under the Show All Batches option as a Read Only field. If a date displays in the read-only field, the check has been reconciled.
The Bank Statement Date field is hidden when in Edit an Existing Batch mode.
Date Escheated
Use the Date Escheated field to enter a date that this payment record was escheated. For more information, see Complying with State Escheat Laws.
Status
Notes
Use the Notes field to enter any notes pertaining to this paycheck record. If you enter more than one line of information, the system automatically wraps the lines of information for you.
Filter Summary
The summary totals reflect the totals of the filtered check records.

Direct Deposit Information
The Direct Deposit information grid from the Employee Master File displays. If Direct Deposit information is changed in the Employee Master File, after the check has been printed, this window continues to display the Direct Deposit information from when the check was printed.

An Hours Type set up with the Exclude OT Premium if these hours caused the OT check box selected will not show a calculated overtime rate on the screen unless there is some amount calculated for Premium dollars. Only records with true overtime premium being paid will display a calculated overtime rate.
Note: Double-click the Job Description to open the Job Master File for that job.
Override Computation Notes
Click the blue notebook icon in the far right column to open the Override Computation Notes window where you can view additional information about how sick pay was calculated. The icon is grayed out if there are no sick pay calculations.
Note: See Override Computation Notes for details.
Notes
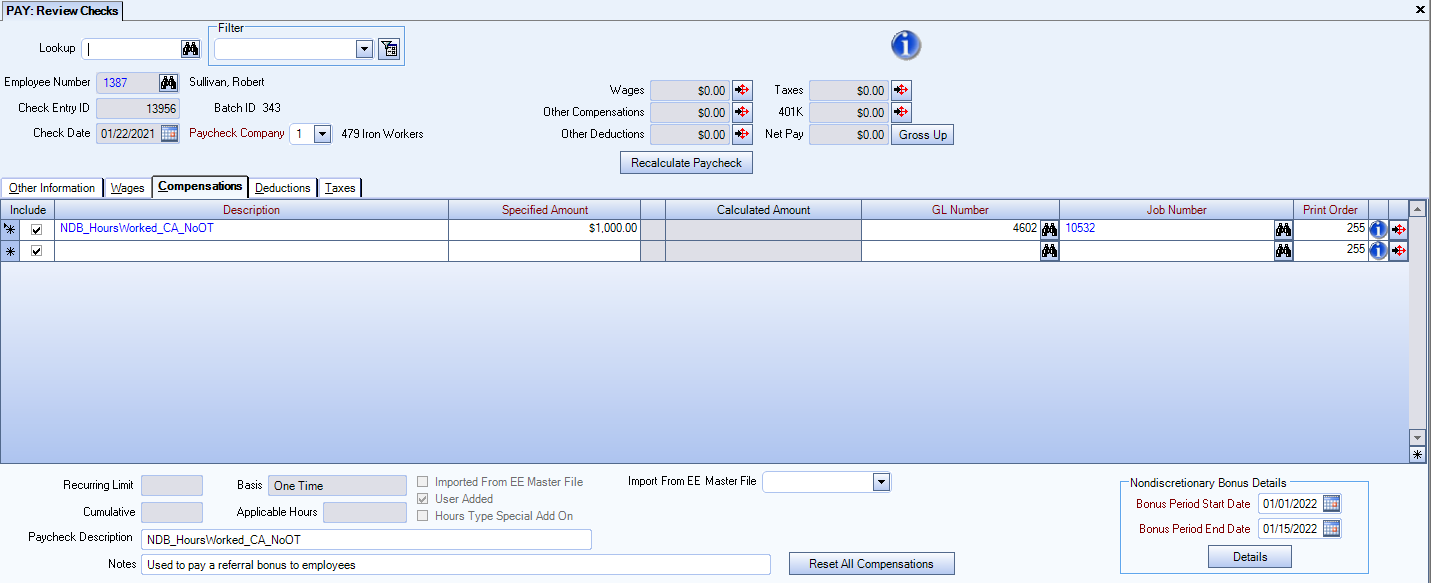
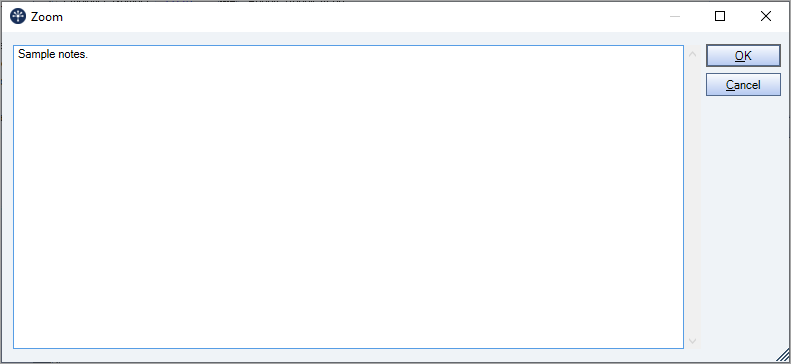
Notes can be added for each specific compensation. These notes display in the compensation grid footer on the Employee Master File Other Comps/Deducts window. Click in the field, to expand it and make the contents more visible. You can open the Zoom box to view the entire contents of the field by double-clicking in the field or selecting Zoom from the right-click menu.
Nondiscretionary Bonus Details
This section is used to enter the bonus period for a nondiscretionary bonus.
Tip: See Review and Edit Checks for more information.
Notes can be added for each specific deduction. These Notes display on the PAY: Employee Master File Other Comps/Deducts screen in the deduction grid footer.
When in an editable batch the Adjustment Amount field can be edited on deductions which are set up as Recurring No Limit.
When the Specified Amount does not equal the Calculated Amount, this may be due to an Employer Contribution setup for this deduction code. Use the button to see additional information.
Note: Double-click the Job Number to open the Job Master File for that job.
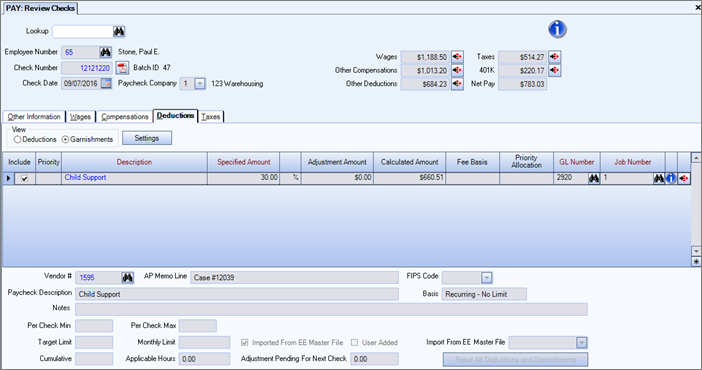
Deductions (viewing Garnishments)
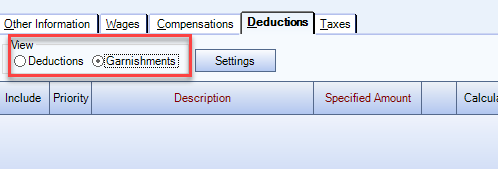
View
Select to view Deductions by standard deductions or garnishments.
Note: There is a column that will display in the Other Deduction grid whenever a Recurring No Limit deduction exists in the grid. If you are in edit mode, Edits to this field will only be available on Recurring No Limit deduction lines. It is not available for One-Time or Recurring With Limit deductions.
If you select the Deductions view, only records that are not marked as Garnishments or Admin Fees display in the grid. This is the default View.

If you select the Garnishments view, only the records marked as Garnishments or Admin Fees display in the grid.
Reset all Deductions and Garnishments button
Click the Reset all Deductions and Garnishments button to import all Deduction Codes set up in the Employee Master File. Click Yes to import all Deduction Codes set up in the Employee Master File; No to import only filtered Deduction Codes; Cancel to return to the Review and Edit Paychecks screen and make no changes.
Settings
Click Settings to view the Deduction Settings screen. The Deduction Setting screen is used to view the information that was stored with the check record (at the time of the creation and/or recalculation). It also includes notes on the garnishment calculation. This is especially useful if you need to determine exactly how amounts were computed.
Grid
Include
Select the Include check box for each Deduction to include in this paycheck.
Priority
The Priority column displays when the View is set to Garnishments.
For more information see Understanding Garnishment Priorities and Allocation.
Fee Basis
The Priority column displays when the View is set to Garnishments.
If this garnishment is an Admin Fee, then the Fee Basis will be Added or Subtracted.
Priority Allocation
The Priority column displays when the View is set to Garnishments.
If more than one garnishment has the same Priority Number, a Priority allocation is used. This will be "Prorated" or Distribute Evenly."
For more information see Understanding Garnishment Priorities and Allocation.
Print Order
The Print Order column displays if the View is Deductions.
The Print Order is used to print the deductions in a specific order on the paycheck. The default value is 255.
If this number is not changed, each item will display in the order it was entered on the screen.
The order is from the lowest print/invoice order number to the highest. The order they appear on your screen is the order they will print.
For more information, see Changing the Print/Invoice Order.
Note: Garnishments and Admin Fees always print first within the Other Deductions section of the paycheck by Priority Level. Then the standard deductions print in Print Order.
Hover over the Change Information icon ![]() to see User Added, Date Added, User Changed, and Date Changed information. WinTeam records the logon name of the user entering or changing this record. The Date Added is the original date this record was entered into the system. The Date Changed is the date the record was last changed. Right-click on the Change Info icon for additional options.
to see User Added, Date Added, User Changed, and Date Changed information. WinTeam records the logon name of the user entering or changing this record. The Date Added is the original date this record was entered into the system. The Date Changed is the date the record was last changed. Right-click on the Change Info icon for additional options.
Detail button
Click the Detail button to display the screen for the selected Other Deduction. The screen lists the pay dates, check numbers, and amounts for each occurrence of the selected Other Deduction for this employee. Close the Other Deduction Details screen to return to the Other Compensations and Deductions screen or Review and Edit Paychecks screen.
Vendor #
If a Vendor # has been assigned to this deduction, the Vendor # displays here. You may double-click in this field to view the associated Vendor Master File record.
AP Memo Line
The AP Memo Line field displays information stored with the Other Deduction detail line. This information populates after the Payroll Batch has been updated to the General Ledger, providing a reference of the memo line information at the time the payroll check was updated to the General Ledger.
FIPS Code
Displays the FIPS Code used with the deduction, if applicable
Deductions and Garnishments are displayed through different Views.
- If you select the Deductions view, only records that are not marked as Garnishments or Admin Fees display in the grid.
- If you select the Garnishments view, only the records marked as Garnishments or Admin Fees display in the grid.
When adding a deduction on the deducts tab to an employee paycheck record, the system checks to see if the deduction is one that needs to be imported into Accounts Payable. If it does need imported into Accounts Payable, the following message displays warning you that you should be using the Import from EE Master File feature. Since there are times that a deduction should not be imported into Accounts Payable, the message has been changed to allow you to bypass this warning and proceed with adding the deduction.
Basis
Shows if the deduction is Wage Based or Deduction Based.
Per Check Min/Max
Displays what is currently present on the Employee Master File. Click the Settings tab to view values for when the payroll batch was ran.
Monthly Limit
Displays the monthly limit at the time the payroll batch was ran.
If you are reviewing Subcontractor checks, you will see the Taxes tab, but no information displays (since there are no tax calculations for Subcontractors).
During Check Processing the Employer Only and Shared taxes totals on Handwritten checks are read-only. Only the Employee Withhold Only tax code totals are editable.
Important: If an employee has a Comp Only paycheck with no wages, taxes are calculated based on the primary job and not the job entered in the compensation grid.
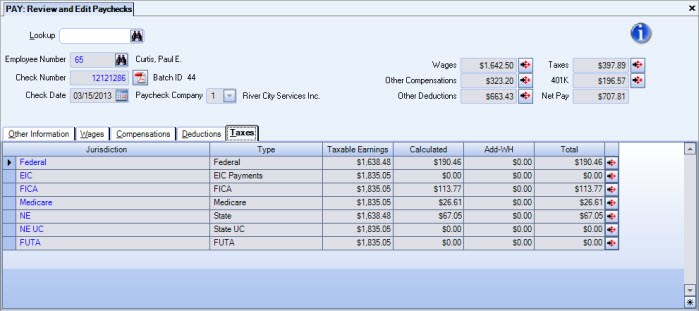
Payroll | ViewAllTaxes | True
You can use this internal only custom setting to display a column in this grid that contains all taxes being withheld in the check (both employee and employer portions) which can be helpful during validation and testing. This is available for both the existing tax engine and the updated tax engine.

Security
The Payroll Review and Edit Paychecks screen has its own Security Group, Pay Review and Edit paychecks.
The PAY Review and Edit paychecks screen is part of the PAY ALL Security Group.
Note: In order to view a PDF from Employee Check History you must have access to the PAY Review and Edit Paychecks screen.
