Overview
Use AP: Defaults to enter default GL numbers for the system to use when posting invoices and payments and when applying discounts; here you will also provide a clearing account number to use for drop shipments.
Standard Terms are defined here for use when calculating the due date of an invoice. When you set up a new AP Vendor, the Vendor’s Standard Terms will default to this value. At that time, you may to change the terms for the Vendor, if necessary. As you enter Accounts Payable invoices for this Vendor, the system calculates the due date on each invoice based upon the Standard Terms of the Vendor.
You can also choose whether or not to Allow Batchless Payments or Update Drop Shipments From Inventory.
If you enter a P.O. Message here, the message defaults to all Purchase Orders. You may override this default message in the AP: Vendor Master File (PO tab).
AP Check Layout options are also defined on this screen.
You must fill in the Accounts Payable Defaults screen using information from the General Ledger Chart of Accounts and the Job Master File screens. Information must be set up in those two areas before working with Accounts Payable.

The AP: Defaults screen can be accessed from the Accounts Payable Menu.
Key Functionality
Hover over the Change Information icon to see User Changed and Date Changed information. WinTeam records the logon name of the user changing this record. The Date Changed is the date the record was last changed. You can right-click on the Change Info icon to filter for records changed by a specific user or date.
When you hover over the User Changed or Date Changed filters, you can then choose to
- Filter By Selection - Filters for all records that match your current records field value.
- Filter by Exclusion - Excludes from your filter all records that match your current records field value.
- Filter For - Filters based on the text/value you enter.
- Sort Ascending - If you already have a filter applied, the Sort Ascending command is available. Also used to include all records in the filter and sort in ascending order based on the current records field value.
- Sort Descending - If you already have a filter applied, the Sort Descending command is available. Also used to include all records in the filter and sort in descending order based on the current records field value.
Use the GL Accounts Payable Number field to enter the General Ledger liability account that contains your company’s Accounts Payable. The system debits this account when payments are updated to the General Ledger and credits this account when Accounts Payable invoices are updated to the General Ledger.
Type the GL # in this field, or use the Quick Lookup feature to locate the GL account number.
Use the GL Discounts Taken field to enter the General Ledger account to post discounts to when payments are updated to the General Ledger.
Type the GL # in this field, or use the Quick Lookup feature to locate the GL account number.
Use the Drop Shipment Clearing Accounts field to enter the General Ledger account to use for drop shipment orders. The system credits this account when updating Drop Shipment activity to the General Ledger. The Accounts Payable invoice from the vendor is posted as a debit to this General Ledger number, clearing out the activity.
Type the GL # in this field, or use the Quick Lookup feature to locate the GL account number.
Use the Password for Reprinting Payable Checks field to store a password if you want the system to require a password prior to reprinting Accounts Payable checks.
See Custom Setting information below for how to password protect the ability to overwrite the Beginning Check # field.
If a user attempts to change the beginning check number to something other that what is set up in the Cash Account Set Up area, the system will display a prompt indicating the password is required for authorization.
Without this Custom Setting in place, the program will continue to allow the Beginning Check # to be changed without prompting for a password.
Use the Starting PO Number field to enter a PO Number for the system to use when creating Purchase Orders or Drop Shipments. The system tracks the next available purchase order number instead of just issuing the "ID" of the record as the purchase order number.
Each time a Purchase Order or Drop Shipment is created, the system looks to see if a Starting PO Number was entered in AP: Defaults. If a starting number was entered, the system then searches for the next available number, in increments of 1, and assigns it to the PO or Drop Shipment record.
If the AP Defaults Starting PO Number is left blank, the system assigns the PO Number on Purchase Orders or Drop Shipments based on the ID number of the record.
Enter a valid email address if you want to send AP NACHA Advices via email when processing AP Payments. This address then appears on the From line in the message. For more information see Sending AP NACHA Advices Electronically.
Select to Allow, Deny or Prompt a warning message when users try to import invoices for inactive vendors.
Enter a message you want to print on Purchase Orders.
To open the field in Zoom mode you can
- Double-click in the field OR
- Press Shift + F2 OR
- Right-click, then select Zoom (only for multi-line text boxes, not in a grid)
From the Zoom screen you can view or edit the entire Notes area. For more information see Using the Zoom Feature.
Select the Allow Batchless Payments check box to allow a user to make payments without going through the Payment Wizard and creating a batch.
Select to allow a user to add new payment records through the Payments screen and Update Drop Shipment activity from the Inventory module to the General Ledger. Selecting this option requires you to enter a Drop Shipment Clearing Account number. If left unselected, the System: Close Period Validation will ignore Drop Shipment records when it is determining whether there are open/non posted records.
Select to require Invoices to be posted to the GL before checks can be processed in the AP Payment Processing Wizard. Any Invoices not posted will be read-only.
Use the Standard Terms to select the default terms for the system to use when setting up new Vendors. As you set up a new Vendor, the system defaults the terms selected here to the AP: Master File (Payments tab).
Due in Number of Days
If you select this option, the system displays an additional field labeled How Many Days. In the How Many Days field, enter the number of days after the invoice date that an invoice is due for payment. This number may be between 1 and 255 days. In this case, when you enter an invoice in the Invoice Entry screen for a Vendor that uses Standard Terms, the system calculates a Due Date based on the number of days after the invoice date.
Due On Day of Month
If you select this option, the system displays an additional field labeled Which Day. In the Which Day field, you must enter the day of the month invoices are normally due for payment. For/ example, if invoices are due to be paid on the 10th day of the month, you will enter 10 in the Which Day field. In this case, when you enter an invoice in the Invoice Entry screen for a Vendor that uses Standard Terms, the system calculates the Due Date based on the day of the month that was selected. This number must be between 1 and 28 (since every month has at least 28 days).
If you enter a P.O. Message here, the message defaults to all Purchase Orders.
You may override this default message in the AP: Master File (PO tab).
Layout Type
Select the check layout type: Standard, Standard-2 Part Stub, or Legal Size Self Sealer.
The Standard Layout Type can be printed on Preprinted Checks or Blank Check Stock.
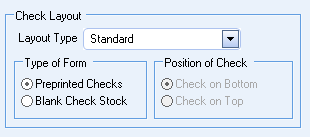
- If using Preprinted Checks, you cannot change the Position of Check.
- If using Blank Check Stock, select to position the check on the bottom or top of the form.
In order for the Check # to display on the check stub, you must be using MICR. For more information see Setting Up WinTeam to Print on Blank Check Stock.

Sample of Standard AP Check using Blank Check Stock with Check on Bottom

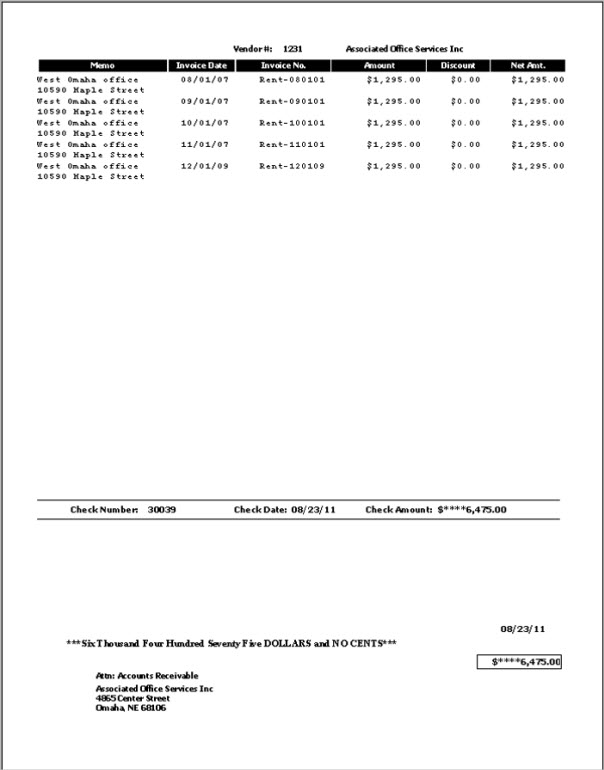
Sample of Standard AP Check using Preprinted Checks
The Standard-2 Part Stub can be printed on Blank Check Stock and Canadian AP Checks.
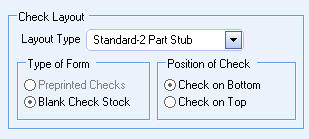
- The check can be positioned at the bottom or top of the form.
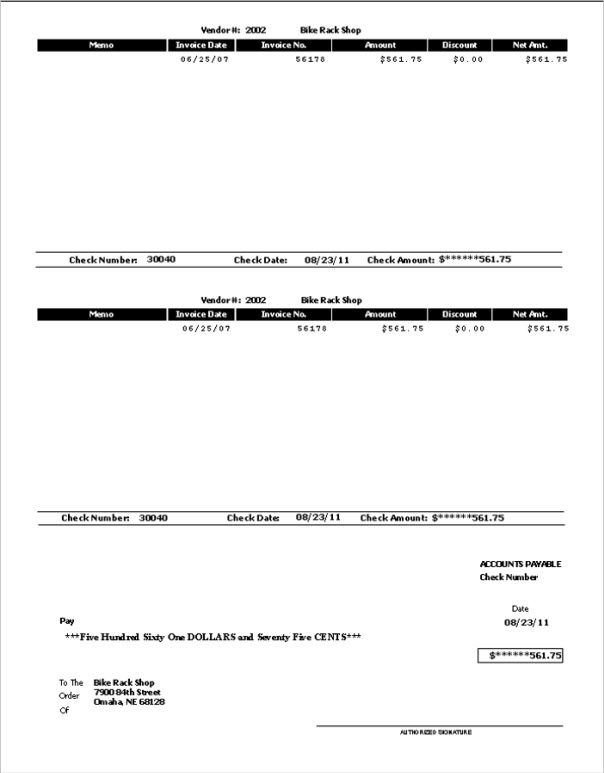
- Each stub can print up to 16 lines of detail within each section. If there are more than 16 lines of invoices being paid, additional check forms will be used. In this case, all check forms except the final check form will show as 'voided'.
- If your company prints MICR on the check forms (where you print the check numbers), the check number will also print in the top right-hand corner of each of the 2 check stubs. To suppress the check number from printing, use the following Custom Setting:

Sample Standard-2 Part Stub with Check on Bottom
The Legal Size Self Sealer must be printed on Preprinted Checks. The Type of Form will be disabled, since they do not apply to this selection.
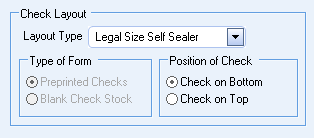
- The Legal Size Self Sealer is not available for Canadian clients.
The Standard - 3 Part stub measurements are
- 3 2/3 ” X 2 for the stub part of the check
- 3 2/3 for the check portion
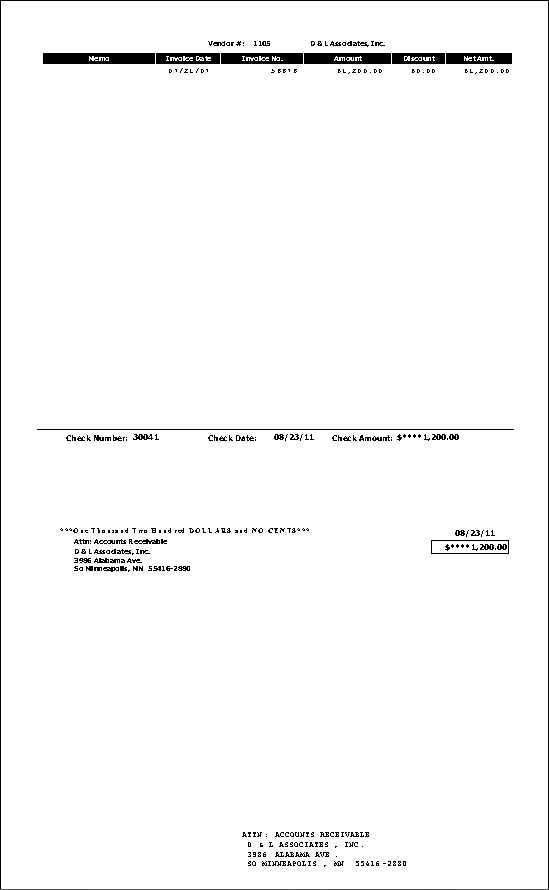
Sample of Legal Size Self Sealer with Check on Bottom
Select the Type of Form to correspond with the Layout Type.
- Preprinted Checks
- Available when the Layout Type is Standard.
- Not available for Standard-2 Part Stub.
- Selected by default for Legal Size Self Sealer.
- Blank Check Stock
- Available when the Layout Type is Standard and Standard-2 Part Stub
- Can always select Position of Check.
- In order to use Blank check stock, you must be using MICR for the Check # to appear on the check stub. For more information see Setting Up WinTeam to Print on Blank Check Stock.
- We do not recommend that you use the vertical adjustment Custom Settings with the Blank Check Stock option(s) since this could cause incorrect formatting of information on your check. If you are going to go to Blank Check Stock forms, and you previously were using the following Custom Setting to move the data, you will want to remark the Custom Setting out by placing a 'z' after the Item so that it is not a valid Custom Setting. Below is the Custom Setting that you will want to "remark" out before running your sample checks using the blank check stock option(s).
- Make sure that you test your alignment by printing out sample checks. The MICR must print in an area of the check where the bank can read it. If it is not placed correctly, they will not be able to be cashed. You will want to send a sample check to the bank in order to ensure that the MICR is printing in the proper spot. This is normal procedure for anyone who is printing MICR regardless of the check format.
This option is available if you are printing on Blank Check Stock or are using the Legal Size Self Sealer Layout Type.
Select to print the check on the bottom or top of the form.
Related Information
The AP:Defaults screen does not have its own Security Group.
The AP Defaults screen is part of the SYS Defaults / Setup ALL Security Group.
This screen has the Read-Only Feature. For more information see Learning about Read-Only Security.
Tip: For more information see Security Groups Overview and Security Groups By Module.
| Section | Item | Value | Purpose |
|---|---|---|---|
| APCheck | BegCheckPasswordProtect | Yes | This setting allows you to store a password if you want the system to require a password prior to reprinting Accounts Payable checks. With this Custom Setting in place, the same password can be used for protecting the ability to overwrite the Beginning Check # field. |
| APCheck | MovePayLabel | True | Standard Format (formless format) checks This setting will add 'PAY' in front of 'To the order of' on Standard Format (formless format) checks. |
| Laser5APCheck | SuppressCheckNumber | Yes | This setting applies to the Standard-2 Part Stub check layout using MICR (where you print the check numbers). This setting is used to suppress the check number from printing in the top right-hand corner of each of the 2 check stubs. |
For more information see Custom Settings and List of Custom Settings.
