Overview
You can use the Benefits by Employee screen to review the benefits assigned to an employee, to enroll an employee into a plan option, or select an available benefits package for an employee. You can also manually assign a package to an employee from this screen.
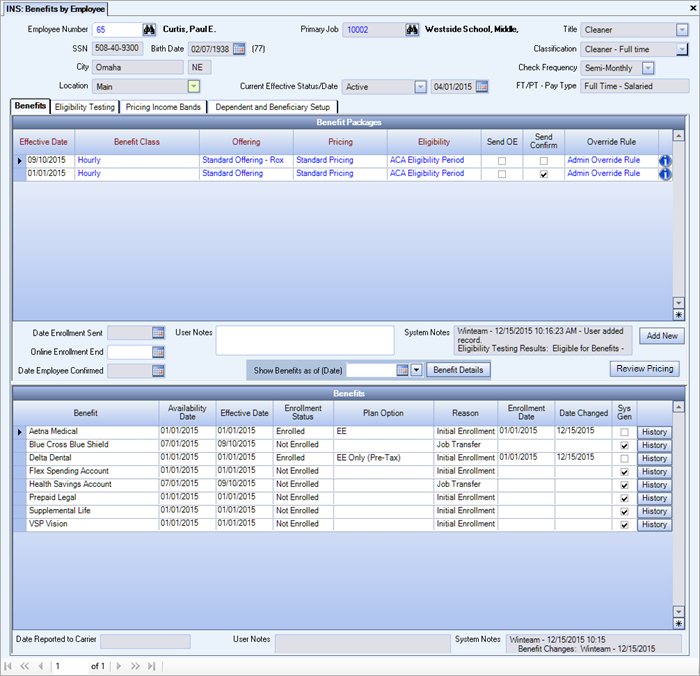
The Benefits by Employee screen provides a history related to that employee's elections and packages. Each line in the Benefit Packages grid corresponds to the history information shown below in the Benefits grid.
You can locate Employees by using the Lookup or by entering the Employee Number in the field and tabbing off. Double-click the Employee Number field to display the corresponding Employee Master file. The header displays the Employee SSN, Current Status, Current Status Eff. Date, Check Frequency, Birth Date and (Current Age), Employee's City and State, Primary Job (from Pay Info History), Title and Classification.
Key Functionality
Double-click to open the Job Master File.
The Benefit Packages grid displays package records containing information on the Effective Date of that package, Benefit Class, Job Number associated with that package, Offering, Pricing and Eligibility.
Overrides are a way for users to specify the exact benefit package settings that should apply for a given employee and time period, overriding what is set up in the Job. This field will normally be blank. Double-click the Override Rule field to display the Override Rules table. For more information, see Setting Up Override Rules.
Click to add a new package. You may choose to carry over the current package benefits or select a new set. Once a package is added, the Eligibility Testing window displays allowing you to choose whether to retain the Employee's benefit elections.
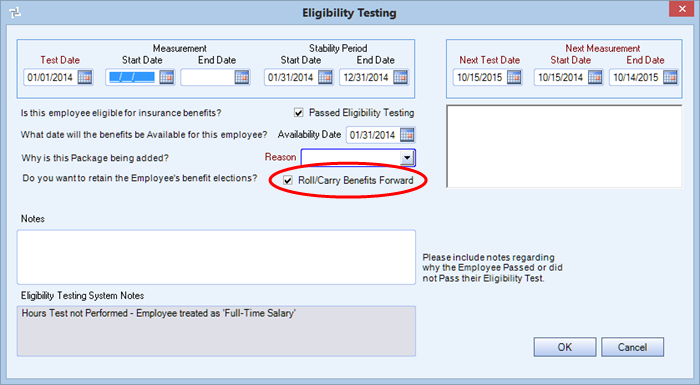
Note: By default, the option to retain current benefits is selected. See Rolling Benefits Forward for details.
This option displays when the Using Online Enrollment option is selected in the INS: Defaults window. When that option is not selected, the Date Confirmation Sent field displays in this area.
Enter the date the open enrollment period is to end. When the date entered in this field is equal to or greater than today, an employee may be allowed to make benefit selections after the enrollment deadline. The date may be entered for an individual employee by specific package, which could allow an enrollment extension or an enrollment reopening for an employee to make changes.
You can automate the Online Enrollment End which can help you control the enrollment period and employees' access to potential benefits.
You do this by selecting a duration in the Online Enrollment Period field (in the Eligible New Employees section on the Eligibility Setup window).
After you select duration, the Online Enrollment End Date is automatically populated in the Package Validation window based on the duration and when a package is assigned to an employee, that date is automatically populated in the Online Enrollment End field.
Note: This field pertains only if your company uses TEAM's eHub Online Enrollment Solution.
Once the employee starts online enrollment, (but has not completed the last confirmation step) this Date Employee Confirmed field becomes read only and an Enrollment in Progress label displays to the right of the field. After the employee confirms their benefits in online enrollment, this field displays the appropriate date and the Enrollment in Progress label is removed.
You can identify a passive enrollment (where we infer confirmation based on previously elected benefits) when this field is read only, has no value, and there is no Enrollment in Progress label displayed.
There are three enrollment status indicators which list the employee’s step in online enrollment.
- Enrollment Open – Employee can enroll in benefits
- Enrollment In Progress – Employee has started enrollment, but has not confirmed
- Enrollment Abandoned – Employee started enrollment, but they did not confirm by the online enrollment end date
Click the Benefit Details button to display the Benefits by Employee - Details screen where package details can be edited. If an As of Date is entered that does not include the most recent changes to the package, the screen becomes read-only and a notification displays. Double-click a row in the Reason column to display the Reason for Change table.
This column contains the reason an employee waived a benefit in Online Enrollment.
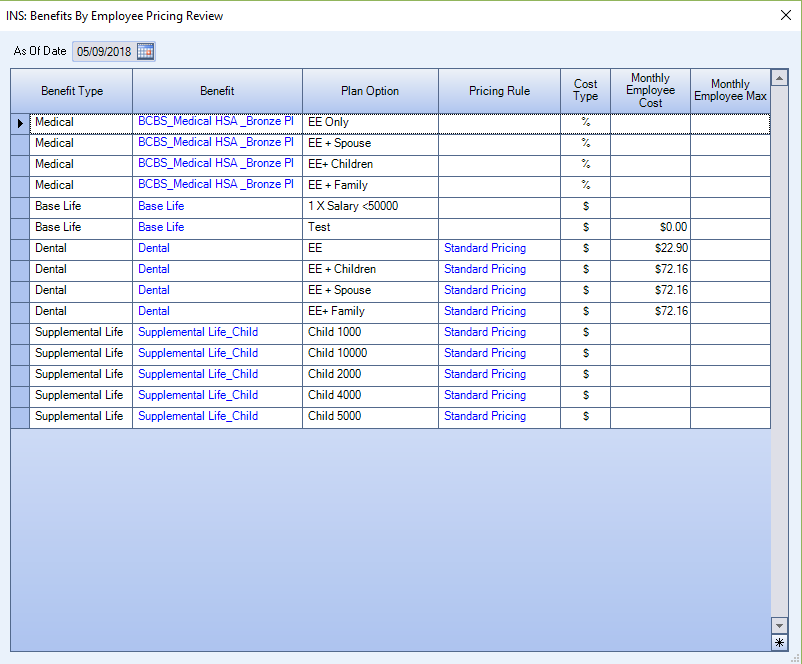
Click the Review Pricing button to open the Benefits By Employee Pricing Review grid. In this grid you can see the different pricing levels for the same plan. For example, employee only, employee + spouse, employee + family. This is useful for example, if an employee wants to know how much their plan price would increase if they added a dependent.
- The pricing in this grid shows the employee’s pricing structure.
- All of the prices listed are monthly.
- Percentage amounts are estimated, the same as in Online Enrollment
- The order matches that in Online Enrollment
Contains historical information from Online Enrollment in order to provide a more detailed history of employee (or proxy) actions. The system saves the Note each time an employee (or proxy) saves progress during Online Enrollment. The System Note that appears is specific to the benefit. The system displays the following information: Employee/Proxy ID, Benefit Description, Benefit ID, Plan Option, Plan Option ID and Enrollment Status.
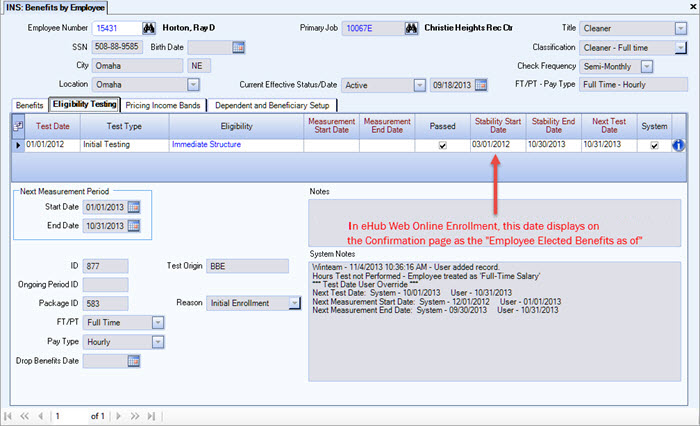
This grid stores/displays results of all Eligibility Testing performed by the system, and the date that the next Eligibility Testing should occur. When a newly hired employee is processed by the nightly engine, the system will write a record into this grid to determine when that employee's first eligibility testing should occur. If an employee switches jobs, or anything causes the employee's benefit package to change (particularly eligibility), then additional records will be written to this grid. When you run the No Hours Engine from the Automation Review screen, if an employee does not have hours, an entry is made in the grid. Normally, you would not need to enter records into this grid.
The Stability Start Date from this tab is displayed on the eHub Online Enrollment Confirmation screen as the Package/Benefit Effective Date to help employees understand when new benefit(s) will become effective.
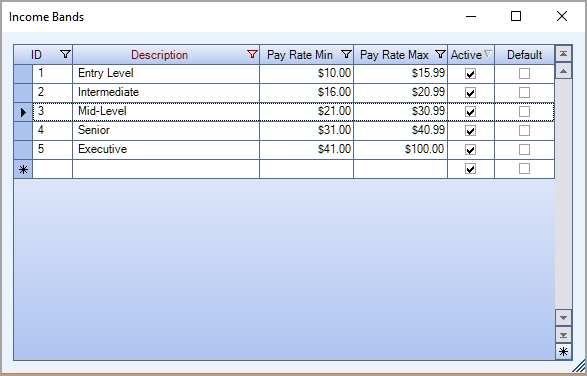
An income band is an additional setting used in the pricing structure to create sub groups of employees for determining pricing for benefits. For example, this could be used for sub-groups within a benefit class. You must manually assign an income band to an employee on this tab. It is possible to create an external update query that assigns the income band to the employee to make the feature more efficient. (Please see your Customer Service Representative or Support for information.) Typically these sub-groups are associated with wage or income bands to comply with the Rate of Pay Safe Harbor for ACA compliance.

Double-click on an Income Band label to open the Income Bands add/edit list where you create and maintain the income bands. The pay rate ranges cannot overlap between descriptions. A message box displays if there is a gap in the pay rate minimum/maximum amounts between descriptions. You can proceed with a gap, but it advisable to set-up the bands without gaps in the amounts between descriptions.
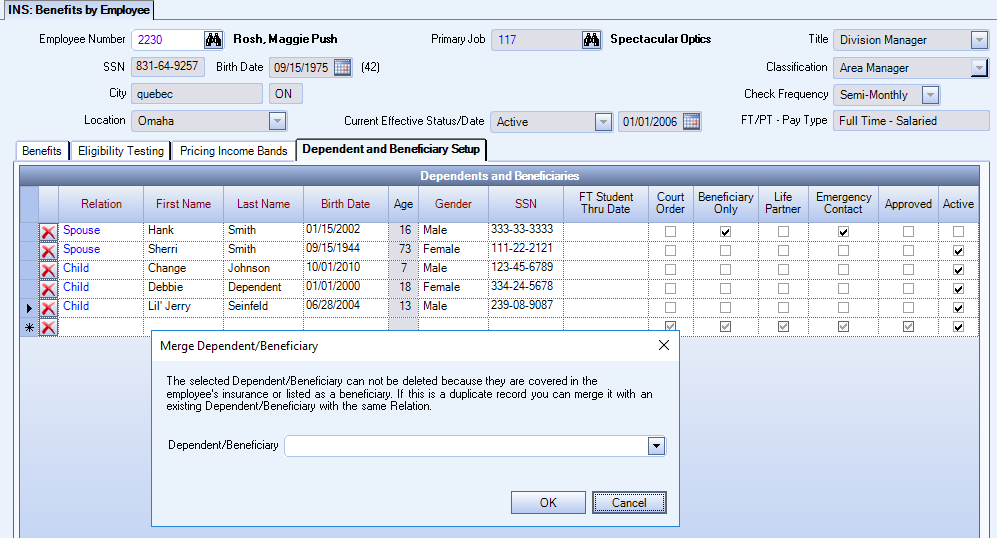
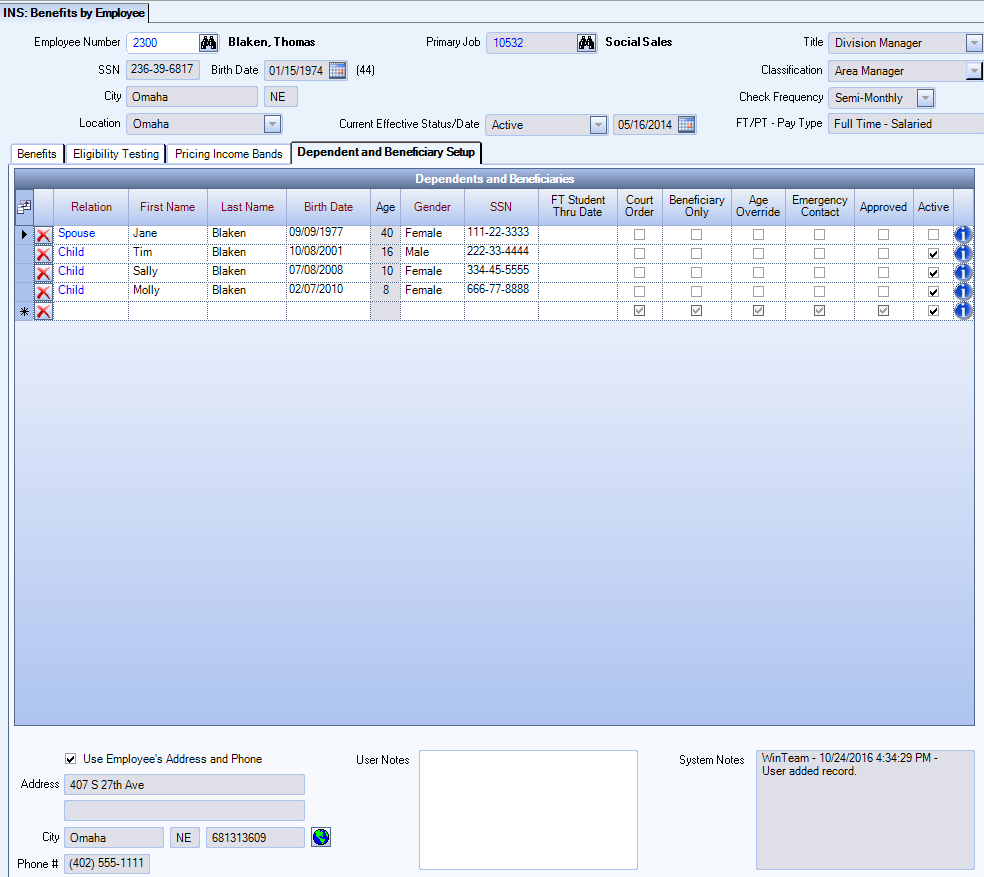
Enter Dependent and Beneficiary information for the selected Employee in the Dependent and Beneficiary Setup tab. The Dependent/Beneficiary Relation, Name, Birth Date, Gender and SSN are required fields. Each dependent or beneficiary must have a unique Social Security number, and the employee’s Social Security number cannot be used for a dependent or beneficiary.
Dependents and Beneficiaries listed here will appear as appropriate in the Coverage Information grid in the Benefit Details screen. The check box in the Active column is selected or cleared based on information the Employee enters in Online Enrollment. All dependents/beneficiaries are marked as active by default. When the Employee deletes an existing dependent or beneficiary in Online Enrollment, this check box is cleared and the dependent becomes inactive. The Employee can only delete a dependent or beneficiary who is not enrolled in any benefit in the Employee’s current benefits package.
If a dependent is marked as Age Override the employee can enroll them in Online Enrollment regardless of the dependent’s age. By default dependents can no longer be enrolled at age 26. This is a means for Benefits Administrators to allow employees with handicapped dependents who are eligible for benefits indefinitely to use Online Enrollment. The Benefits Administrator performs the due diligence to certify the dependent is disabled, notes it in WinTeam, then the employee can enroll the dependent online.
You cannot select the Beneficiary Only check box for a dependent who was ever enrolled in any benefit (even when they were enrolled last year but not this year.)
The Life Partner check box does not display in the Dependent and Beneficiary grid by default (life partner does not drive any system functionality) if you want to see this column, use the field chooser to add it to the grid.
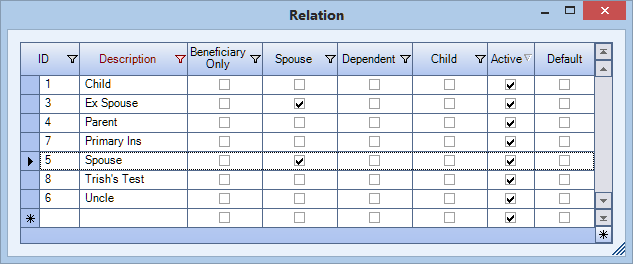
Double-click on a Relation label to open the Relation add/edit list where you create and maintain the relations.
Note: Any Relation designated as a Dependent in the Relation table and who currently is set up to receive insurance coverage, such as a Child, cannot be designated as Beneficiary Only in the Dependents and Beneficiaries grid.
Deleting a Dependent or Beneficiary
Click the delete icon (red X) to delete a dependent or beneficiary.
If the dependent or beneficiary cannot be deleted, a merge dependent/beneficiary dialog box opens where you can merge duplicate records.
