
Overview
The Customer Balance Posting screen can be accessed from the Accounts Receivable Menu.
Use Customer Balance Posting during the initial setup of WinTeam to enter outstanding invoices and credit memos from a previously used accounting system. Entering individual invoices and credit memos enables you to post cash receipts and to apply credit memos on the Payments screen. You may view the invoices and credit memos on the AR: Invoices screen. These invoice records will show "Balance Posting" in the Notes field and will not have any information in the Invoice Details area.
Invoices entered through Customer Balances display in the Non Taxable column on the AR Sales Tax Report.
Note: Entry of the invoice information into the Customer Balance Posting screen does not affect the General Ledger, since these invoices and credit memos should already be included in the beginning balance of Accounts Receivable. It is important to enter each invoice and credit memo individually. TEAM does not recommend entering one lump sum for each customer.
Security
This screen has the Read-Only Feature. For more information see Learning about Read-Only Security.
The AR Customers Balance Posting screen is part of the SYS Defaults / Setup ALL Security Group (no features selected).
Tip: For more information see Security Groups Overview and Security Groups By Module.
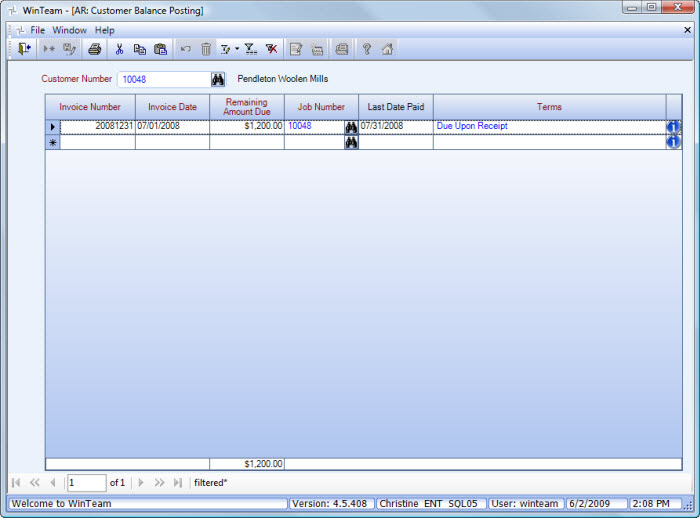
AR: Customer Balance Posting screen
Related Information
- Enter outstanding invoices and beginning balances from a previously used accounting system?
- Handle customer's bounced check?
- See WinTeam Default topics?
- See Accounts Receivable topics?
- Go to Accounts Receivable Menu?
Key Functionality
Customer
Use the Customer field to select the customer number of the outstanding invoice you want to enter .
Type the Customer # in this field, or use the Quick Lookup to locate the Customer Number.
You can double-click on the Customer Number to open the Customer Master File record.
Invoice Number
Use the Invoice # field to enter the invoice number of the outstanding invoice or credit memo.
Invoice Date
Use the Invoice Date field to enter the original invoice date of the outstanding invoice, or use the Date Control to select a date.
Remaining Amount Due
Use the Remaining Amount Due field to enter the remaining amount to be collected or refunded for the invoice or credit memo entered.
Note: No amount information (Original Amount or Remaining due) appears in the Outstanding Invoices grid on the Payment screen of the Accounts Receivable module for Customer Balance Posting records. When you receive a payment from, or you refund an amount to, the customer for this invoice or credit memo, you will need to know the invoice number to apply the payment to. You may drill down with the detail button to open the AR: Invoices screen to verify if you are applying to the correct invoice.
Note: If you select to Apply a payment to a Customer Balance record, the "Original Amount" in the Applied Invoices grid is "grayed out".
Job Number
Use the Job Number field to enter the Job Number that applies to this invoice.
Type the Job Number in this field, or use the Quick Lookup to locate the Job Number.
Note: The Job Number is an important item of information when running the Accounts Receivable Invoice Aging By Tiers Report. The Job Number allows the system to group and/or print an Aging Report of all outstanding Accounts Receivable invoices belonging to a particular management level.
Double-click on the Job Number to open the Job Master File record.
Last Date Pd
Use the Last Date Pd field to enter the last date you received a payment, or issued a refund, for this outstanding invoice or credit memo, or use the Date Control to select a date.
Terms
Use the Terms field to select the appropriate payment terms for the selected Invoice #. The system fills this field by default with the Terms selected on the Customer Master File screen for the selected customer.
Type or select the Invoice Terms to print on the invoice.
To add a new Term, double-click in the Terms field, or type a new Term and press Enter.
The Invoice Terms add/edit list displays.
In the Terms field, type or select the Terms you want to use. You may select different terms for each invoice or credit memo.