Overview
You can use Tier Templates to ensure reports (or updates) are created with the same criteria each time a tiered report is run. On a tiered report option screen, a drop-down list exists to indicate a saved Tier Template. Select the saved template, and then click Load. Templates will default for each User, based on whether the template is shared, and if the User belongs to the Shared Group Name. Default templates can be set for specific reports or users when setting up Tier Templates.
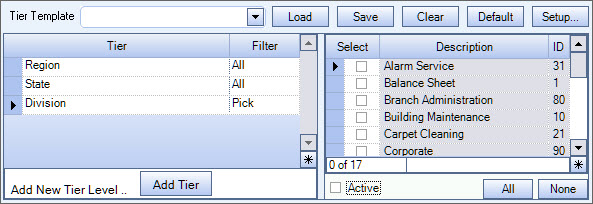
You may filter, group, and print by Tiers, allowing for total customization of the report. To make filtering easier, for any Tier, you may include All, Pick/Create or Exclude parameters. Click the Active check box to filter the list to only active items.
Company totals can also be included on a tiered report by selecting the Print Company Totals check box. You do not need to use one of the Tier levels to include company totals. (If you have multiple companies, this check box will say Print Enterprise Totals).
Access to the tier templates is controlled by the SYS Tier Template screen under the SYS Tier Setup security group.
Note: The SYS Tier Setup group is part of the SYS ALL group. For more information, see Understanding Security Groups.
Company and Location security are implemented for Enterprise and ASP Customers. For more information, see Learning about Location Security.
- Click Add Tier to add the first tier in your tier levels. Tier 1 displays.
- Click Add Tier again to add Tier 2.
- Continue adding Tiers, if desired.
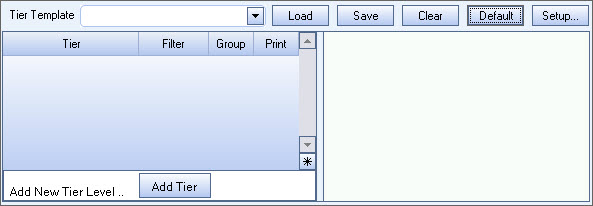
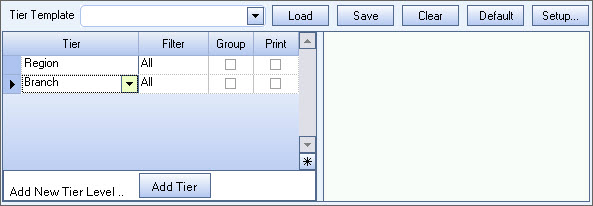
You would not want to add all 12 tier levels to a report, but they are all available to use.
Tier 1 (whatever name you have given Tier 1)
Tier 2 (whatever name you have given Tier 2)
Tier 3 (whatever name you have given Tier 3)
Tier 4 (whatever name you have given Tier 4)
Tier 5 (whatever name you have given Tier 5)
Tier 6 (whatever name you have given Tier 6)
Tier 7 (whatever name you have given Tier 7)
Tier 8 (whatever name you have given Tier 8)
Tier 9 (whatever name you have given Tier 9)
Tier 10 (whatever name you have given Tier 10)
Tier 11 (whatever name you have given Tier 11)
Tier 12 (whatever name you have given Tier 12)
Job Types
Timesheet Types
Accrual Types
Salesman (Custom Field set up as a Drop Down List in the Job Master File (Custom Field))
Company
Location
Supervisors
Jobs (The Jobs Tier has an option for ALL, Range, or Pick. If Pick is selected, a check box displays for Active Only. This check box is selected by default. Clear the check box if you want Active and Inactive Jobs to display in the Pick. If you select Range, once you enter the From value, it will default to the To value.
It is necessary to click the Add Tier button to add the next line in your tier grid.
Once added, you can use the drop down list and actually change the Tier that you want on that line and indicate whether you want to Group and Print that Tier level. The order the Tier levels appear in the Tier grid directly affect the hierarchy of the report. This allows for the ultimate level of flexibility when reviewing and evaluating each aspect of your business.
There is a limitation of 6 tier levels that can be grouped and printed (besides grouping Jobs). If you attempt to select more than 6 tiers (other than Jobs) you will receive a message.
Even though there is a limitation of 6 tiers to group and print, you can do a Pick from any number of tier selections. There is no limit on tier levels you can do Picks for.
For more information see Using Group and Print options on tiered reports.
Some reports provide Tier filtering without the Group and Print options, such as:
- Benefit Insurance/Other Analysis Report
- Job File Report
- Bill Codes By Job Report
- Conflicting Shifts Report
- Revenue Report
- Call Review Report
- Job/Employee List Report
- Paging Review Report
When you select any Tier (whether you include All, Pick/Create or Exclude parameters), the report criteria page will show Group and Print as YES.
- After adding each tier to your template, click the Save button.
- On the Save Tier Template dialog box, type a unique name to identify the saved template.
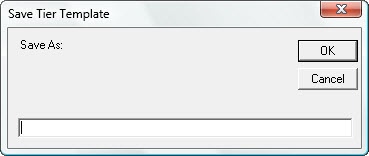
- Click OK to save the template.
The template is now added to the list. The next time you are in a tiered report, you are able to load this saved tier template.
Tip: Pick selections are saved as part of the Tier Template. These "picks" do not have referential integrity. So if the "pick" is deleted from the add/edit list, it is not deleted from the saved template.
- Select a Tier Template from the list. Only Templates that you created or Templates that are "shared" are available to Load.
- Click the Load button. The system brings in the tier details for this template.
- Pick selections are now saved as part of the Tier Template. These "picks" do not have referential integrity. So if the "pick" is deleted from the add/edit list, it is not deleted from the saved template. If you select an existing Tier Template that no longer has a "pick" in the database, a message displays stating the "pick" does not exist. You will then need to save the template again.
If you want to run a report that looks very similar to an existing template, you can load the template, make whatever changes you want to, it and run the report. Your saved template is not altered or overwritten AS LONG AS YOU DO NOT USE THE SAVE BUTTON TO SAVE THE FORMAT AGAIN.
- Click the Clear button to clear the contents of the tier grid.
- Click in the gray box to the left of the line you want to delete in order to select it. The entire line will be highlighted (except for gray box).
- Press the delete key on your keyboard.
- You will be prompted with a message to confirm the deletion of that one row. Click YES to delete the row.
You can go from row to row by pressing your delete key until all of the line items are removed. If you are wanting to delete all the line items, it is much quicker to use the Clear button.
- Select a Tier Template from the list.
- Click the Load button. The system brings in the tier details for this template.
- Click the Default button.
The next time you select this report, the Tier Template will default to the Template you have chosen.
- Click the Setup button on any report screen that uses Tiered Reports.
The Tier Template Setup screen displays.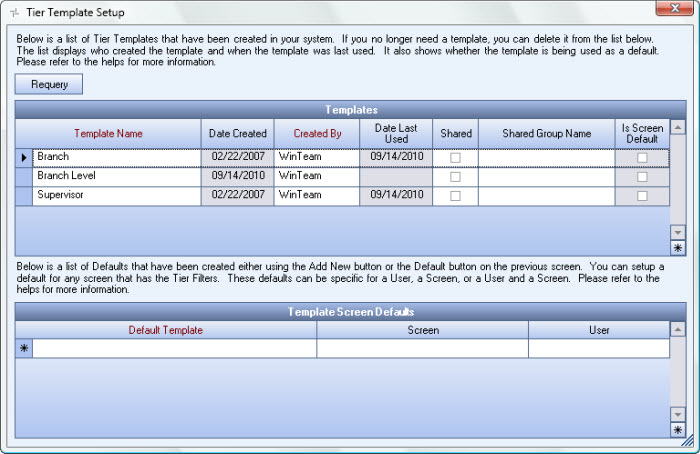
- In the Templates grid, select the record row of the template you want to delete, then select your Delete key on your keyboard.
- A message displays similar to this:
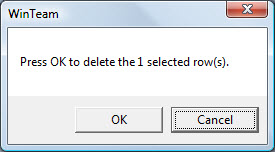
- Click OK to delete the selected row.
- Click the Setup button on any report screen that uses Tiered Reports.
The Tier Template Setup screen displays. - The Template Screen Defaults grid is used for assigning default templates to screens and/or users.
- Select the Default Template name from the list.
- Select the Screen you want to assign the template to.
- Select the User you want to assign the template to.
- Click Close to save the record.
Note: You do not have to assign a screen to the template, but you must assign either a screen name or a user name, or both to the template.
Note: You do not have to assign a screen to the template, but you must assign either a screen name or a user name, or both to the template.
The Tier Template Setup contains two columns that enable the sharing of templates, Shared and Shared Group Name. Only the templates created by the logged on User will display in the Tier Template list, unless the template is "shared".
To share a template to all Users, select the Shared column for that template.
To share a template with specific Users, select the Shared column AND select a Group Name under the Shared Group Name column.
Example: If you select the Group Name "AR ALL", all Users who are set up with AR ALL rights are able to use the template.
When a screen loads, the system checks to see if there is a default template for that user for that screen.
If there is not, the system checks to see if there is a default template for just that user.
If there is not, then the system checks to see if there is a default template for just that screen.
If a default template is found, the template is loaded upon opening that screen. The DateLastUsed and UserNameLastUsed fields populate on the Tier Template Setup screen. This information may be used to analyze the usage of the template.
For more information on Tier Parameters, see Tiers Overview.
