
A benefit Plan Option is a list of coverage and participation options from which an employee may choose, such as insurance for the employee only, employee plus child, or employee plus spouse. Before you set up a Plan Option, you must Set up a Plan Option Type.
You can set up benefit Plan Options on the INS: Benefit Setup screen.
Example: If your company is providing a paid benefit (i.e., company-paid life insurance), you can leave the Plan Option Deduction field blank, and use the Auto Enrollment Engine to enroll employees eligible for the paid benefit. If your company offers employees an Online Enrollment option via eHub, since no options to enroll or waive a company paid benefit exist, that paid benefit will not be displayed.

To Set up a Plan Option:
- On the Benefit Setup screen Plan Options tab, in an empty row in the Plan Option field, type a Description. The Active check box displays selected by default. (Clear the check box to make the plan option inactive. It will remain in the system, but no longer appear in lists.)
- Select the Plan Option Type from the drop-down list, or double-click in the field to open the Plan Option Types window.
- Select the Deductioncode from the drop-down list to use for the Plan Option. You can double-click the Deduction code to see how the deduction is set up in the PAY: Other Deduction Codes screen.
Example: WinTeam allows you to use whatever naming conventions for Plan Options, Plan Types and Relation Descriptions that work best for your company. Many companies keep naming conventions consistent with previous years, or match their carriers' plan descriptions.
To set up a Pricing Rule:
A Plan Option's Cost Method uses a Pricing Rule in calculating Employee Monthly Cost for a benefit. You are required to include a Pricing Rule Description when you set up benefit pricing.
Click the down-arrow to pick a Pricing Rule Description from the list, or double-click in the Pricing Rule field to open the Pricing Rules window to create a pricing rule description.
To create a pricing rule description:
Note: Before you set up a pricing rule description, you must set up the required Description, Type and Carrier on the INS: Benefit Setup General Info tab, plus and a plan option for at least one benefit.
- To open the Pricing Rules window, do the following:
- On the Benefit Setup screen Pricing tab in the Effective Date box, enter the date you want the pricing for the benefit to be effective.
- On the Pricing Rules tab in the Plan Option list, select the plan option to which you want to assign a pricing rule.
- In the Pricing Rule grid, double-click in the Pricing Rule box. The Pricing Rules window appears.
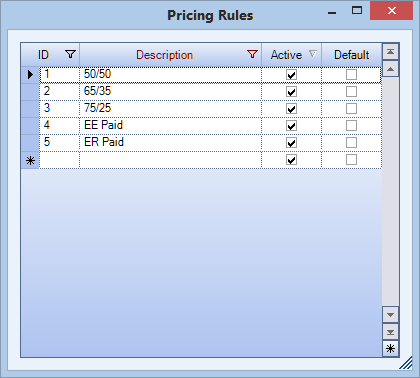
- In an empty row in the in the Description box, type the new pricing rule description, and then press Tab. When you add a new item to this Add/Edit list, the system automatically assigns and displays its unique ID number. The system selects the Active check box by default, which means the item is available on the list to pick during future record creation. Clear the check box to make the item inactive or grayed out. If you select the Default check box, WinTeam uses this item to automatically fill in the corresponding field on new records.
- (optional) To make the new pricing rule description the default value, select the Default check box.