Overview
The SYS: Location Setup screen is available only to clients licensed for multiple locations. If you are not licensed for multiple Locations, this option is not visible from the Defaults menu. The number of Locations you may set up is based on the number of Location licenses your company has. You can verify your license file by selecting the Help menu, then clicking About. Click the License tab and look for Max Locations.
Note: During initial setup, after setting up a second Location, you must exit WinTeam and relaunch to see the new Location in the drop down list in the Job Master File or Employee Master File.
You can access the Location Setup screen from the System - Setup Menu. You can also access it by double-clicking in the Location field on the Employee Master File screen, Job Master File screen, and Additional Locations add/edit list screen.
Key Functionality
General

The Location ID is a unique number to identify each Location Setup record. This is a required field. If you are adding a new Location record you can enter a Location ID or let the system assign a Location ID when you save the record. If the system assigns the ID, it will find the greatest ID number and add 1.
The system does not perform a lookup based on the ID. You must use the Location Lookup field to locate an existing Location Setup record. For an existing Location Setup record, you are able to modify the Location ID field.
The Allow Transfers check box is used to enable you to use the Employee Transfer feature accessed from the Employee Master File. This feature allows you to transfer an employee from one location to another even if you do not have security privileges for the original location in the SYS: User Security screen, Other tab. Select this check box to enable this transfer feature for each appropriate location. See Employee Transfer for additional information.
Select whether the Location is active or inactive. The Location status is active if the check box is selected, and inactive when the check box is cleared. For a new Location record, the system selects Active by default.
If a Location is made inactive (Location Setup – Active check box not checked), the Location is unavailable for selection on data entry screens. However, the Location will continue to be available for selection for reports.
The Description field is used to identify the Location. The Description must be unique for each Location Setup record. This is a required field.
The system does not perform a lookup based on the Description. You must use the Location Lookup field to locate an existing Location Setup record.
Use the Address, City, State and Zip fields to enter the Location address. You can use the Zip Code Custom Setting to populate City and State fields. To automatically populate the City and State field based on the ZIP Code entered see Auto Populating City and State Fields.
The Google Mapping feature links to Google Maps to allow you to quickly view maps and get directions. Using the address you have entered in WinTeam, the link generates a map centered on the address you have specified. For more information see Using Google Mapping.
Click the Validate Address button to check the address you entered against the address in the USPS database (Melissa Data).
Important: Validating addresses is part of the implementation process for the Updated Tax Engine. See Job and Employee Master File Address Validation for more information.
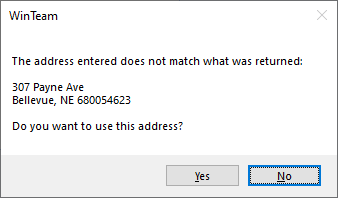
The following message box displays when the system finds a close match to the address you entered–click Yes to accept the system's suggestion or click No to close the message box and adjust the address.

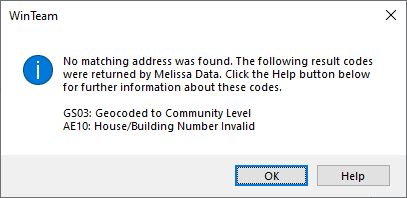
The following message box displays when the system cannot find a match to the address you entered–click OK to close the message box or click Help to see more information about the result codes.

Use the Phone fields to enter phone numbers for each Location. You must enter the area code for all phone numbers including local phone numbers. Parentheses around the area code and a dash (-) after the first three numbers will display after you enter the first number.
You can use the Phone Description field to assign a description to this Phone Number. To add a new Location Phone Description , double-click in the Description field, or type a new Location Phone Description and press Enter. The Location Phone Descriptions add/edit list displays.
Use the Establishment field to assign one or multiple locations to an establishment. This field is used in conjunction with the CA Pay Data report type in the HR EEO/Vets report. That report type allows you to comply with the requirement that California employers of 100 or more employees report pay and hours-worked data by Establishment, Job Category, Sex, Race, and Ethnicity to the Department of Fair Employment and Housing (DFEH). See HR EEO/Vets report for details. An establishment is defined as an economic unit producing goods or services. Definition defined by government below:
An “establishment” is an economic unit which produces goods or services, such as a factory, office, or store. An establishment is typically a single physical location engaged in predominantly one type of economic activity. Businesses at different physical locations, even though engaged in the same business, must be reported as separate establishments. There are exceptions for the construction, transportation, communications, electric, sanitary services, and oil and gas industries whereby it is not necessary to report separately for each individual site, project, or field. These industries are only required to report as establishments relatively permanent main or branch offices, terminals, or stations.
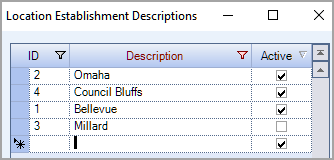
Double-click in the Establishment field to open the Location Establishment Descriptions add/edit list to create and maintain the contents of the drop down list for the Establishment field. When the Active check box is selected, the description displays in the drop down list, and when it is cleared, the description is hidden from the list.


The Census Metro Area field only displays on Canadian databases.
Use this field to enter the Census Metro Area (CMA) information that is used in reporting for the Employment Equity Act for Canada. You can enter up to 20 characters in this field (numbers and/or letters).
Use the Notes field to enter any notes pertaining to this Location. If you enter more than one line of information, the system automatically wraps the lines of information.
Custom Fields
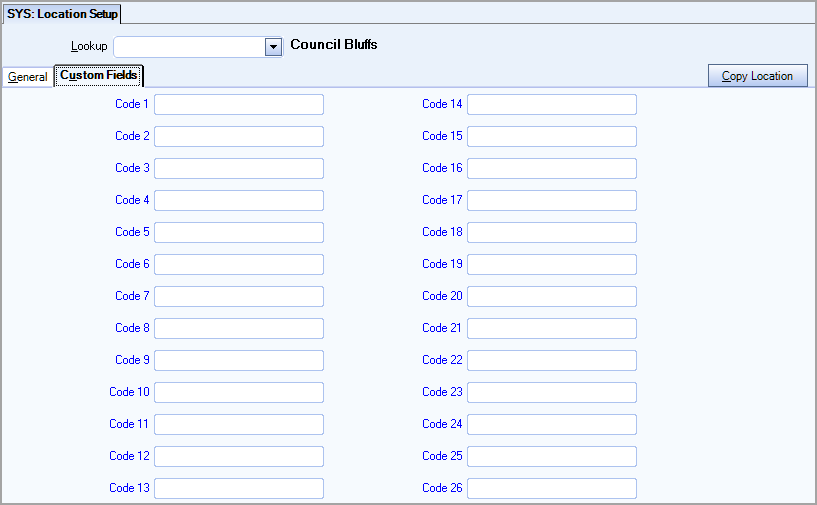
Custom Fields allow you to set up fields for your own use. You may choose to use none of the Custom Fields or all of the fields. You may customize each field to have a Drop Down list, Text entry, Numeric or Date field. You can define up to 26 Custom Fields. For more information, see Using Custom Fields.

Custom Settings
| Section | Item | Value | Module and Purpose |
|---|---|---|---|
| Addresses | UseZipsForCityState | Yes | This setting automatically fills in the City and State (City and Province) fields when entering a Zip Code. It also removes the City and State fields from the tab stop order. |
| Addresses | TabCityState | Yes | This setting will leave the City and State fields (City and Province) in the tab stop order when the Zip Code Custom Setting is in place. |
For more information see:
Auto Populating City and State Fields
Security
The Location Setup screen belongs to the SYS Location Setup security group. It is also assigned to the and the SYS Defaults / Setup security group. This screen has the Read-Only Feature. For more information see:
Learning about Read-Only Security
