Overview
Use the Direct Deposit Information screen to enter bank account information for employee deposits.
The entry of information on this screen is optional, although if you use NACHA you will want to complete the information on this screen in order to create a file which can then be transmitted to a bank.
The same Routing and Account number can be used for both Savings and Checking Accounts. Since credit unions typically use the same account number for both checking and savings accounts, the uniqueness of the accounts is based solely on the Account Type (Savings or Checking).
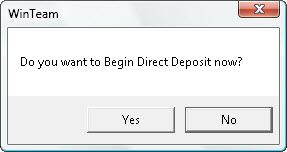
The first time you set up Direct Deposit Information, and then close the screen, the system prompts you with this message:

Select Yes to enable and select (check) the Begin Direct Deposit check box on the Employee Master File (Pay Info tab).
Select No to return to Employee Master File (Pay Info tab). The Begin Direct Deposit check box is enabled, but is not selected. You can select this check box at any time to start direct deposit for the employee.
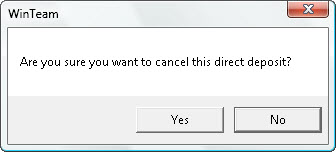
To cancel Direct Deposit for an employee, clear the Begin Direct Deposit check box on the Employee Master File (Pay Info tab). This message displays:

This screen can be accessed from the Pay Info tab screen by clicking the Direct Deposit Information button.
Key Functionality
History As of Date
Click the History as of Date to display the Direct Deposit Information for All Accounts window. Select the As of Date/Time field to view changes as of the selection.
Use the Direct Deposit Account Information area to describe the employee’s account for direct deposits.
Primary
Select the Primary check box to designate this account as the default account for the employee’s direct deposits. If the employee has more than one bank account listed, the account designated as the Primary account will always show first.
Account Type
Use the Account Type field to select either “Checking” or “Savings” for this Direct Deposit record.
Routing #
Use the Routing # field to define the financial institution’s routing or transit number for this Direct Deposit record. Do not include dashes or spaces.
Once you enter a Routing #, the Account # is required.
Account #
Use the Account # field to define the employee’s account number for this Direct Deposit record. Do not include dashes or spaces. You may enter alpha or numeric characters.
Amount
The Amount field for the Primary account will not have an amount value.
The Amount field is a required entry for other (non-primary) accounts.
Note: You cannot enter an amount for the record marked Primary. The Primary account will have the employee’s paycheck amount deposited, less any other Direct Deposit amounts listed on this screen.
Note: If the Total amount of all other (non-primary) accounts exceed the employee's paycheck, no funds will be deposited to the other accounts. The entire paycheck will be deposited in the Primary account.
Notes
Enter any notes pertaining to this Direct Deposit record. If you enter more than one line of information, the system automatically wraps the lines of information for you. To start a new line or paragraph, press Ctrl + Enter.
Enter the name of the employee’s financial institution and the corresponding address, city, state, and ZIP Code. The Bank Information is for informational purposes only and is not used by the system.
Bank Name
Use the Bank Name field to define the name of the employee’s financial institution.
Address
Use the Address field to enter the financial institution’s street address, including the street number, street name, and suite number (if applicable).
City
Use the City field to enter the financial institution’s city.
To automatically populate the City and State field based on the ZIP Code entered see Auto Populating City and State Fields.
State
Use the State field to enter the financial institution’s state. You can enter the entire state name or the two-character state abbreviation.
To automatically populate the City and State field based on the ZIP Code entered see Auto Populating City and State Fields.
Zip
Use the Zip field to enter the financial institution’s ZIP Code. The field is preformatted to accept the optional four-digit extension.
To automatically populate the City and State field based on the ZIP Code entered see Auto Populating City and State Fields.
Google Map button
Click to link to Google Maps to quickly view maps and get directions. The link generates a map centered on the address you have entered in WinTeam. For more information see Using Google Mapping.
Incomplete or Duplicate Direct Deposit Information
Checks cannot be printed and the NACHA file cannot be submitted if there is no Primary account selected, or if there is more than one Primary account selected. This must be corrected before the print checks process can complete.
Custom Settings
| Section | Item | Value | Module and Purpose |
|---|---|---|---|
| Payroll | ValidateDDInfo | Yes | This setting forces a User to reenter Routing and Account Number information when entering or changing Direct Deposit Information. For more information see Validating Direct Deposit Information. |
For more information see Custom Settings and List of Custom Settings.
Security
In order to access the Direct Deposit Information screen, you must belong to the PAY Employee Direct Deposit Info or PAY All (Security) group. For more information on security groups, see Learning about Security Groups.
The ability to view Direct Deposit Information is based on the Basic Read Security. In order to overwrite information on this screen, you must have a Basic Write security level equal to or greater than the Employee Master record's security level.
If you enable the Read-Only security feature under the PAY Employee Direct Deposit Info screen, the user cannot add, edit, or delete any of the fields on this window–they can only view the information.

