Overview
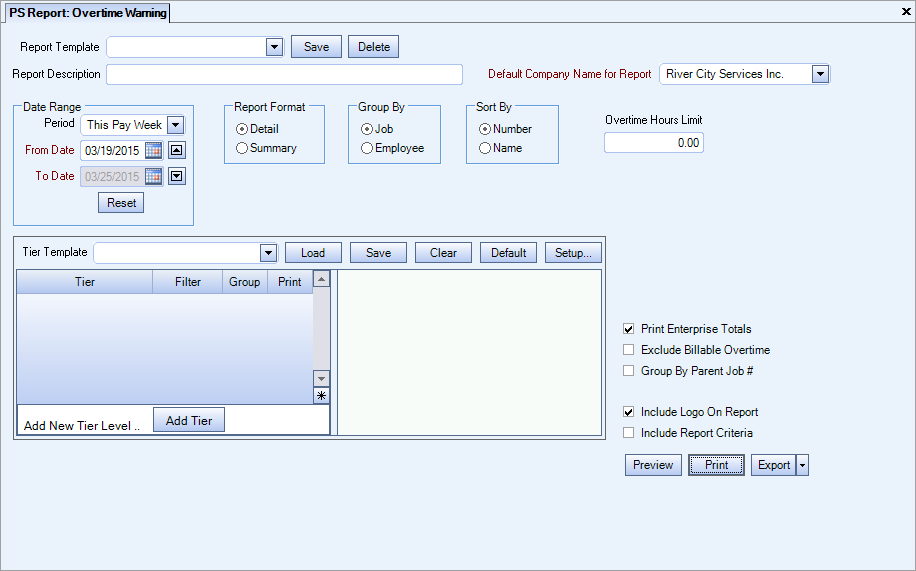
The Overtime Warning Report can be opened from the Personnel Scheduling Reports menu or from PS Schedules Reports menu. Use this report to identify jobs where overtime has been scheduled or worked–you can run it by job or employee. If this report is run prior to the specified work week, the overtime may be reduced or eliminated by assigning other employees to the extra hours.
Based on the amount of hours entered in the Overtime Hours Limit field, the system finds all jobs (if running by job) or all employees (if running by employee) that have overtime equal to or greater than the amount entered. In addition, the system includes any jobs or employees with billable overtime. A person or job could have overtime hours under the limit specified, but if there is billable overtime, they are going to show up on the report.
To see only payroll overtime and not include billable overtime, select the Exclude Billable Overtime check box. You should, however, review your billable overtime hours so that you can see how many hours of overtime you pay compared to how many hours of overtime you bill.

Key Functionality
You can select a Report Template from the drop down menu to easily load a previously saved template. You can also create a new template by typing in a name, selecting criteria, and clicking the Save button.
You can type a description for the report template.
Use the Date Range field to select the dates to check for overtime. The start date must be a valid week starting day.
Use the Report Format option to choose the level of detail for the report.
You can select to group by Job or Employee.
You can select whether to sort the results by Number or Name.
Use the Tier Template to define and save customized settings for a report. To use an existing template, select the template from the list and click Load.
To create a new template, you can load an existing template, make the necessary modifications, click Save, and define a new template name in the Save As dialog box. Alternatively, you can start with a blank template by clicking the Clear button.
To modify an existing template, load the template, make the necessary modifications, and then click Save. The name of the existing template display in the Save As dialog box. Click OK.
For more information see Using Tier Templates and Using Tier Parameters.
The Print Enterprise Totals check box is available to users who have more than one company, and may be selected to print enterprise totals on the report. This check box is selected by default.
If this is not selected, the report prints only the tiered reports that are marked for printing.
Select to exclude overtime marked as billable by the Customer.
Select x to group records by parent job number.
Select to print the company logo on the report.
Select to include a list of the report options selected for this report.
The Report Criteria page includes any ranges specified and each Category/Record selection made for the report.
Click the Preview button to view the report before printing.
Click the Print button to send the report to your default printer.
Click to export the report to the one of the following:
- Excel
- CSV
- Grid View
Column calculations for Overtime
Total Hours Paid - Total for jobs that have overtime for that date range
Hours - Total of Billable and Non-Billable hours for job
Billable - Overtime hours marked as Ovt
Billable % - Billable overtime hours divided by Total Hours Paid
Non-Billable – Overtime hours that are not marked as Ovt
Non-Bill% - Non-Billable hours divided by Total Hours Paid
Total Hours Scheduled - Total for all jobs for your location that have employees scheduled
For comparison, if you run the PS: Scheduling Activity report for the same date range, tier criteria, etc. the last page displays Grand Totals for Hours Billed (Reg and OT), and Hours Non Billed. If you add the billed and non billed hours, it equals the Total Hours Scheduled on this report.

Key Functionality
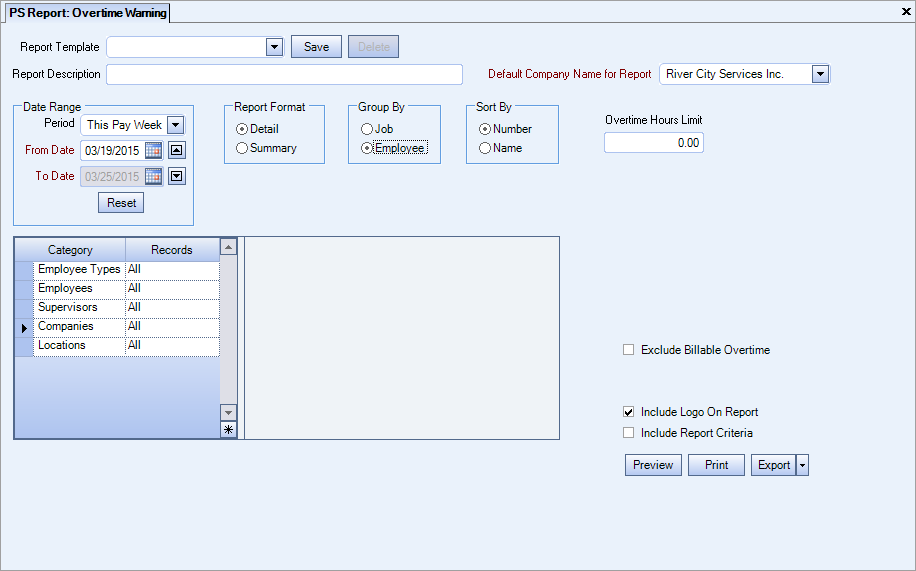
You can select a Report Template from the drop down menu to easily load a previously saved template. You can also create a new template by typing in a name, selecting criteria, and clicking the Save button.
You can type a description for the report template.
Use the Date Range field to select the dates to check for overtime. The start date must be a valid week starting day.
Use the Report Format option to choose the level of detail for the report.
You can select to group by Job or Employee.
You can select whether to sort the results by Number or Name.
Use the Overtime Hours Limit field to specify the minimum number of overtime hours to include on the report.
Use the Category/Records area to select which records you want to display for the following categories:
- Employee Types
- Employees
- Supervisors
- Companies
- Locations
Select to exclude overtime marked as billable by the Customer.
Select to print the company logo on the report.
Select to include a list of the report options selected for this report.
The Report Criteria page includes any ranges specified and each Category/Record selection made for the report.
Select to print the company logo on the report.
Select to include a list of the report options selected for this report.
The Report Criteria page includes any ranges specified and each Category/Record selection made for the report.
Click the Preview button to view the report before printing.
Click the Print button to send the report to your default printer.
Click to export the report to the one of the following:
- Excel
- CSV
- Grid View
