Overview
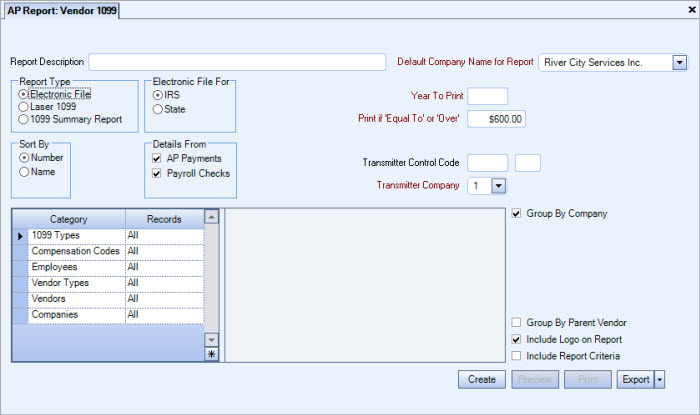
You can use the Vendor 1099 Report to print Laser 1099 forms, the 1099 Summary Report, or to create an electronic file for each vendor set up in the Vendor Master File.
Only those invoices and payments (including credit cards) that have the Include on 1099 check box selected are included in the report. The Include on 1099 check box for Payments is located on the AP: Payments (Other tab).
Select to include the details from AP Payments, Payroll Checks (Subcontractor checks), or both. The default selection is for both AP Payments and Payroll Checks.
The report can be sorted by Vendor Name or Vendor Number.
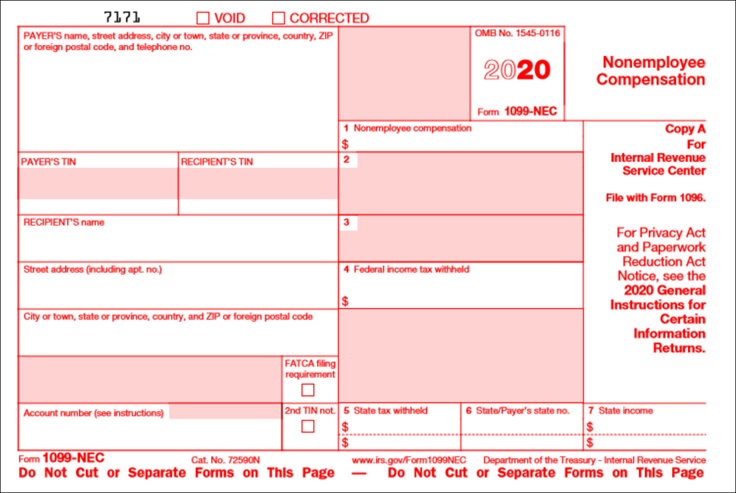
The SSA copy of the 1099 must be printed using a color printer in red ink.
1099 Corrections
You must make any corrections to your 1099 file directly on the IRS web site. WinTeam does not process 1099 corrections.
Multi-Company Databases
For multi-company databases, the 1099 Company is determined by the Invoice Company (for Payments that are Applied to Invoice) and by the Payment Company (for those Payments that are Applied to Expenses). In this case, each of the company’s payments will be put to the Limit test separately. In order to receive a 1099, the Vendor must have been paid at least $600.00 by that individual company (this amount is defaulted on the AP 1099 selection option screen).
The above functionality occurs IF the Company Number in the 1099 Information of the Vendor Master File is left blank.
If there is a Company Number filled in, the 1099 will be issued to that company.
If you want payments to be split by the Invoice Company and the Payment Company, you will need to remove the Company Number from the 1099 Information area in the Vendor Master File (Payments tab).
Note: To make a 1099 other compensation adjustment for a subcontractor, use the PAY: Check Processing Wizard adjustment feature. See PAY: Adjusting Taxes on W-2 Forms and Tax Reports for additional information.

Key Functionality
Type a description to name the report. This description prints above the Report Title.
Available for Clients using the Multi-Company feature. The Default Company Name for Report is populated from the Company Setup screen. The list contains all companies you have permission to access. The default company prints on every page of the report.
If the User has permission to only one company, then just that one company will display in the list. If the User has permissions to more than one company, the list will contain all companies the User has rights to PLUS the default reporting company. For more information see Learning about WinTeam Reports.
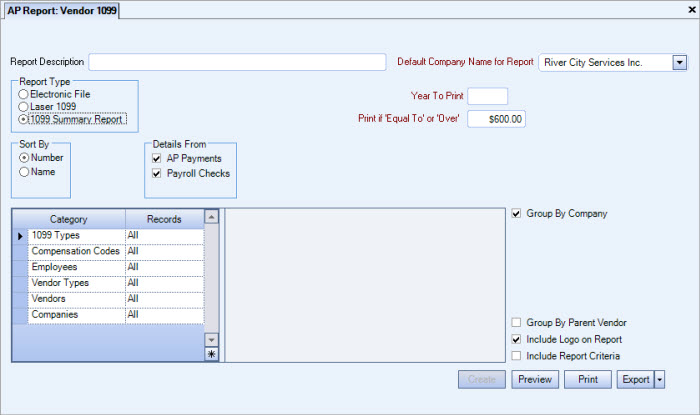
Select to prepare/print either the Electronic File , Laser 1099, or the 1099 Summary Report.
- Electronic File - This report is prepared electronically rather than a hard copy report. You must get specific instructions from the IRS to use this format. If you select this option, Electronic File For and Transmitter Control Code are now displayed.
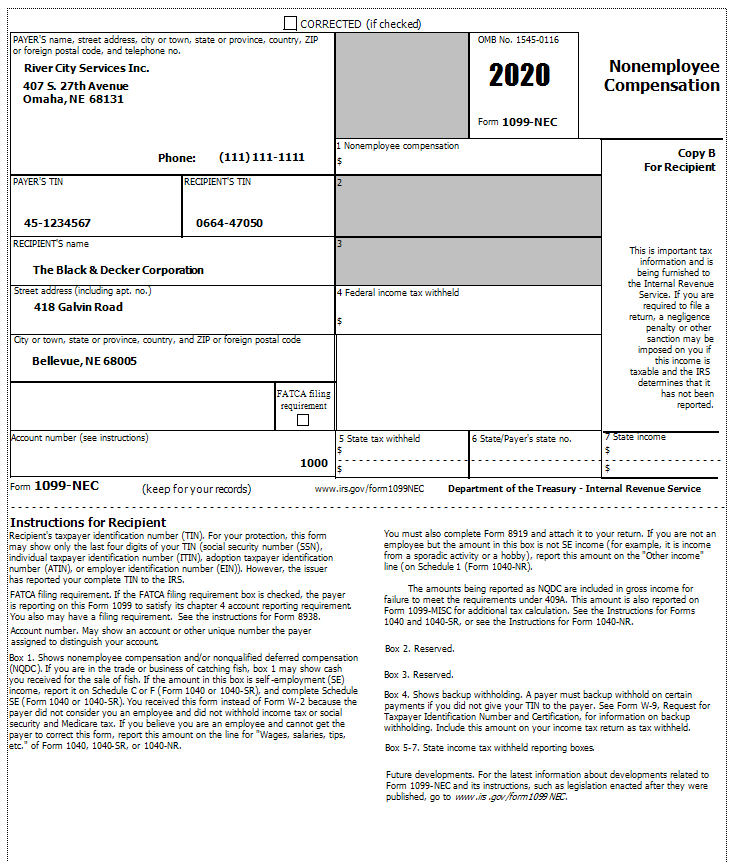
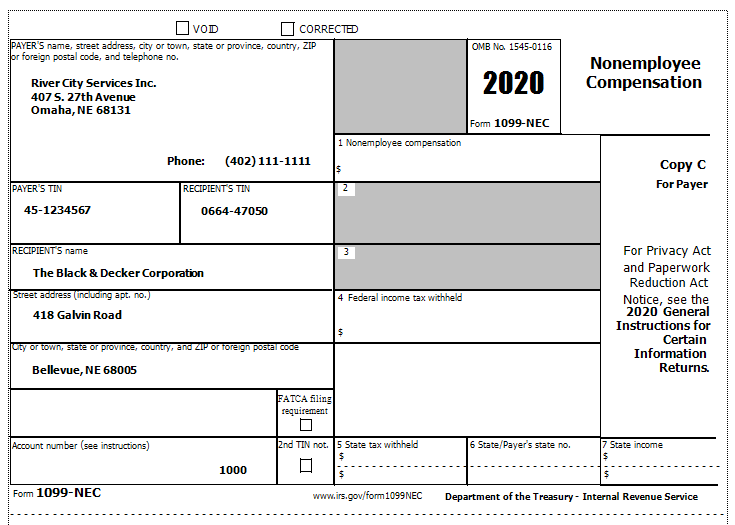
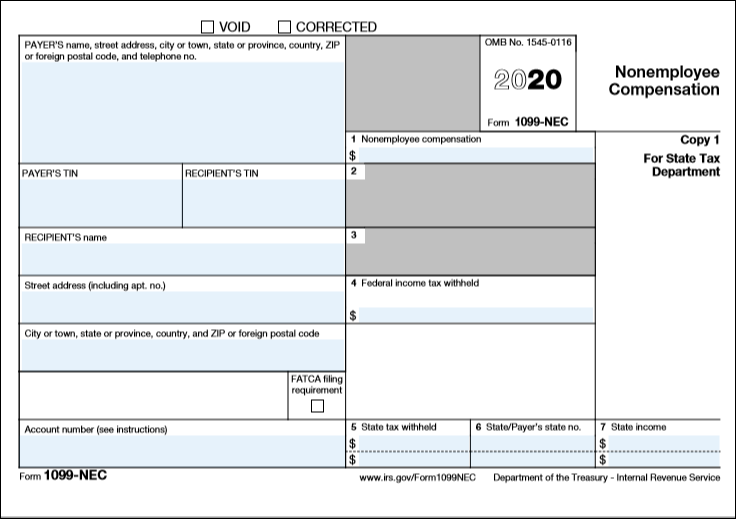
- Laser 1099 - This option generates the 1099 forms to print for the selected vendors. The system prints 5 (five) 1099 forms for each vendor. There are three forms printed on the first page and two on the second. The IRS copy of the 1099 must be printed in red ink which requires a color printer.
This is the default selection. - 1099 Summary Report - This option generates a summary report for the selected Vendors. This report lists each Vendor and its total taxable purchases. This may be printed before actually printing the 1099 forms to verify all of the Vendors on the list.
Note: All laser reports generated for 2020 and later use the 1099 NEC format by default. The 1099 MISC format is automatically used for any laser reports that are generated for 2019 or earlier.
This option displays when the Report Type is Electronic File. Select select whether this Electronic File is For IRS (Fed) or State.
If a vendor is not part of the IRS combined Federal/State filing program, your business must file with that State either Electronically or Manually. Refer to each State’s requirements and guidelines for filing.
Enter the tax year for which you are printing 1099 forms or the summary report. The year must be entered in its entirety (2015 instead of just 15).
The system defaults the minimum dollar charge that recipients must be reported for. The 1099 forms or report will print only for those recipients over the amount listed. You may modify this field.
This option displays if Laser 1099 is the Report Format.
Enter your company phone number. This is required by the IRS to be printed on 1099 Forms.
This option displays if Electronic File is the Report Type.
Enter your Transmitter Control Code. Both alpha and numeric characters can be used.
Note: The Transmitter Control Code is issued by the government.
This option displays for Users who have more than one company and Electronic File is the Report Type.
Select the Transmitter Company to use in the header record of the electronic file. This field defaults to Company 1.
Use to sort report data by Vendor Number or Vendor Name.
The AP Payments and Payroll Checks check boxes are both selected by default.
If the Payroll Checks option remains selected, an Employees Category/Record is available to enter an employee number range. The system will find checks that are marked as being "Subcontractor" checks. If the "Subcontractor" check has any tax record in it that is not equal to $0.00, the check will not be picked up.
Also when Payroll Checks is selected the Compensations category is available.
This option displays if Laser 1099 is the Report Type.
Select to print the recipient form or the employer form.
1099 Types
Use the 1099 Types category to filter the report by 1099 Types.
Select All to include all 1099 Types.
Select Pick to define specific 1099 Types to include on the report. When you select Pick, a list of 1099 Types displays. Select the check box next to each 1099 Type you want to include on the report.
Compensation Codes
Use the Compensation Codes category to select the Compensation Codes to include on the report.
Select All to include all Compensations.
Select Pick to define specific Compensations Codes for the report. When you select Pick From List, the Compensation Codes list displays. Select the check box next to each Compensation Code to include on the report.
This category displays when the Details are From Payroll Checks.
Employees
Use the Employees category to select the Employees to include on the report.
Select All to include all Employees on the report.
Select Range to define a range of Employees for the report. Type the beginning Employee Number in the From field and the ending Employee Number in the To field.
Select Create to define your own list of Employees. When you select Create, a small grid displays to the right. Enter the Employee Numbers you want to include in the list, or use the Lookup to locate the Employee Numbers.
Select Exclude to identify records that should not be included. When you select Exclude, a small grid displays to the right. Enter the Employee Numbers you want to exclude in the list, or use the Lookup to locate the Employee Numbers.
This category displays when the Details are From Payroll Checks.
Vendor Types
Use to select the vendor types to include on the report.
Select All to include all Vendor Types on the report.
Select Pick to define specific Vendor Types for the report. When you select Pick, a list of Vendor Types from the Vendor Master File displays. Select the check box next to each Vendor Type you want to include the on the report.
Vendors
Use the Vendors category to select the Vendors to include on the report. (On the HR: and INS: Benefit Insurance/Other Analysis Reports, this Category is available when the Report Type is Vendor Billing.)
Select All to include all Vendors.
Select Range to define a range of Vendors for the report. When you select Range, the range fields display. Type the beginning Vendor Number in the From field and the ending Vendor Number in the to field, or use the Lookup to locate the Vendor Number.
Select Pick to define specific Vendors for the report. When you select Pick, the Vendor list displays. Select the check box next to each Vendor to include on the report.
Select Create to define your own list of Vendors. When you select Create, a small grid displays to the right. Enter the Vendor Numbers you want to include in the list, or use the Lookup to locate the Vendor Numbers.
Select Exclude to identify records that should not be included. When you select Exclude, a small grid displays to the right. Enter the Vendor Numbers you want to exclude in the list, or use the Lookup to locate the Vendor Numbers.
Companies
The Company Pick option filters for AR Invoice and Payment records. The Companies category is available for Clients using the Multi-Company feature.
Select the Companies to include on the report.
Select All to include all companies on the report.
Select Pick to define specific Companies for the report. When you select Pick, the Companies list displays. Select the check box next to each Company to include on the report.
Note: When running reports using the Company Category/Record Pick and the company name exceeds the maximum number of characters, WinTeam will truncate the name.
Select this check box to run the 1099-MISC report instead of the default 1099-NEC report. This check box is cleared by default (the 1099-NEC prints by default.)
Note: This check box is available when the Year to Print is 2020 or later.
This option is available to users who have more than one company, but is not selected by default. If selected, the default company prints on the Grand Total Page and the Report Criteria page. All other pages print the applicable company name. If not selected, the default company prints on every page of the report.
Select this check box to group the 1099's Vendors by Parent Vendor.
If a 1099 Vendor is a sub Vendor (Parent Vendor has been assigned to the Vendor in the Vendor Master File), and you select to Group by Parent Vendor then the 1099 is issued only for the Parent 1099 Vendor with the totals included from the sub Vendor.
Example: Vendor Number 2000 has received payments in the amount of $700.00.
Vendor Number 20001 (who is a sub Vendor of Vendor Number 2000) has received payments in the amount of $650.00.
If the Group by Parent Vendor check box is selected, the 1099 displays payments in the amount of $1350.00.
If the Group by Parent Vendor check box is not selected, 2 1099's are issued: Vendor #2000 displays payments in the amount of $700.00 and Vendor # 20001 has payments of $650.00.
Select the Include Logo on Report check box to print the company logo on the report. This check box is selected or cleared by default, based on the option selected in SYS:Defaults. However, you can modify the setting on each report.
This check box applies only to the 1099 Summary Report Format.
Select the Include Report Criteria check box to include a list of the report options selected for this report. The Report Criteria page includes any ranges specified and each Category/Record selection made for the report. This check box is NOT selected by default.
Note: Multi-Company—WinTeam looks to the Job's Company logo to determine which Company logo to use on the Work Ticket Report and Work Tickets.
This check box applies only to the 1099 Summary Report Format.
The Create button is available when the report Type is Electronic File.
Click the Create button to create an electronic file for each vendor set up in the Vendor Master File.
Preview
Click the Preview button (or use the shortcut key, ALT + V) to view the report before printing.
Click the Print button (or press ALT + P) to send the report to your default printer.
Export
Click the Export button (or press ALT + X) to export the report to a specified format. Reports may be exported to Adobe Acrobat (PDF), Excel, Comma-Separated Values (CSV), Grid View and E-mail (available for premise-based clients only).
Note: WinTeam cannot select the Corrected box when creating a corrected 1099 form. See the IRS.gov website for additional information on a 1099 form correction.
The IRS copy of the 1099 must be printed in red ink which requires a color printer.

Related Information
The AP Report Vendor 1099 screen has its own Security Group, AP Report Vendor 1099.
The AP Report Vendor 1099 screen is part of the AP Reports ALL Security Group.
Tip: For more information see Security Groups Overview and Security Groups By Module.

