
Grids are used throughout WinTeam to display a tabular view or list of records.
A typical grid supports the following features:
- Virtual Data - WinTeam can display unlimited numbers of rows and columns to load data on demand.
- Sorting - Single and Multi-Column sort operations.
- Filtering - Built in filtering expressions including regular expression support Outlook Grouping - Groups rows with similar values together, just like Microsoft Outlook.
- Fixed Headers, Rows and Columns - You can control how data is displayed.
- Microsoft Excel Operations - Export to Excel
Navigating Records
When there are more records in the grid than what displays on the screen, you can see a vertical scrollbar on the right side of the grid to view the additional rows.
To advance to the next field of the grid use the Tab key.
You can use the up and down arrow keys on your keyboard to navigate through the list.
You can also use the Home, End, Page Up, and Page Down keys to navigate through the list.
You can click the asterisk at the bottom of the vertical scrollbar to go to a new row.
Selecting Records
Grid rows can be selected by clicking in the row
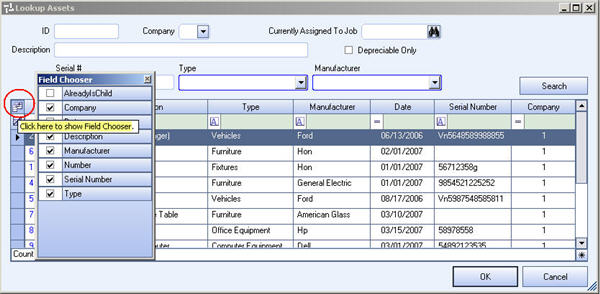
Choosing Columns to display in the grid using the Field Chooser
You can customize visible columns. Emulate the Microsoft ™ Outlook Field Chooser dialog with the built-in Field Chooser dialog which allows you to select or clear which columns display in the grid.
When you clear a check box next to a column name, that column no longer appears in the grid.
The fields available from the Field Chooser are different for each screen. See the applicable screen for details.
Not all grids have the Field Chooser functionality.
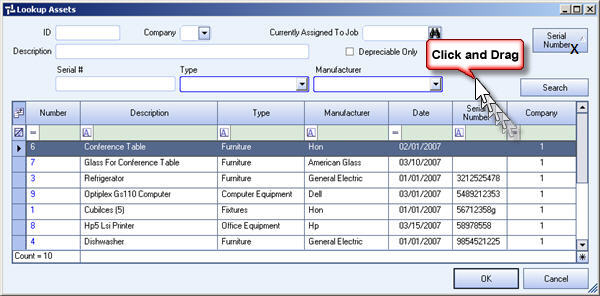
You can also click and drag a column header away from a grid to remove a column from the grid.
Simply click the column header, drag off of the grid, you will see an X on the column header name, then release the mouse button. The column of data is then removed from the grid.
To place a column back in the grid, click the Field Chooser button, select the column you want to add, then close the Field Chooser dialog box.
Fixed Columns
Pin columns to the left of the grid, conveniently allowing columns to remain visible while scrolling horizontally.
Sorting Columns of Information
Within WinTeam you can sort columns of information, in ascending or descending order, by clicking the column headings within the Lookup screens. The functionality works as follows:
- The first time you click a column heading, a very small gray Up Arrow appears in the column header, indicating that the information within the grid will sort in Ascending order.
- If you click on the same column header again, a small gray arrow appears within the column header, indicating that the information within the grid will sort in Descending order.
- All columns have the ability to sort in ascending or descending order. The sort remains valid until you click the Search button again.
- An advanced feature within these screens is the ability of applying more than one sort to the grid by applying the first sort, holding down on the shift key and applying a second sort to another column. This is applicable if the first column you are sorting by does not already apply a unique filter, and the automatic secondary sort that the system is applying is not the secondary sort you want used.
Example: If you are on the Lookup Employee screen you might want to first sort by Last Name. The system would then normally sort the records by First Name. That is not what you want. You want to sort by Employee Number as the secondary sort. To do this, click the Last Name column first, hold down the Shift key and click the Number column next. You have now applied a double sort, first by Last Name ascending and second by Employee Number ascending.
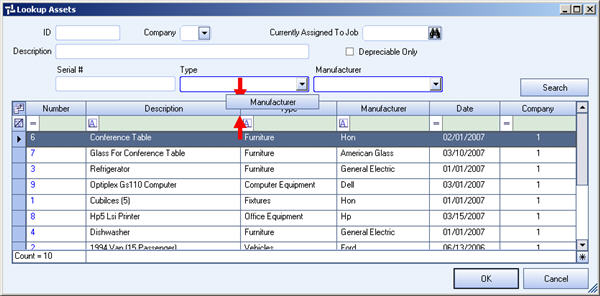
Rearranging Columns
Click and drag a column header to another area in the grid until you see a red downward and upward pointing arrow, then release the mouse button.
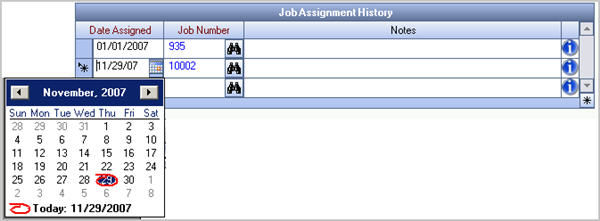
Date fields
If you hover over a Date field in a grid, you will see the Calendar icon.
To enter a date quickly, click the calendar icon at the right of the Date field, and then click a date on the pop-up calendar.
Filter Rows
The Filter Row is a fixed row in the column header area used for filtering rows.
Filter rows are found on all WinTeam Quick Lookup and Diary screens.
For more information, see Using the Filter Row Feature.
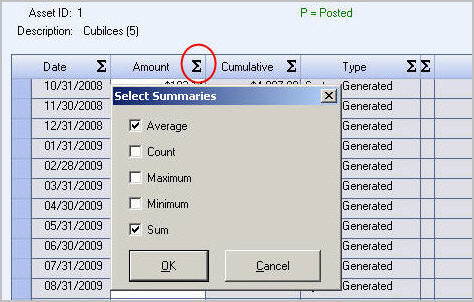
Column Summaries
Calculate column data at each level with sum, min, max, average, and count.
Fixed Filter Row
A fixed filter row allows further filtering incrementally using "And" and "Or", as well as custom regular expression support.
Add New Row
You can click the asterisk button on the bottom of the vertical scrollbar so that you can easily go to a “New Row”.
This will be especially helpful if you are in a grid that has many rows and the new row is not readily visible. Click this button to get to the new row quickly, rather than scrolling down through the records to find the new row.
A new row is indicated on a grid with an asterisk *.
Simply type in the row to add an item. Once you start typing you will notice the row changes to edit mode.
Once you add an item to a grid, a new row appears at the bottom of the grid to add another item.

Right-click functionality
You can right-click within a grid to perform actions:
- Print Preview - Allows you to preview and print the grid. The grid will resize to 1 page wide. If you find that the image is too small, you may want to remove some columns of information by using the Field Chooser.
- Excel Export - Allows you to export the data to save in an .xls format.
- This includes all grids on which you can right click and then select Export.
- It also includes Crystal Reports that can be exported to a grid—after they are in the grid you can export them to Excel.
- Any grid that has the + and – to expand and collapse the grid details can be exported—the expanded data is contained in separate tabs and all of the tabs have the appropriate data to join back to the job or parent.
- Filter Row - Allows filter functionality.
Depending on the type of grid you are on, you will either have available the Advanced Filter Row (used in Quick Lookups) or the simpler filter row (used in Add/Edit Lists). - Group By - Allows you to group the grid data in a specific way. Once you select "Group By", a header area displays at the top of the grid. You can drag column headers into that area to group the data.
- Row Summary - Allows you to summarize the column by Average, Count, Minimum, Maximum, or Sum (depending on the type of data).
Once you select "Row Summary", an icon displays, then you can select the Summary you want to use. - Fixed Rows - Allows you to designate rows to the top of the grid and cause them to stay in place. A pin icon displays on the rows you have "fixed".
- Fixed Columns - Allows you to designate columns to stay "fixed" while moving through multiple columns of information.
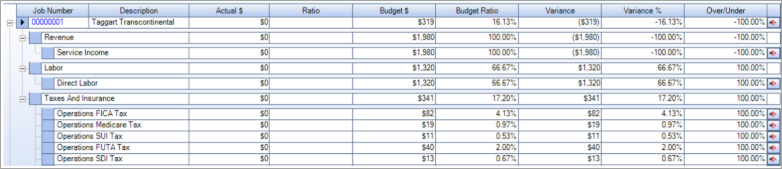
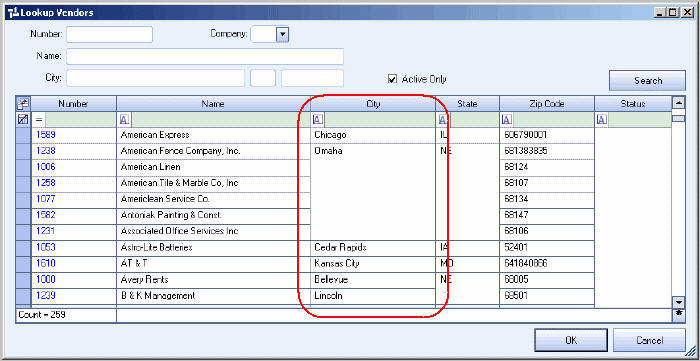
- Merged Cells - Displays like information in a merged cell, which makes viewing information easier by grouping like records. The record below was merged using the "City" column. Notice "Omaha" has multiple records, but "Omaha" displays only once.
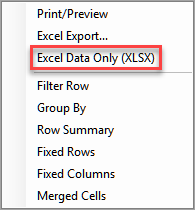
You can export up to 1 million records from a grid in WinTeam to an Excel spreadsheet. Only data is exported—no formatting is exported. To use this option select Excel Data Only (XLSX) in the grid right-click menu.
Tip: Before you use this option, you may need to increase your Connection Timeout setting in the System Defaults window.
The first tab of the spreadsheet contains the Job Level information. The second tab contains the next layer of data (Labor / Taxes and Insurance / Material). The third tab contains the Direct Labor / Overtime Premium / Holiday Labor.
In the header row, the description for any child column that is grouped under a parent column is Description. You must change the descriptions for these columns manually in Excel.

For more information on the Advanced Filter, see Using the Filter Row Feature. For Add/Edit Lists, once you select the Filter Row feature, a funnel displays indicating you can filter this column.


Notes field
If you tab to a Notes field in a grid, the field will expand to display the entire text that is entered.
You can also hover your cursor over the field to display the text in the Notes field.
When printing Notes, only the Notes that currently display on the grid will print. This will vary based on how you are currently viewing the grid. You can resize the resize the grid\popup to span multiple monitors or even remove all the columns except the Notes field. What you see is what you get. Screen resolution can also play a factor.
Lookup fields
Added ability to use the F4/F5 keys to open the Lookup in a grid with focus in the Number (F4) or Description (F5) fields. You can also start typing the description in the Lookup field and the system will display a list of item that begin with the characters you typed.
This functionality is consistent with Lookup fields that are not in grids.
OK button
The OK button is enabled as long as you have records filtered in the grid.
The field you are currently on must be a field that can be updated with a different value. The field could be "locked" because of Read-Only security or because the record had already been updated.