
Benefit Types in WinTeam are designed to help you categorize groups of benefits. Some examples of benefit types include Dental, Medical and Vision. Benefits Types are used on the INS: Benefit Offerings screen to link to Pricing. Benefit Types also provide grouping capability for online enrollment. Examples include Medical, Dental, Vision, and Life.
You can determine the order in which Benefit Types will display in eHub. For example, for medical benefits to show as Employees' first selection, enter 1 in the Online Benefits Display Order field.
You use Benefit Types when performing the following tasks in the Insurance Benefits module:
To set up a Benefit Type:
- To open the Benefit Types window, do one of the following:
- INS: Benefit Setup window (General Info tab) – double-click in the Type field
- INS: Benefit Class Setup window – double-click in the Benefit Type field
- INS: Pricing Structures window – double-click in the Benefit Type field
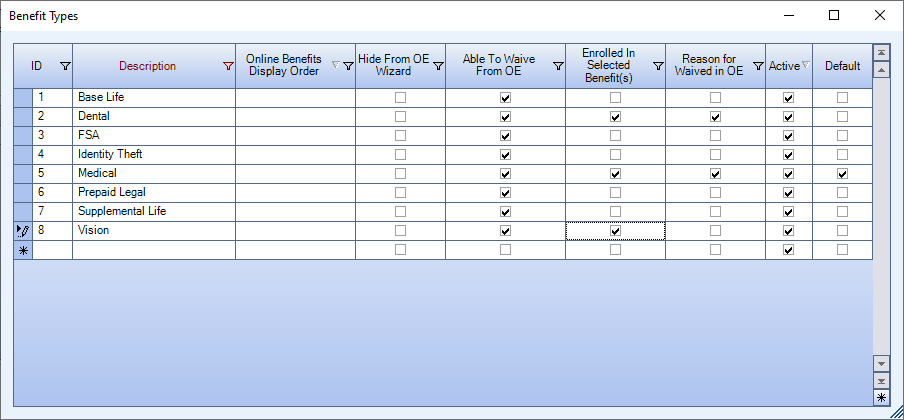
- In an empty row, type a Description for the new benefit type, and then press Tab. The system automatically assigns a unique identification number that appears in the ID box, and the Active check box is selected by default.
- (optional)Select the Hide From OE Wizard check box to hide that benefit type from the Online Enrollment Wizard. This is useful if you want to hide the employer paid benefits that the employee is already enrolled in from the wizard. All of the employee’s benefits, including those paid by the employer will still display in the Confirmation and Summary window.
- (optional)Select the Able to Waive from OE check box to allow employees to waive that benefit type in the Online Enrollment Wizard.
- (optional)Select the Enrolled in Selected Benefit(s) check box to enable the feature on the Assign Packages tab of the Package Validation window that allows you to see which employees are enrolled in the benefit type.
- (optional)Select the Reason for Waived in OE check box to make it required that an employee select a reason when waving that benefit type in the Online Enrollment Wizard.
- (optional)To make the new benefit type the default value, select the Default check box.