Use this procedure to create an automatic paycheck batch. Make sure all Timekeeping, Other Compensations and Other Deductions are entered prior to creating a payroll batch.
To create a paycheck batch, do the following:
- From the Payroll menu, select Check Processing Wizard.
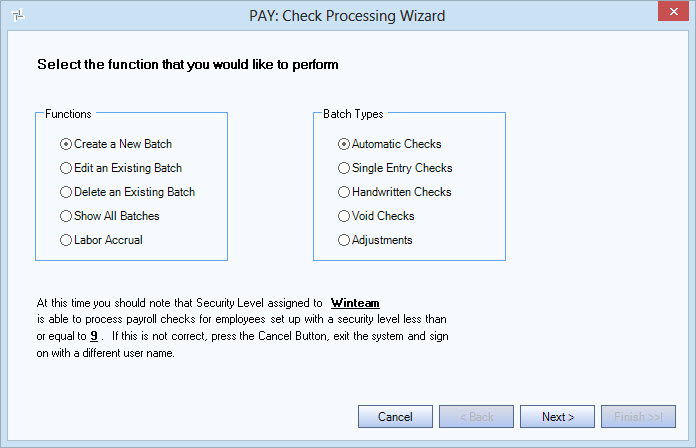
- In the PAY: Check Processing Wizard window, select Create a New Batch, select Automatic Checks, and then click Next.
- In the Create a New Batch - Automatic Checks - Paycheck Frequency window:
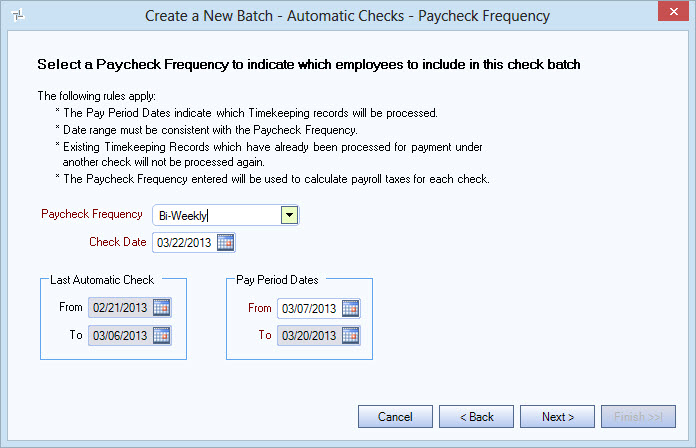
- Select a Paycheck Frequency to process. The batch is limited to only those employees who have the selected paycheck frequency.
- Enter the Check Date to print on the paychecks.
- WinTeam automatically populates the Last Automatic Check dates that were used for the last automatic check batch.
- Enter the Pay Period Dates to indicate the pay records to process. The date range must be consistent with the Paycheck Frequency. Timekeeping records already processed in another batch are not processed again.
- Click Next.
- In the Create a New Batch - Automatic Checks - Employee Filters window:
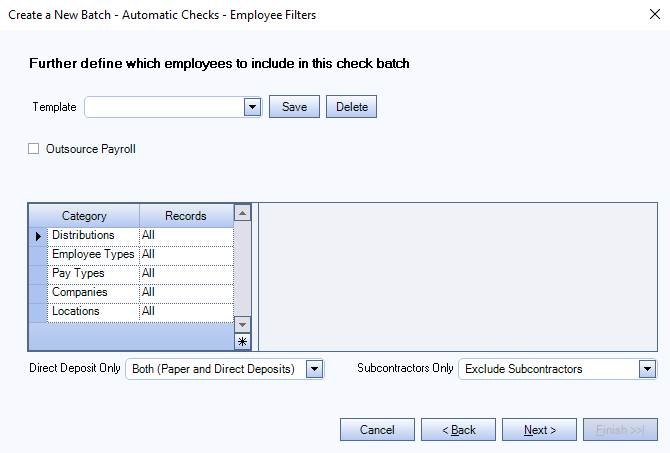
- Select the Outsource Payroll check box if you outsource your payroll. For more information, see Using a Payroll Outsource Agency.
- Select all or some of the Distributions, Employee Types, Pay Types, Companies, and Locations in the batch. The default is All records. To select specific records, choose Pick in the Records column and then select the check boxes for the records to include.
- In the Direct Deposit Only field, select whether to include or exclude paper and/or direct deposits in the batch.
- In the Subcontractors Only field, select whether to include or exclude subcontractors and/or employees in the batch.
- You can save all of the selections and settings in this window in a Template. Creating a temple allows you to bring back you selections and settings in the future by selecting the saved template.
Note: Any user with access to the Check Processing Wizard can use a saved template even if the Can Manage Report Criteria Templates check box is not selected for that user in User Security. This check box must still be selected in order for a user to create, edit, or delete templates.
 Creating a New Template
To create a new template, do the following:
- Make all of your selections and settings in the Employee Filters window.
- Click the Save button to the right of the Template field. The Save Criteria Template box opens. Enter a name for the template in the field and then click the OK button.
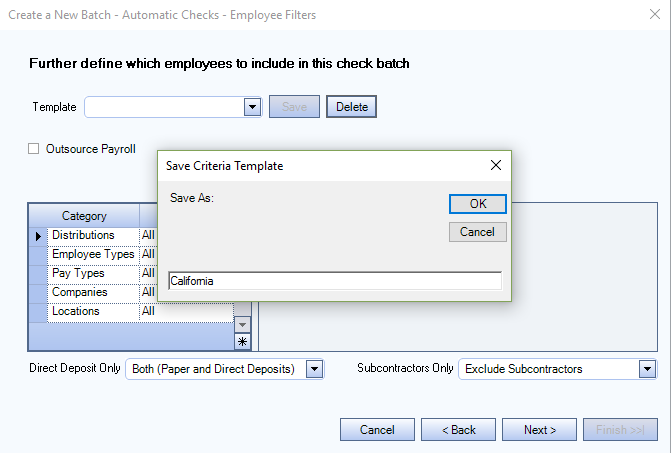
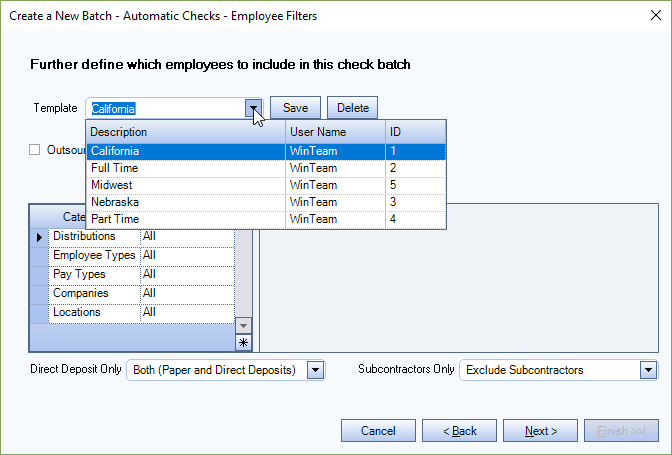
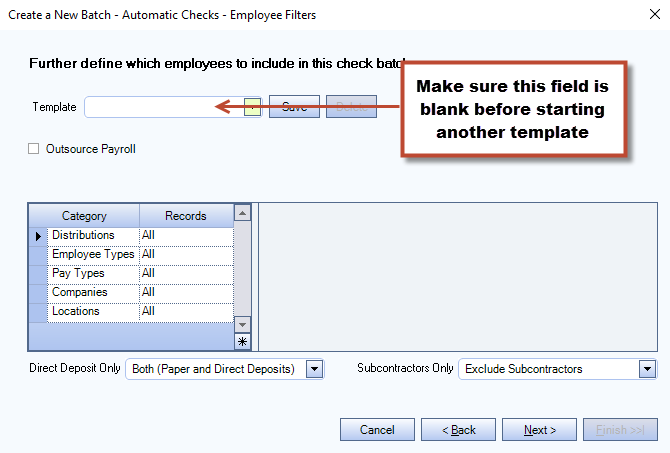
- The saved template is now available in the Templates drop down list. If you want to create another template, make sure the Template field is blank before you begin making the filter selections for it. Otherwise, you could inadvertently change the filters for a saved template.
 Editing an Existing Template
To edit an existing template, do the following:
- Select the template you want to edit by clicking the drop down arrow in the Template field and selecting it from the list.
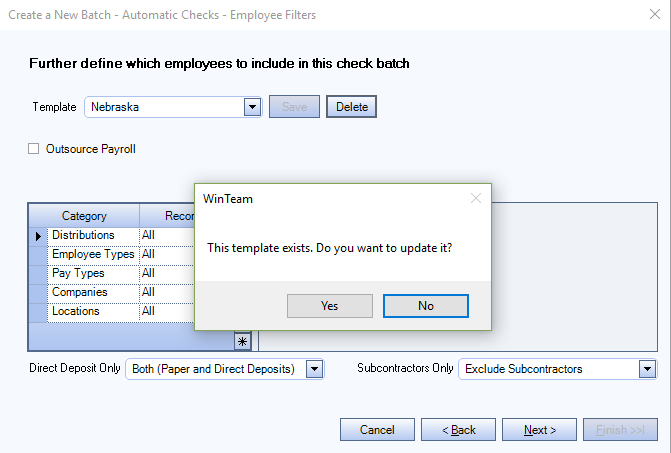
- Make your changes to the filters and then click the Save button to the right of the Template field. A message box opens asking if you want to update the template, click the Yes button to save your changes.
 Deleting an Existing Template
To delete an existing template, do the following:
- Select the template you want to delete by clicking the drop down arrow in the Template field and selecting it from the list and then click the Delete button to the right of the Template field.
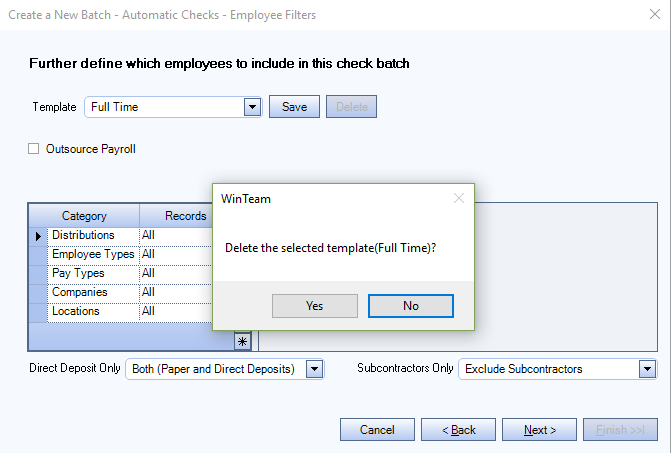
- A message box opens confirming your intention to delete the template, click the Yes button.
- In the Create a New Batch - Automatic Checks - Compensation/Deduction Filters window, select all, some, or none of the Compensation Types and Deduction Types in the batch. The default is All types. To select specific types, choose Pick in the Records column and then select the check boxes for the types to include.
- In the Create a New Batch - Automatic Checks - Notes window,
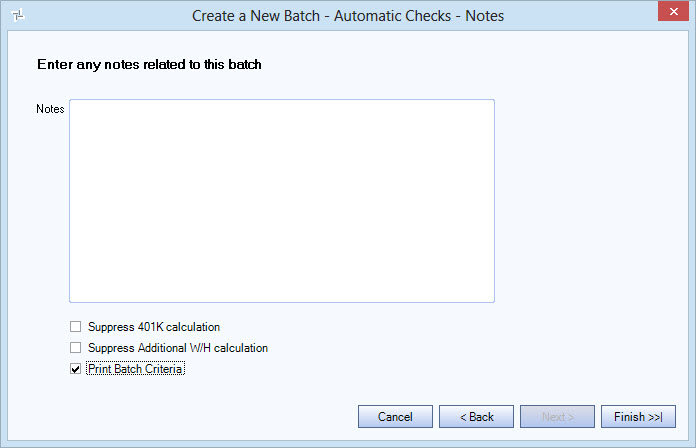
- Enter any Notes that are relevant to this batch. These notes are only visible when editing a batch and do not print.
- Select the Suppress 401K calculation check box to exclude the 401K Plan withholding from the batch. For example, you are creating a batch for a holiday bonus and don’t want the 401K deduction taken out of the amount. The 401K Plan information is located on the Pay Info tab of the Employee Master File.
- Select the Suppress Additional W/H calculation check box to exclude the additional withholding from the batch. For example, you are creating a batch for a holiday bonus and don’t want the additional deduction taken out of the amount. The Additional Withholding information is located on the Tax Info tab of the Employee Master File.
- Select the Print Batch Criteria check box to display the batch criteria in preview mode after the batch is processed.
- Click Finish.
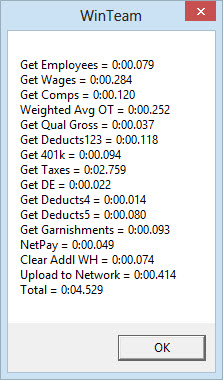
- A message box displays after the batch is processed. Click OK in the message box.
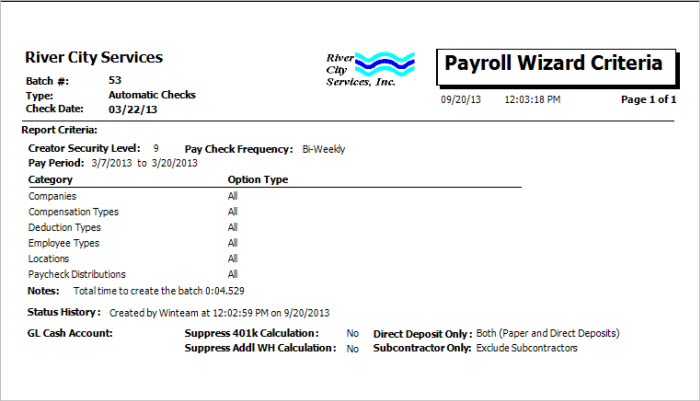
- If you selected the Print Batch Criteria check box on the the Create a New Batch - Automatic Checks - Notes window, the Payroll Wizard Criteria report opens in preview mode. This report contains a summary of the batch criteria information.
- The PAY: Review Checks window automatically opens. In this window you can make changes to the checks, run filters to review only certain checks, or add checks to the batch. You can verify the totals for the batch in the PAY: Timekeeping Report.
