Payroll Tax Address Validation
Overview
The Address Validation window is a tool to aid you in cleaning up your Job Master File and Employee Master File addresses that are incomplete or have not been validated.
Having validated addresses is important to payroll tax automation as it ensures we have the corresponding State, Federal, and Local tax codes for processing payroll taxes.
The Address Validation window is accessed from the Payroll menu.

Key Functionality
Two options are available for the Address Type, Employees and Jobs. If the Employees option is selected, the system validates the physical address on the Employee Master File. If the Jobs option is selected, the system validates the payroll tax address on the Job Master File.
The Employees (Physical) Address Type is selected by default.

Pending Address Change Tab
Click the Search button to display the records. The Pending Address Changes tab defaults. If you have the bulk address validation process turned on it may display pending address changes in the grid. These records include suggestions for the original address.

- Click the Approve button to accept the suggested address and update the address on the Employee Master File.
- Click the Reject button and the address moves to the Invalid Addresses tab in this window.
You also have the option to double click and drill down to the Employee Master File to update and validate the address on that window. This removes the address from the Pending Address Changes tab in the Address Validation window when refreshed.
Invalid Addresses Tab
To view a list of Employee Master File addresses that need to be validated, click on the Invalid Addresses tab and click the Search button.
The records in the Invalid Addresses grid display the Employee Number, First Name, Last Name, Address1, Address2, City, State, Zip Code fields, and Same as Mailing check box.

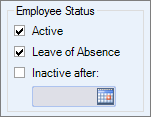
The Employee Status filter defaults to display employees with an Active and Leave of Absence status. You may select the Inactive after: option and enter a specific date. Click the Search button to update the displayed records.
Select the Include Subcontractors check box to include subcontractors who are setup in the Employee Master File. Click the Search button to update the displayed records.

Additional filter options include: Classifications, Distributions, Employee Types, Pay Frequencies, Primary Jobs, Supervisors, Paycheck Companies and Locations.
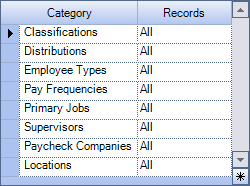
Once all filter options have been selected, click the Search button to update the displayed records.
A record count displays at the top of the address validation window. This count represents records that meet the criteria selected and need address validation.

To validate an address, click the Validate button on the appropriate row. A Melissa Data message displays. Depending on the address validation situation, different types of messages display.

Also, you can make address changes directly in the grid. Once a change is made to an address, the address is sent through Melissa Data to be validated.
Note: Melissa Data is an international address validation service that verifies and normalizes addresses to a USPS preferred format.
- If the address matches a standardized address it displays a message asking if you want to accept the standardized address. Click Yes to accept the address or click No or Cancel to close the window and make adjustments to the address information.
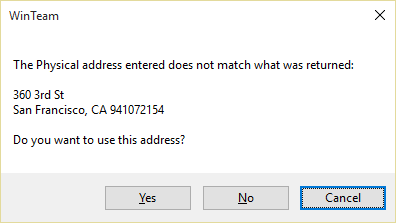
If you select Yes the address record displays in green as an indicator that the address is now valid.
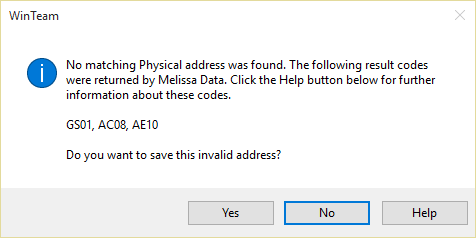
- If there was no address match it displays a result code message box. (The codes returned may be different than what you see in the below image). If you receive this message, click Yes to save the invalid address, click No to close the window and make adjustments to the address information, or click Help for additional details on the codes.
The button uses latitude and longitude to validate the address. Use this feature if you are unable to validate the address.
| If Google populates the latitude and longitude information | If Google does not populate the latitude and longitude information |
|---|---|

|
-
|
To remove an overridden address, change the physical address, save and decline the override option.
Note: The button automatically opens Google Maps, but you may use other websites to retrieve the latitude and longitude information.
Use the Validated Address History tab to view addresses that have already been validated and the history of those address changes. Each row contains an employee with a validated address. Click the plus sign to expand a grid row so you can see details for the employee. You can click the large plus sign in the top left corner of the grid to expand all of the rows. Click the large minus sign to collapse all of the rows. Right click in the grid to export the validated address history as an Excel spreadsheet if you need to complete a bulk review.

Select the Jobs (Payroll Tax) option for the Address Type.

Pending Address Change Tab
Click the Search button to display the records. The Pending Address Changes tab defaults. If you have the bulk address validation process turned on it may display pending address changes in the grid. These records include suggestions for the original address.

- Click the Approve button to accept the suggested address and update the address on the Employee Master File.
- Click the Reject button and the address moves to the invalid addresses tab in this window.
You also have the option to double click and drill down to the Job Master File to update and validate the address on that window. This removes the address from the Pending Address Changes tab in the Address Validation window when refreshed.
The Job Status filter defaults to Active. You may also select the Inactive after: option and enter a specific date.

Additional Tier filtering options are available, or if you have a Tier Template setup you can select the template from the tier template drop down.
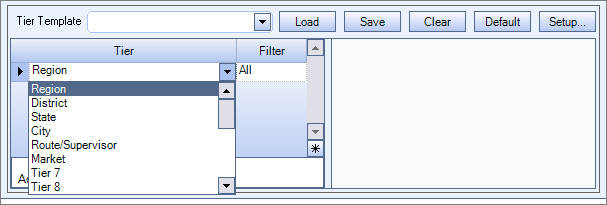
Once all filter selections have been made, click the Search button.
A record count displays at the top of the address validation window. This count represents records that meet the criteria selected and need address validation.

Invalid Addresses Tab
The records in the Invalid Addresses grid display the Job Number, Job Description, Address1, Address2, City, State, Zip Code, and Same as Physical.
To validate an address, click the Validate button on the appropriate row. A Melissa Data message displays. Depending on the address validation situation, different types of messages display.

Also, you can make address changes directly in the grid. Once a change is made to an address, the address will be sent through Melissa Data to be validated.
- If the address matches a standardized address it displays a message asking if you want to accept the standardized address. Click Yes to accept the address or click No or Cancel to close the window and make adjustments to the address information. If you select Yes the address record displays in green as an indicator that the address is now valid.
- If there was no address match it displays a result code message box. (The codes returned may be different than what you see in the below image).
- If you click Yes to the message asking to save an invalid address, it saves the address with the changes you made, however the address will not be valid and continues to display on the results window as needing to be validated.
- If you click No to the message asking to save an invalid address, the changes you made to the address will not save and the address returns to the original address.
- If you click the Help button, you are directed to a Melissa Data site with descriptions of the codes. These code descriptions help you understand why the system wasn’t able to find the address. You can then return to the Address Validation window to make the needed changes to the address information. Once you click off the row, tab through the row, or click the Validate button, you will receive another message with validation status.


The Override button uses latitude and longitude to validate the address. Use this feature if you are unable to validate the address by using the validate button.
| If Google populates the latitude and longitude information | If Google does not populate the latitude and longitude information |
|---|---|

|

|
To remove an overridden address, change the Payroll Tax address, save and decline the override option.
Note: The Check Map button automatically opens Google Maps, but you may use other websites to retrieve the latitude and longitude information.
Validated Address History Tab
Use the Validated Address History tab to view addresses that have already been validated and the history of those address changes. Each row contains a job with a validated address. Click the plus sign to expand a grid row so you can see details for the job. You can click the large plus sign in the top left corner of the grid to expand all of the rows. Click the large minus sign to collapse all of the rows. Right click in the grid to export the validated address history as an Excel spreadsheet if you need to complete a bulk review.
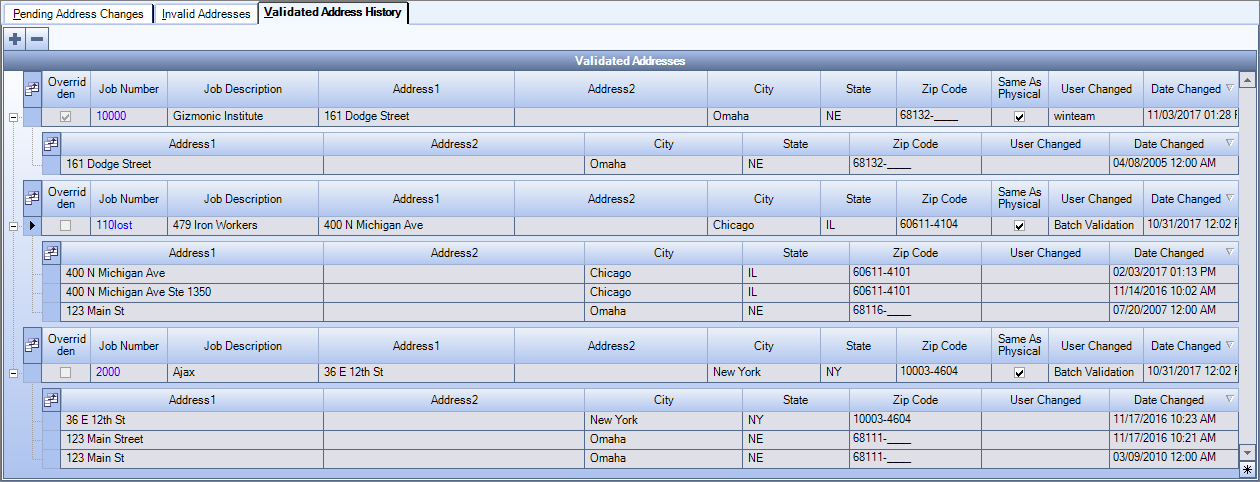
When using the Address Validation window to validate job payroll tax addresses a blank update option is available. This option may be used to bulk update blank job addresses to a specific address.
To start this process, click the Blank Update button at the top of the window. Enter the address information into the window and click the Validate button. Once the address has been validated, click the Blank Update button.
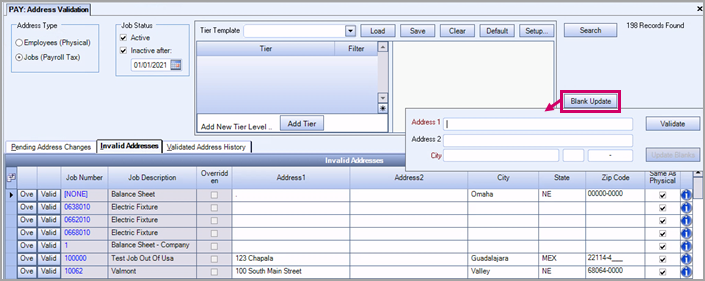
Once the processing is complete, all the job payroll tax addresses display in green as an indicator that the blank addresses have been validated.
Important: The blank update, updates all blank job payroll tax addresses that are displayed in the Address Validation window to this address. You may need to adjust your filtering to avoid updating blank addresses to an incorrect address.
Related Information
Security
For access to this window you need the PAY Address Validation window located in the PAY All security group in SYS: User Security. If you want to make either the employee or job records read-only, select the Employee Addresses Read-Only or the Job Addresses Read-Only features in the PAY Address Validation window.
Also, a security level message is displayed on the window with a reminder warning that you will only be able to validate addresses for employees that have the same security level as yours or lower.
