
Before setting up a Duration, you may wish to review the concept of Insurance Benefits Durations. In WinTeam Insurance Benefits, Durations are used in setting up waiting periods, measurement periods, stability periods, termination rules and no hours rules. In other words, Durations define various sets of parameters that you want the system to use throughout the processes of determining employee eligibility for insurance benefits.
You can set up a Duration to measure either a static or variable length of time, the latter of which may be rounded up or down, to start on either the first day of a pay week or the first day of a month.
The Durations window may be accessed from the Insurance Benefits Benefit Setup screen General Info tab. First, double-click in the Termination Rule field to display the Termination Rules window. Then double-click in either the Derived from Termination Date or Derived from Processing Date fields to display the Durations window.
The Durations window may also be accessed from the Insurance Benefits Eligibility Setup screen General Info tab by double-clicking in any of the following fields: Waiting Period, Measurement Period Start, Measurement Period End, Stability Start or Stability Duration.
To Set up a Duration:
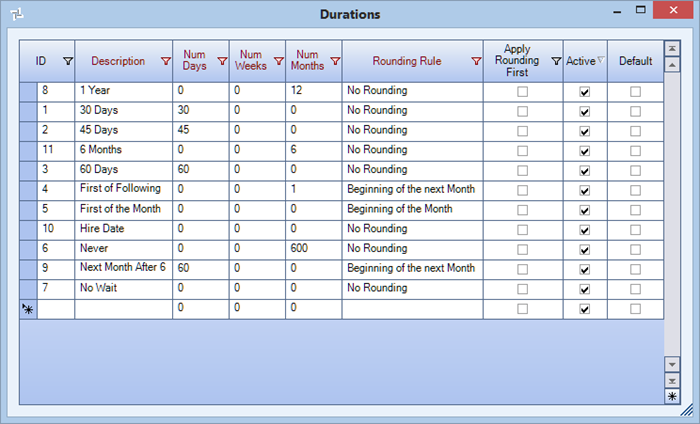
- In an empty row in the in the Description field, type a unique description of up to 50 characters for the new Duration, and press the Tab key. The system automatically assigns a unique identification number that appears in the ID box and the Active check box is selected by default.
- Enter numeric information in the required Num Days, Num Weeks and Num Months fields. Enter zeroes for records where days, weeks or months are not applicable. Negative numbers are acceptable.
- From the drop-down list, select the Rounding Rule you wish to apply. Several choices exist:
Beginning of Next Pay Week - The first day of the pay week following the trigger date.
Beginning of Pay Week - The first day of the pay week in which the trigger date occurs.
Beginning of the Month - The first day of the month in which the trigger date occurs.
Beginning of the next Month - The first day of the calendar month following the trigger date.
First Day of Pay Week - The first day of the next pay week following the trigger date.
First of the Month - The first day of the next month following the trigger date, unless it is the first day of the month already.
Half Month Rounding - If the trigger date occurs between the 1st and 15th of the month, round back to the beginning of the current month. If the trigger date occurs between the 16th and 30th of the month, round forward to the beginning of the next calendar month.
No Rounding - Apply the trigger date with no rounding.
- Do one of the following:
- To have the system apply the rounding rule before calculating the date based on the Num Days, Num Weeks, and Num Months columns, select the Apply Rounding First check box.
- To have the system apply the rounding rule after calculating the date based on the Num Days, Num Weeks, and Num Months columns, clear the Apply Rounding First check box.
- (optional) To make the new duration the default value, select the Default check box.