You can create and add Separators to your DocLink Projects. Separators are used to organize your electronic documents in DocLink. For more information about Separators, please refer to the FileBound Overview topic.
Separators must be added to your project using the FileBound Web site and then added to WinTeam. You must perform all of the following procedures in order for your separators to function properly.
- Create Separators Using the FileBound Web Site
- Add Separators in WinTeam's DocLink Setup
- Make Separators available using WinTeam's Security Groups
Create Separators Using the FileBound Web Site
Separators are first created and added to projects on the FileBound Web site. To do this:
Log on to FileBound's Web site using your user name and password assigned to you by FileBound. If you don't know your user name or password, contact FileBound Technical Support.
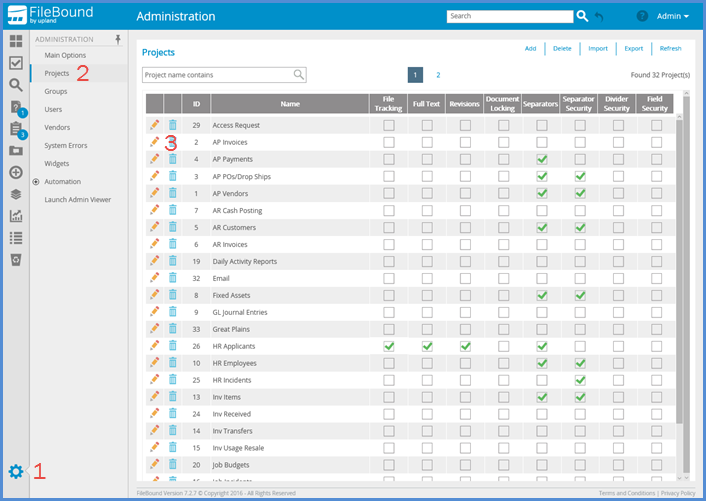
- Click the Administration button in the lower, left corner of the screen.
- Click the Projects choice from the left navigation pane.
- Click the Edit Icon
 adjacent to the project you want to edit.
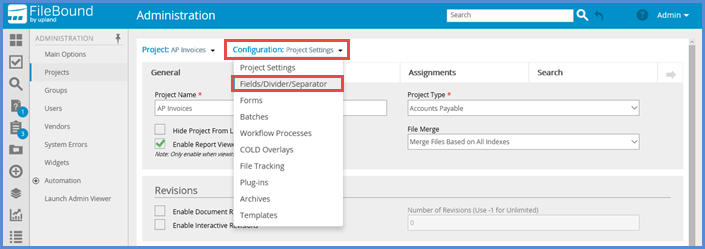
 - Click the Configuration:Project Settings button and choose Field/Dividers/Separator from the Configuration list.
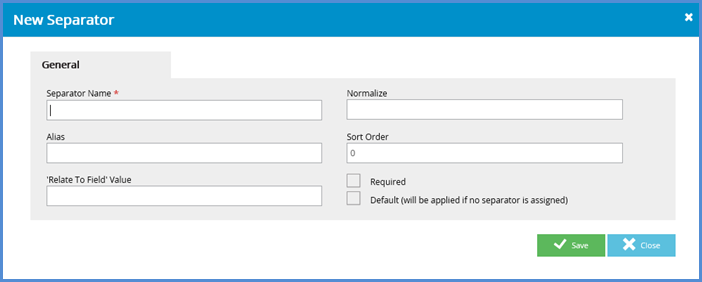
- Click the Separators tab in the Project Settings panel and then click the Add button in the top right corner of the window.
- Type a name for your new Separator in the Separator Name field and click the Save button. Other fields are optional.
- Log off of the FileBound Web site by clicking your User Name in the top right corner of the window and select Logout.

Add Separators in WinTeam's DocLink Setup
The Separator you created on the FileBound Web site must now be added to WinTeam's DocLink Setup. The DocLink Setup screen can be accessed from the System module under the Setup section. Open DocLink Setup screen and then perform the following procedures in order to do this.
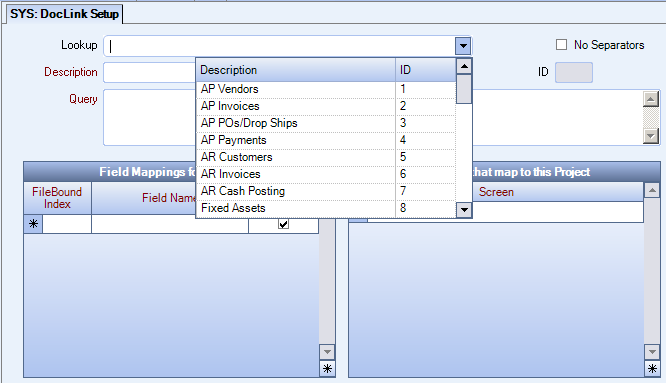
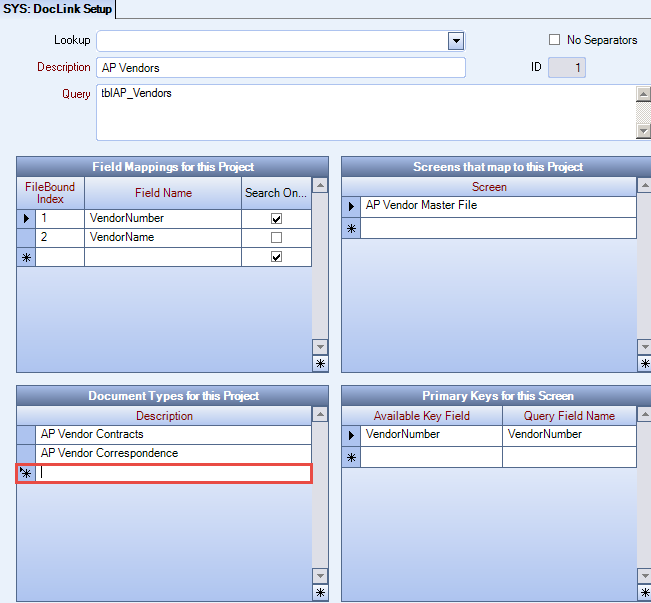
- Choose DocLink Setup from WinTeam's Security menu, Setup group to display the DocLink Setup window. Then choose the Project containing your new Separator from the Lookup menu. This example uses AP Vendors.
- Type the exact name of the Separator you are adding to the project in an empty box in the Document Types for this Project grid. Then press your keyboard's TAB key.
- Your Separator has been added to the Project. Close WinTeam's DocLink Setup window.
Make Separators Available Using WinTeam's Security Groups
The last step in adding a Separator to a DocLink Project is to make it available to the appropriate WinTeam Security Groups.
This topic does not go into detail about DocLink Security. For information about DocLink Security, please refer to the DocLink Security topic.
Open WinTeam and perform the following procedures in order to make Separators available to Security Groups.
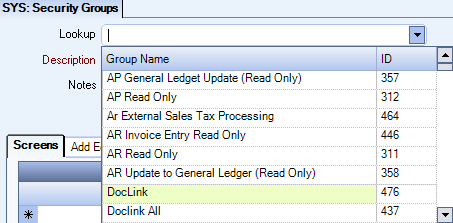
- Choose Group Setup from WinTeam's Security menu, Setup group to display the Security Groups window. Then choose the Security Group to make the Separator available to from the Lookup menu. This example uses the DocLink Security Group.
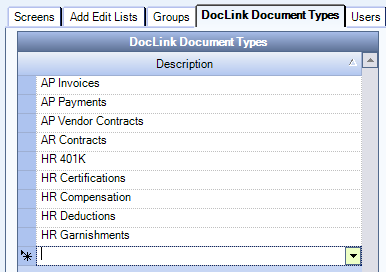
- Click the DocLink Document Types tab and then scroll to the bottom of the list until you see an empty row in the grid.
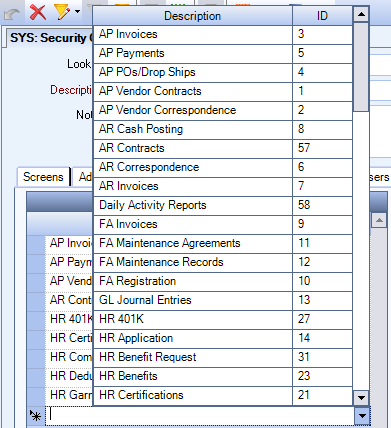
- Click the empty row and choose the new Separator from the list. Then press your keyboard's TAB key.
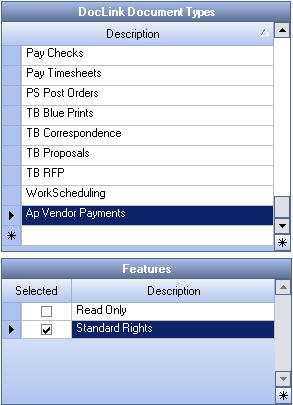
- The Separator is now available to the Security Group. Assign the necessary security rights to the Separator. For information about security rights, please refer to the DocLink Security topic.
- Repeat this process in order to make the Separator available to other Security Groups, if necessary. Then close the Security Groups window.
