
Adding a Payment Portal Contact
This article shows you how to set up a payment portal contact in WinTeam for use with the Online Payment Portal.
Customers have the ability to sign up for the Payment Portal directly from the Portal or a WinTeam administrator can send an account creation invitation from WinTeam to them. To send an invitation from WinTeam, a payment Portal contact needs to first be set up. Once an invite is sent, customers are required to enter an invoice and customer number and then fill out the account registration information. If needed, the invite can be resent.
Setting up a Payment Portal Contact
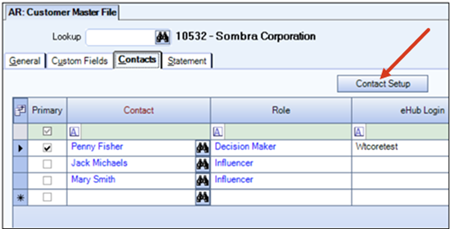
- From the WinTeam Customer Master File look up the customer record of the contact to send the invite to.
- Select the Contacts tab.
- Click the Contact setup button.
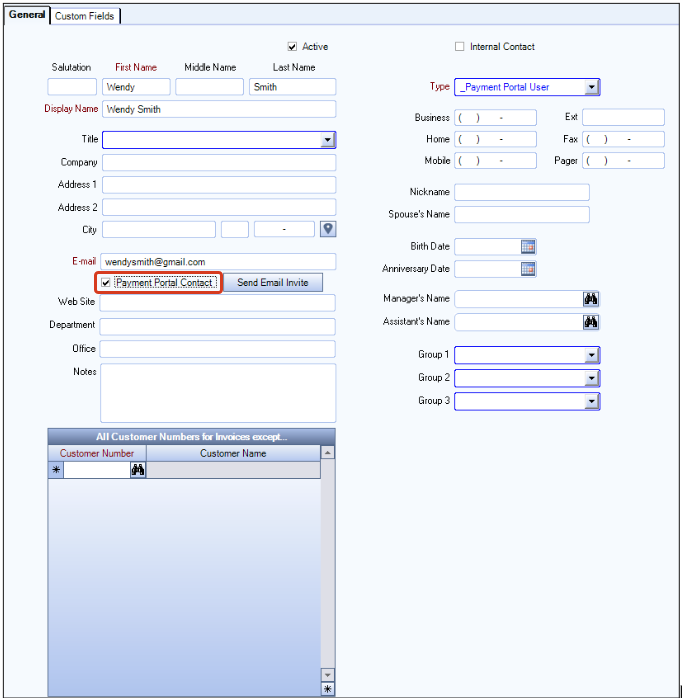
- If this is a new contact enter at least the First/Last Name and E-mail field.
- Select Payment Portal User for the Type.
- Select the Payment Portal Contact check box to enable the Send Email Invite button.
- In the All Customer Number for Invoice Except grid, enter any Customer Number that should be unable to be saved to the list of saved customers in the Online Payment Portal.
- Save changes.
- Close out of the Contact Setup.
- Add the contact record to the grid on the Contacts tab of the Customer Master File.
- Select the Payment Contact check box.
Note: Ensure the email address is correct as this is used as the username on the Payment Portal.

Use this link to learn how to send a payment portal invite from WinTeam.