Overview
The Credit Vendor Reconciliation process is used to reconcile a credit statement with the invoice, payment, and liability transfer transactions. Once the statement information is entered, posted transactions can then be cleared.
When the Difference between the statement Ending Balance and the cleared transactions is zero ($0.00) and you click Finish, a payment invoice is created for the Vendor and a separate invoice is created for Service Charges and Finance Charges (if applicable). A pdf is also created and stored, and the Reconciliation History is updated.
The invoices that are created are prefixed with CCR- followed by the next sequential number.
- The Service Charge and Finance Charge invoices (if applicable) are marked as cleared and reconciled.
- The Payment invoice will not be reconciled until the following month.
All invoices, payments, and Liability Transfers must be posted before reconciling.
Before reconciling
- Make sure the Vendor Master File is set up as a Credit Vendor. For more information see Adding a Credit Vendor.
- Post all invoices, payments, and Liability Transfers (if applicable).
- Review the Credit Vendor Reconciliation topic.
- Review the Reconciling Credit Vendors topic.
Note: If parent/child relationships exist, you must use the same GL # for all associated relationships. Reconciliation for a vendor with both child and parent associated vendors is not possible. If a parent vendor is marked to be reconciled, associated child vendors cannot be marked to reconcile. If a child Vendor is marked to be reconciled, the parent Vendor cannot be marked to reconcile. If associated vendors are marked to be reconciled, the system displays a message stating that, "You already have a parent or child vendor related to this vendor marked for reconciliation. Reconciliation is not possible for both vendors."
Example: In this example we reconcile the Visa Credit Vendor for the first time.
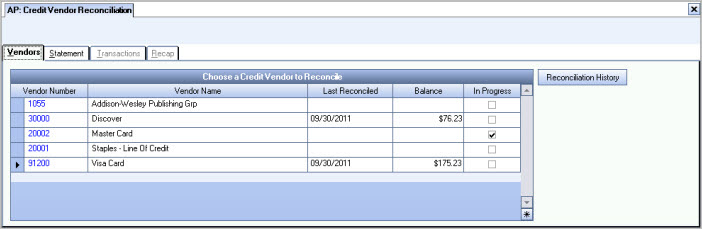
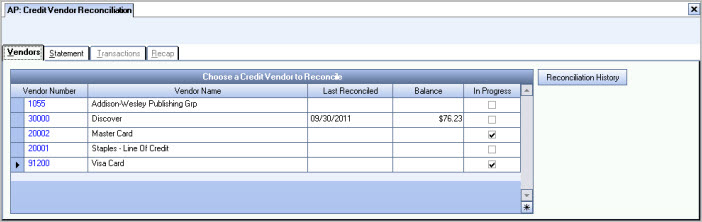
- From the Accounts Payable Menu, click Credit Vendor Reconciliation.
- Select the Credit Vendor to reconcile. Once a Vendor is selected, the Statement tab is available.
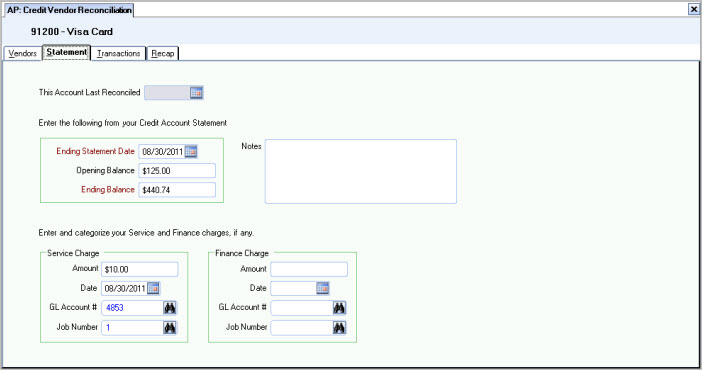
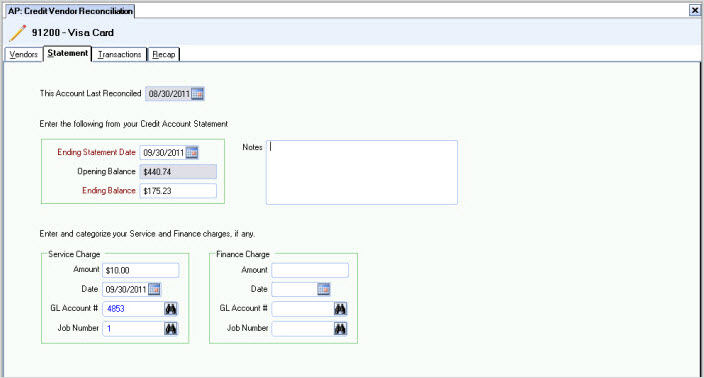
- Click the Statement tab (or press ALT + S).
- Enter the Ending Statement Date as shown on the statement.
- Since this account has not been reconciled yet, enter an Opening Balance for the account.
- Enter the Ending Balance as shown on the statement.
- Enter any Service Charge or Finance Charge shown on the statement. Separate invoices will be created and reconciled for these charges.
- Click the Transactions tab (or press ALT + T). The Transaction tab is used to clear transactions. It also provides a shortcut to create invoices that display on your statement, but are not in your Transactions grid.
- Select the Cleared check box for Posted transactions that show on the statement as Cleared. The Totals grid will refresh as transactions are selected (and unselected) to be Cleared.
- The Difference between the cleared transactions and the statement display. In order to complete the reconciliation the Difference must be $0.00.
- During the reconciliation process you may find that you need to enter additional invoices that display on your statement. You can do so directly from the Transactions tab by clicking the Invoice Entry button.
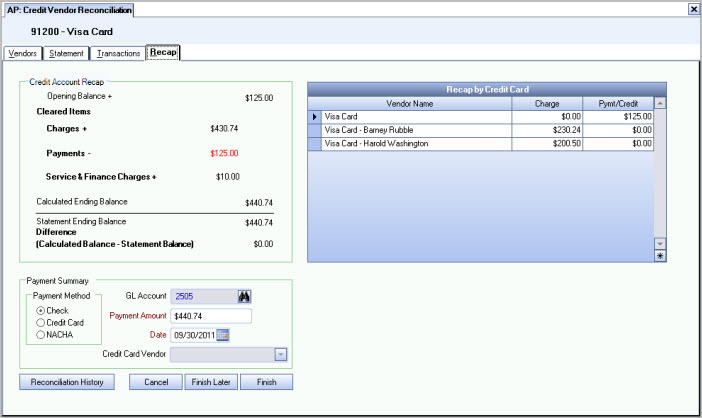
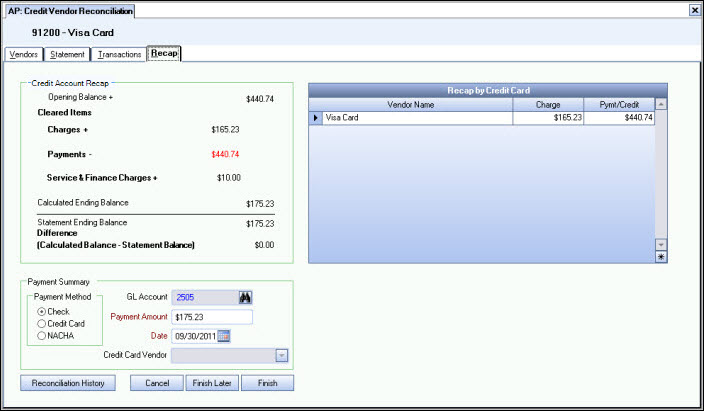
- Once the difference is $0.00, click the Recap tab (or press ALT + R). The Recap tab displays the Credit Account Recap, the difference amount between the calculated balance and the statement balance, Payment Summary information, and a Recap by Credit Vendor.
- Click Finish to complete the reconciliation process. A payment invoice is created for the Vendor and a separate invoice is created for Service Charges and Finance Charges (if applicable). A PDF file is also created and stored, and the Reconciliation History is updated.
All Invoices, Payments and Liability Transfers must be posted before completing the reconciliation.
Tip: If you create additional invoices while reconciling, make sure to post those transactions, as these transactions cannot be reconciled until posted.
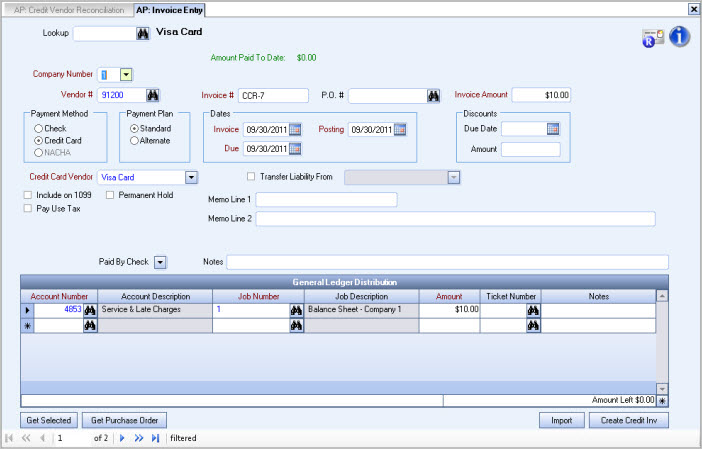
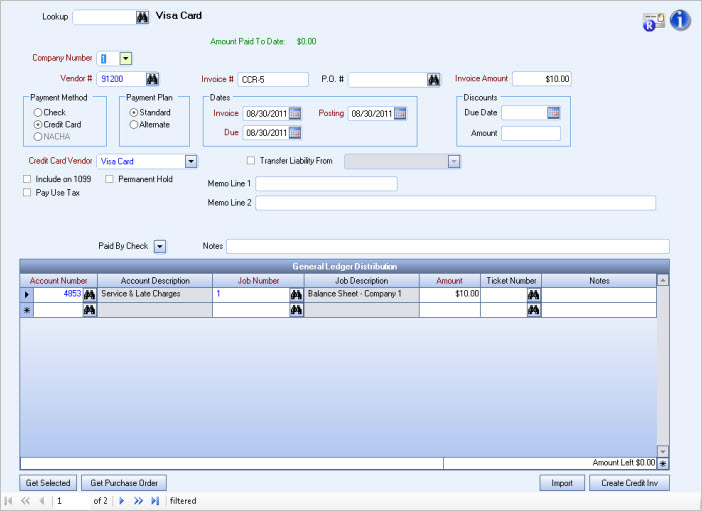
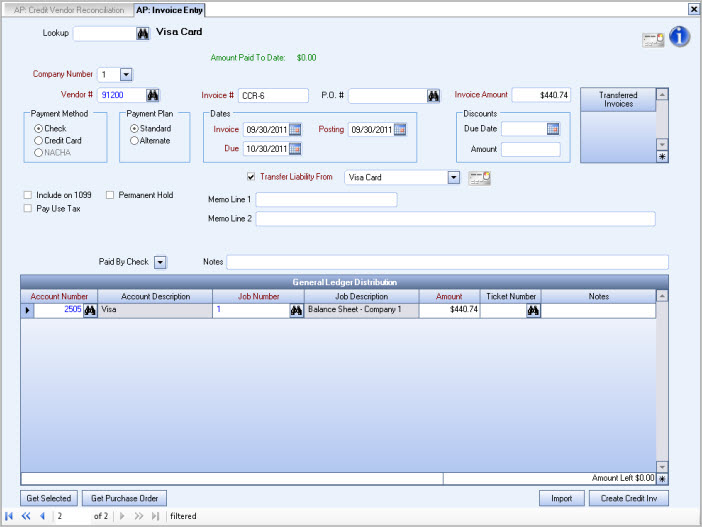
Invoices are created
Take notice of the Invoice #'s - they are prefixed with CCR followed by the next sequential number. The first invoice (CCR-5) is created for the Service Charge and is marked as Reconciled (see icon in upper right-hand corner).
The second invoice (CCR-6) is created for the Payment record. It will not be reconciled until the following month.
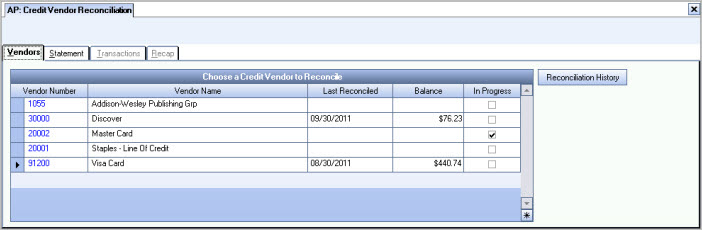
Once you close the Invoices, the Credit Vendor Reconciliation screen displays with the updated information. It now shoes Vendor # 91200, Visa Card, reconciled on 08/30/11 with a Balance of $440.74. This will become your starting balance for next month.
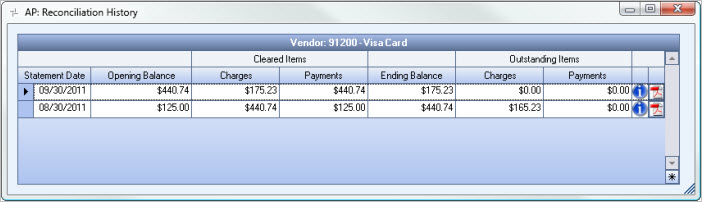
Click the Reconciliation History button. The reconciliation record displays. The information matches the Credit Account Recap tab and the Reconciliation Report.
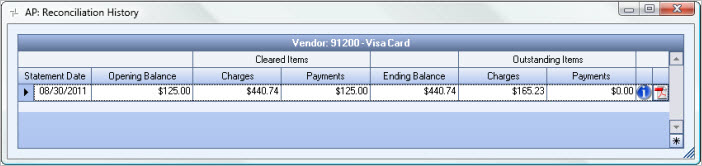
You can hover over the Change Info icon to display User Added/Changed and Date Added/Changed information. Click the PDF icon to display the Reconciliation Report.
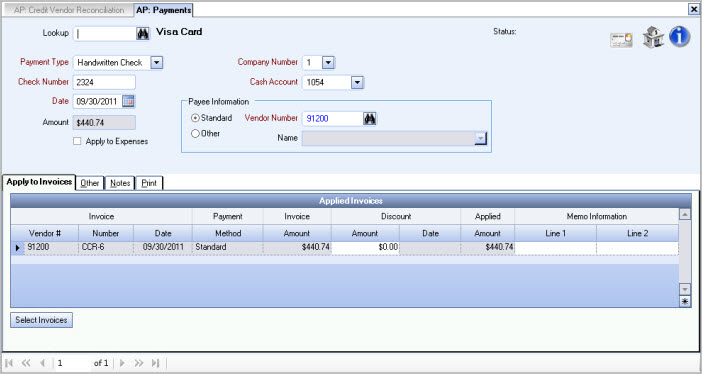
Example: On 09/30/11 we made another payment to Visa in the amount of $440.74 and applied it to the CCR-6 Invoice. We then posted the payment record.
Example: In this example we reconcile the Visa Credit Vendor the following month.
Notice the last reconciled date and the ending balance. The Balance from the 08/30/11 reconciliation will be the beginning balance for this months reconciliation.
- Enter the 09/30/11 statement information. WinTeam will verify that the current month's statement ending date is greater than the previous month's statement date to ensure that the Credit Vendor Reconciliation is not run twice for the same date, therefore ensuring that the correct beginning balance is brought over.
- Select the Posted transactions that have cleared on the statement. Notice the Payment that was made on 09/30/11. This was the payment to Visa in the amount off $440.74 that was applied it to the CCR-6 Invoice. It was later posted and is now available to be cleared. The transaction shows as cleared on the statement.
- Continue to clear transactions or create additional invoices as necessary, until the Difference is $0.00.
- Verify the information on the Recap tab. The Payment Amount and Date can be modified.
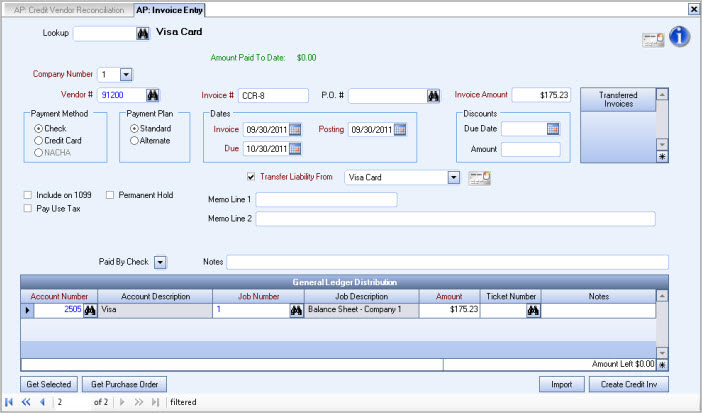
- Once you click Finish, the Invoices are created. Again, notice the Invoice #'s, they are prefixed with CCR followed by the next sequential number.
- Close the Invoices. The Credit Vendor screen updates the Last Date Reconciled and the Balance for the selected Vendor. A PDF file of the Reconciliation Report can be viewed by clicking the PDF icon.
- Click the Reconciliation History button. The reconciliation record displays. The information matches the Credit Account Recap tab and the Reconciliation Report.
- Click the PDF icon to display the Reconciliation Report.
Tip: At any time during the reconciliation process you can click the print icon on the toolbar to print a DRAFT copy of an "In Progress" Reconciliation Report.