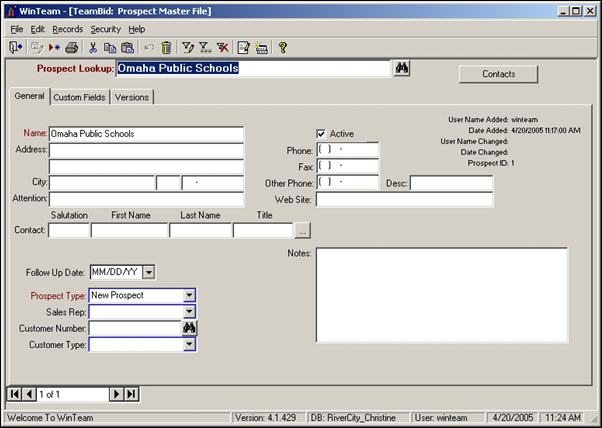
One of the first steps in using TeamBid is setting up Prospects. A Prospect Master File record will have a Prospect Type defined which can be used for filtering different types of Prospects. Only basic information is required to save a Prospect Master File record. When a new Prospect record is saved, the system automatically creates the first Building record for the Prospect. You may create multiple Versions of a bid for a Prospect.
The Diary icon and the Rollover icon are available for use from the toolbar. For more information, see Prospect Rollover.
The Prospect Master File has three tabs of information: General, Custom Fields, and Versions.
A Prospect can have one or multiple Contacts. One Contact can be designated as the Primary Contact for each Prospect. The Primary Contact information displays on the General tab of the Prospect record. For more information, see Creating Contacts.
Each Prospect may have multiple Buildings for Work Loading and Bidding. Each Building can have one or multiple Versions of the Work Load and Bid. For more information, see Setting Up Buildings and Setting Up Versions.
To add a Prospect
- From the TeamBid & Work Scheduling Main Menu, click Prospects.
- Type the Name of the Prospect. Each Prospect Name must be unique.
- Type or select the Prospect Type you want to use. The Prospect Type field is used to group similar type Prospects for filtering, sorting and reports.
To add a new Prospect Type, double-click in the Prospect Type field, or type a new Prospect Type and press Enter.
The Prospect Types add/edit list displays.
Once a Prospect has been added, the system automatically creates the first Building record for the Prospect. In order to view or edit the Building record, you must add a Version to the Prospect.
To add a Version to the current Prospect, see Setting Up Versions.
