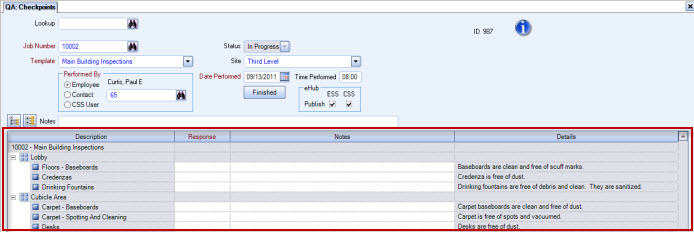
Once you have created Checkpoint Templates, WinTeam users can start completing new Checkpoints, depending on their security settings.
To complete a new Checkpoint:
- Navigate to the QA: Checkpoints screen.
- Enter the Job Number you are completing the Checkpoint for.
- Select a Template from the list. Only Templates related to the Job will be available. See Creating Checkpoints for more information.
- Fill in the Performed By information by selecting Employee, Contact or CSS User (Customer Contact). Then fill in the related ID number. The name will populate when you tab off the number field.
- The Status field will default in as In Progress until the Checkpoint is marked as Finished.
- Choose a Site from the list if necessary. See Specifying Sites, Tiers or Jobs for Checkpoints for more information. Only Sites set up for the Job will be available in the list.
- The Date Performed field will default in with today's date. Modify if necessary.
- Enter the Time Performed if desired.
- Select whether to publish the completed Checkpoint to eHub ESS or CSS for Employees or Customers to have access to the results via eHub.
- Add any notes as necessary.

- Click in the grid to populate the contents of the Checkpoint Template (or click Save). Sections, Areas and Items will display along with details. If responses are designated to default in, they will display too.

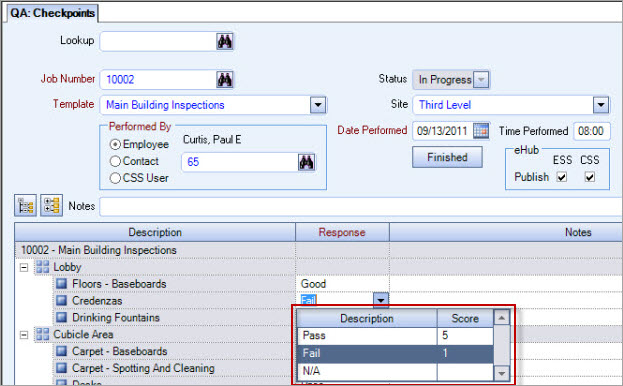
- Select a response for each Item, and add Notes as necessary.

- If you are unable to complete the Checkpoint all at one time, you can finish it at a later time. The Checkpoint is saved every time you tab off a row. Simply return to the Checkpoints screen and locate the In Progress Checkpoint via the lookup. It will display in the same state you left it.
- When you have completed the Checkpoint, click the Finish button beneath the Date Performed field.
- When the Checkpoint has been marked as Finished, the Results grid displays the score and any deficiencies. The status also changes to Completed.

