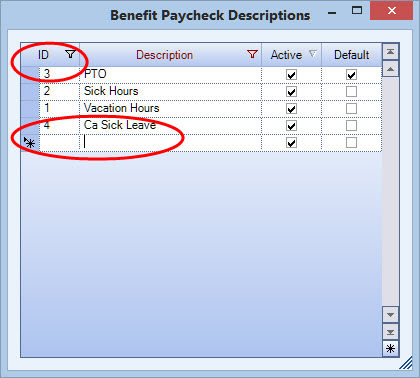
Add/Edit Lists offer you a way to add custom information to a user-defined list. You may also set a default for each add/edit list.
All fields highlighted with a blue border indicate the ability to double-click within the field to open an Add/Edit List. Some of the fields may require an entry (as indicated by the bold, maroon font).
There are two ways to add information to an Add/Edit List:
- Double-click in any field with a blue border.
- The Add/Edit dialog box displays.
- If you double-clicked in a field to open the Add/Edit List, the record selector will point to the first record in the list.
- Click the Add New button. The record selector will jump to the first blank line, you will see an * next to it.
- Type a new description.
- Press Enter (or Tab through to the next line or click the Save button) to save the record.
- Click the Close button to return to the entry screen.

OR
- Type a new description in the field.
- If you type a description that is not in the system you are prompted with a message and asked if you'd like to add it.
- Click Yes to continue. The Add/Edit dialog box displays.
- The new description displays as the last record in the list. You will see an * next to it.
- Press Enter (or Tab through to the next line or click the Save button) to save the record.
- Click the Close button to return to the entry screen.
To set a default entry for an Add/Edit list:
- Click in the record selector area next to the entry you wish to set as the default entry.
- Click the Set Default button.
- Click the Close button to return to the entry screen.
