
A Security Group may be designated as a Role. A Role is a group that contains security to specific screens and groups that are required for their "Role" in the company. This makes it easy for companies to set up new Users by simply assigning them to a Role , rather than adding multiple security groups and screens to the User security.
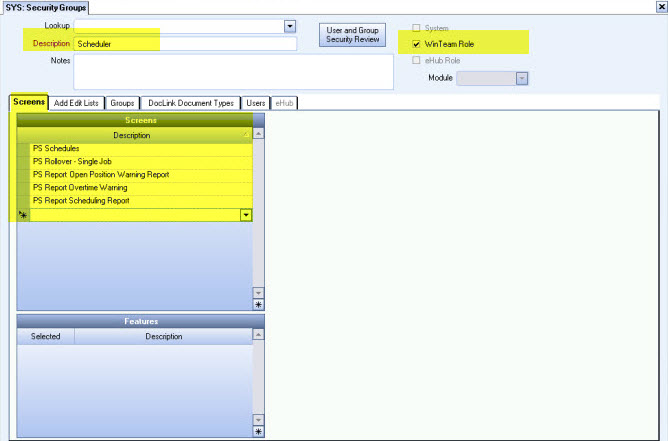
Security Roles are created in the same manner as creating a custom Security Group, but you must select the WinTeam Role check box if you are creating a Security Group that is comprised of specific screens and groups that are required for a Users "role " in the company.
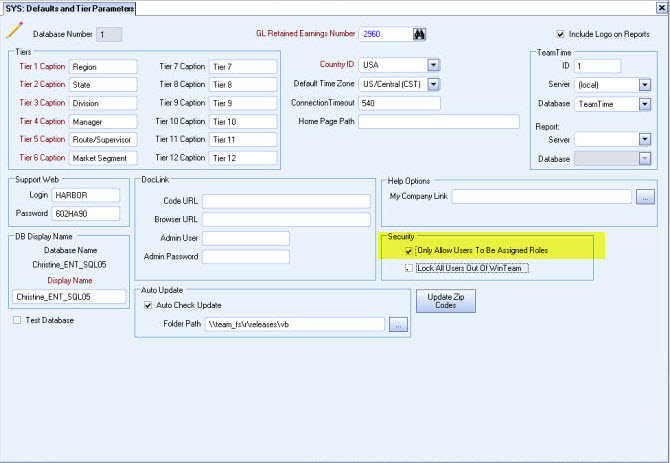
If you always want Users to be assigned to Roles, you can indicate in System Defaults to only allow Users to be assigned to Security Roles.
To set up Security Roles:
- From the Security menu, click Group Setup.
- Type a Description for the Security Role.
In our example, we are creating a Security Role for a Scheduler. - Add screens to the Screens tab.
We want our Schedulers to- have full access to Schedules
- Rollover Single Jobs
- Run and review the following reports: Scheduling Report, Open Position Warning Report, and the Overtime Report
- Select the WinTeam Role check box.
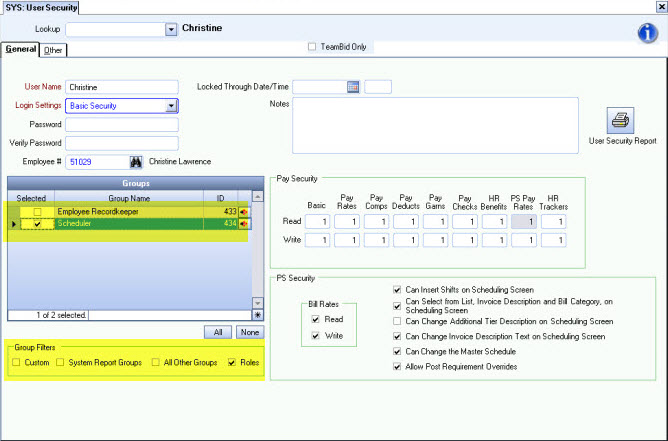
To set up a User with Role Security:
- From the Security menu, click User Setup.
- Type the User Name.
- Select the Login Settings.
- Enter Password, then Verify Password.
- Enter the Employee #.
- Use the Group Filters to filter by Roles.
- Select the check box next to Scheduler.
- Close the record.
To only allow Users to be assigned to Security Roles:
If you always want Users to be assigned to Roles, you can indicate in System Defaults to only allow Users to be assigned to Security Roles.
If you have existing Users setup that are not assigned to Roles, you will receive this message that Users that have groups assigned that are not defined as Roles.
If this check box is selected, the User Setup screen will list only those custom groups that are indicated as Roles (WinTeam Role check box is selected).
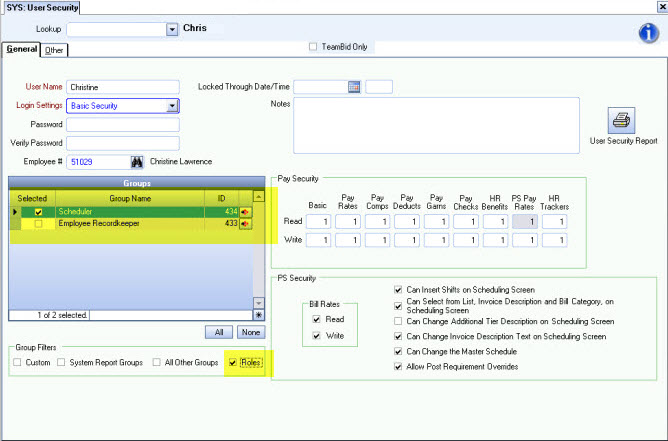
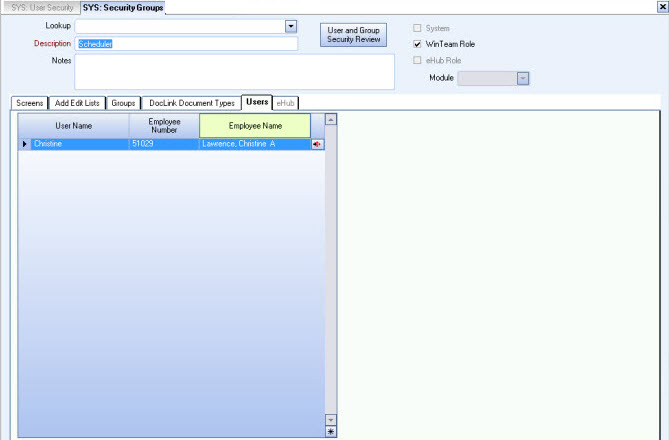
To review Users assigned to new Security Role :
- From the Security menu, click User Setup.
- Lookup Scheduler.
- Click the Users tab.
Contacts
When making a Contact inactive (AR: Customer Master File Contacts tab), a message displays prompting for confirmation to inactivate the record. If you proceed, the contact no longer displays on the Contacts tab, unless the Active check box is cleared. The Contact can still exist in the grid, but the contact will not have an eHub Role, which disables the user to log into eHub.