Overview
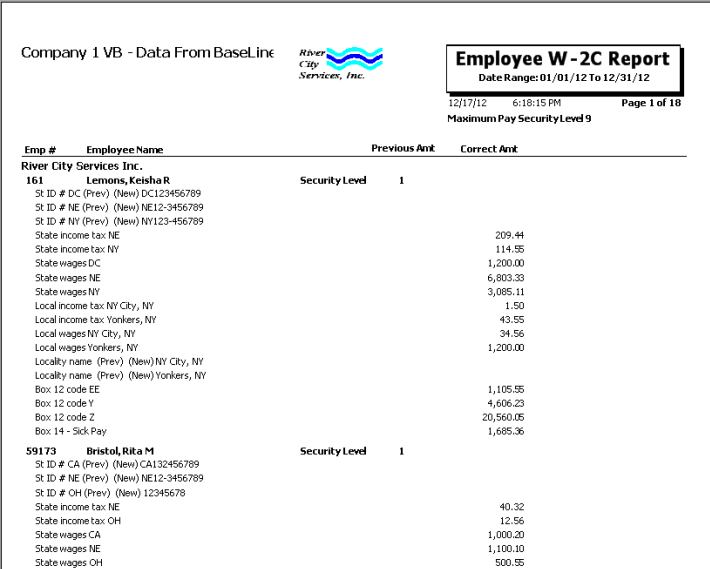
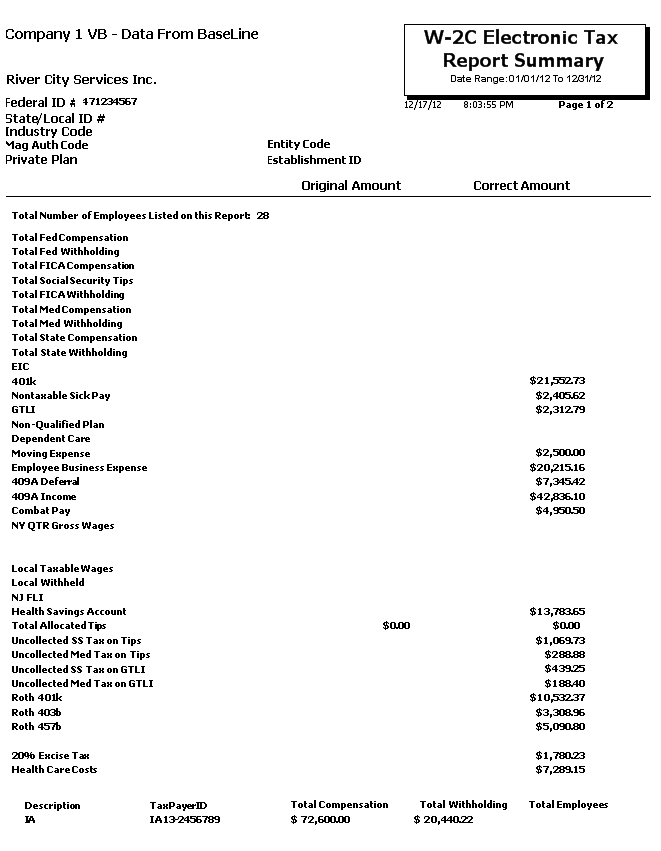
The Employee W-2C Report is used to view corrections to existing employee W-2 information, print W-2C forms, and prepare electronic files.
ADP clients who use the W-2 Print service need to be aware that the W-2C correction is a separate service. If the client does not have this additional service, they can create W-2C corrections in WinTeam.
In WinTeam, make sure the PDF for the employee’s W-2 is created (this should match the W-2 created in ADP). You can create W-2C corrections in WinTeam using the Check Processing Wizard Adjustment Batch Type using the W-2C Adjustment Type. After th W-2C correction is made, you can print and PDF the W-2C corrections in WinTeam to give to the employee.
A W-2C correction batch is included in the Quarterly file sent to ADP (as an amended file). ADP clients can also enter W-2C corrections on ADP's web site in addition to creating the W-2C correction in WinTeam that was given to the employee.
Each output type has different options available for selection.
You do not need to purchase W-2C forms. You will, of course, need to order W-2C Envelopes for these W-2C's. When you print Laser Forms, the form and details will print automatically. For those clients who want to print on preprinted forms, you will need to add a Custom Setting (see below).
| Section | Item | Value | Module and Purpose |
|---|---|---|---|
| CANADA | T4A | True | This setting will change the W2 report from T4 to a T4A form for Canadian Clients. |
| LaserW2 | Box14 | <Tax Code ID> | This setting allows the tax withholding of a particular tax code to print in Box 14 of the W2 with the Tax Code Description. This could be used to report Disability Tax information for codes that are not printed on the W2 such as PA SUI. The Value represents the Tax Code ID (without brackets). |
| LaserW2 | Box14#2 | <Tax Code ID> | This setting allows the tax withholding of an additional tax code to print in Box 14 of the W2 with the Tax Code Description. This would be used in cases where a tax code would normally not print on the W2 in the normal earnings/withholding area but, for whatever reason, you want the employee(s) to know what their yearly withholding was for this tax code. The Value represents the Tax Code ID (without brackets). |
| LaserW2 | FLIPrivatePlan | <FLIPP#> | This setting is used for entering a company's FLI Private Plan # (part of NJ Disability). The Value represents the Plan # D (without brackets). |
| LaserW2 | PrivatePlan | True | This setting lets the software know if they are using a Disability Private Plan. |
| LaserW2 | DIPP | <DIPP #> | This setting is used for entering a company's Disability Private Plan #. The Value represents the Plan # (without brackets). |
| PayCheck | 401KDescription | <401K Description> | This is to help set the Box Letter for 401K. The Value represents the type of plan they have (without brackets). |
If using a Preprinted W-2C, the PDF option is not available. This setting is used to print on preprinted forms. This is not the preferred way, but the option is available for those companies whose printer will not handle printing all of the boxes and verbiage of the form with their W2s.
Key Functionality
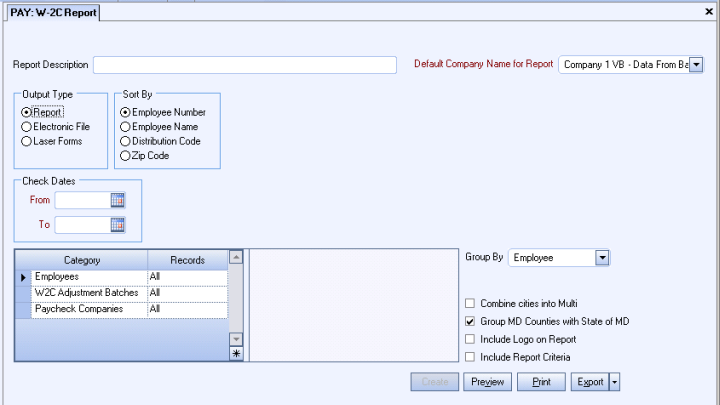
Type a description to name the report. This description prints above the Report Title.
This option is available for Clients using the Multi-Company feature and for all Output Types except Report.
The Default Company Name for Report is populated from the Company Setup screen.
The list contains all companies that the User has Rights for.
- If the User has permission to only one company, then just that one company will display in the list.
- If the User has permissions to more than one company, the list will contain all companies the User has rights to PLUS the default reporting company.
The default company prints on every page of the report.
For more information see Learning about WinTeam Reports.
This option is available for Clients using the Multi-Company feature and the Output Type is Report.
The Default Company Name for Report is populated from the Company Setup screen.
The list contains all companies that the User has Rights for.
- If the User has permission to only one company, then just that one company will display in the list.
- If the User has permissions to more than one company, the list will contain all companies the User has rights to PLUS the default reporting company.
When the Group By Company option is selected, the default company prints on the Grand Total Page and the Report Criteria page. All other pages print the applicable company name.
When the Group By Company option is NOT selected, the default company prints on every page of the report.
For more information see Learning about WinTeam Reports.
Select a display or export method for the W-2 information.
- Click Report to print a standard report.
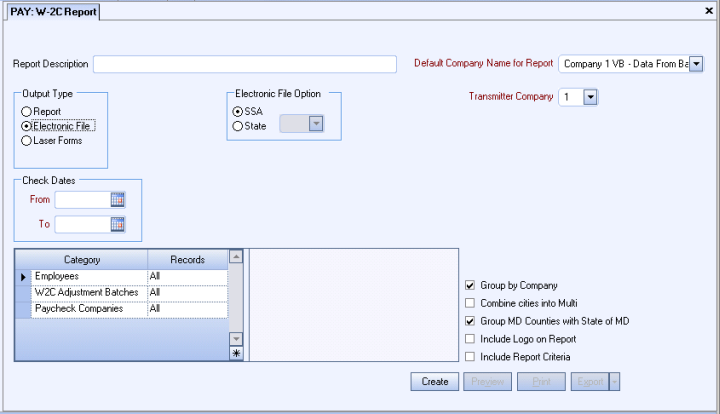
- Click Electronic File to create a file for submission to the federal, state, or local taxing authority. When you click Electronic File, the Transmitter Information screen displays.
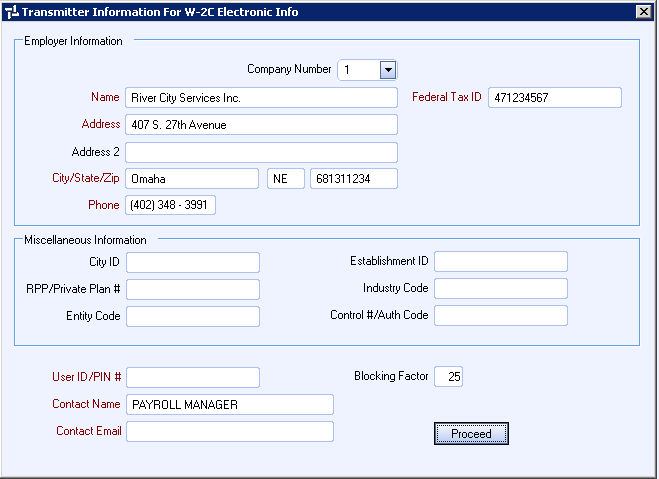
Note: Enter the required fields on the Transmitter Information screen. While not required by the IRS, you will receive an error when using the "AccuW2C" program (provided by the Social Security Administration and used to verify file accuracy).
The PDF button is also available if the Store PDF Copy of the W2 check box is selected on the PAY: Defaults (Paycheck Properties tab). For more information about PDF copies of W2's see Creating PDFs of Employee W2's.
The Electronic File option group is available if the selected Output Type is Electronic File.
- Click SSA to create a file for federal reporting.
- Click State to select a State. The available selections are created in the Tax Tables defaults area.
Use the Sort By option to sort report data by Employee Number, Employee Name, Distribution Code, and Zip Code.
- Click Employee Number to sort report data by Number.
- Click Employee Name to sort report data by Name.
- Click Distribution Code to sort report data by Distribution Code.
- Click Zip Code to sort report data by ZIP Code.
Enter the required fields on the Transmitter Information screen. While not required by the IRS, you will receive an error when using the "AccuW2C" program (provided by the Social Security Administration and used to verify file accuracy). displays for Users who have more than one company and Electronic File is the Output Type.
Select the Transmitter Company to use in the header record of the electronic file. This field defaults to Company 1.
Use the Check Dates category to define the Check Dates to include on the report. The date range must be during the same year and is typically from January 1st to December 31st.
Type the beginning Check Date in the From field and the ending Check Date in the To field.
Employees
Use the Employees category to select the Employees to include on the report.
Select All to include all Employees on the report.
Select Range to define a range of Employees for the report. Type the beginning Employee Number in the From field and the ending Employee Number in the To field.
Select Create to define your own list of Employees. When you select Create, a small grid displays to the right. Enter the Employee Numbers you want to include in the list, or use the Lookup to locate the Employee Numbers.
Select Exclude to identify records that should not be included. When you select Exclude, a small grid displays to the right. Enter the Employee Numbers you want to exclude in the list, or use the Lookup to locate the Employee Numbers.
W-2C Adjustment Batches
Use the W-2C Adjustment Batches category to select the W2C Adjustment Batches to include.
Select All to include all W-2C Adjustment Batches.
Select Pick to define specific W-2C Adjustment Batches. When you select Pick, the W-2C Adjustment Batches list displays. Select the check box next to each W-2C Adjustment Batches to include.
Paycheck Companies
This category is available to users who have more than one company.
Use the Paycheck Companies category to select the Paycheck Companies to include.
Select All to include all Paycheck Companies.
Select Pick to define specific Paycheck Companies. When you select Pick, the Paycheck Companies list displays. Select the check box next to each Paycheck company to include.
The Group By option is available only if the Output Type is Report.
You can choose to group the report data by Employee, Classification, Distribution, Employee Type or Pay Frequency or Primary Job. Using the Group By option provides Group Totals and page breaks when printing the report.
This option is available to users who have more than one company, but is not selected by default. If selected, the default company prints on the Grand Total Page and the Report Criteria page. All other pages print the applicable company name. If not selected, the default company prints on every page of the report.
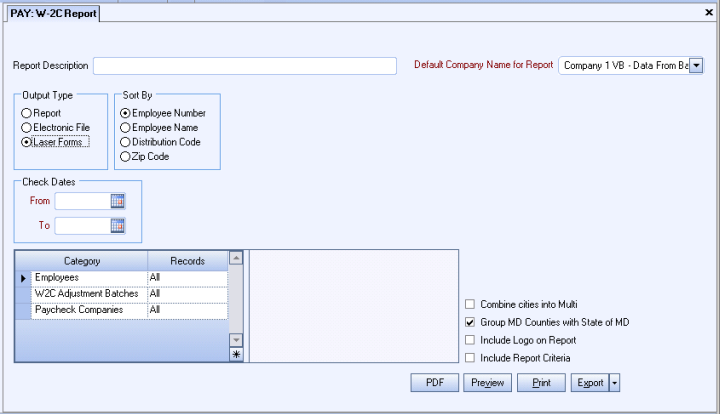
This check box is available if the selected Output Type is W-2C Laser Forms.
Use to combine all Ohio city wages and taxes and print as one, using the Local Description of Multi. Ohio cities are determined by any Tax code Description starting or ending with OH.
If you do not use this feature, a separate W-2C will print for each Ohio City with activity. If you do use this feature, you must provide a separate report showing all city activity for the year so that the employee has the necessary tax filing information.
The Group MD Counties with State of MD check box defaults as selected (checked) and groups Maryland Counties with the State of Maryland on the report.
Select this check box to print the company logo on the report. It is selected or cleared by default based on the option selected in SYS:Defaults. However, you can modify the setting on each report.
Select this check box to include a list of the report options selected for the report. The Report Criteria page includes any ranges specified and each Category/Record selection made for the report. This check box is cleared selected by default.
The Create button displays when the Output Type is Electronic File.
Click Create for WinTeam to prepare the electronic file.
This button displays when the Output Type is Laser Forms and the 'Store PDF Copy of the W2' check box is selected on the PAY: Defaults (Paycheck Properties tab).
The PDF button stores a copy of the W-2C in PDF format.
If any of the following Custom Settings are in place, the PDF button on the Employee W-2 Report when choosing Output Type: W-2C Laser Forms, is not shown even if the Pay Defaults is set up to Store PDFs.
| Section | Item | Value |
|---|---|---|
| LaserW2 | Preprinted | Yes |
| PayWagesW2 | EEW2LaserSSE | Yes |
| CANADA | T4A | Yes |
| LaserW2 | State | PuertoRico |
This button displays when the Output Type is Laser Forms and the 'Store PDF Copy of the W-2' check box is NOT selected on the PAY: Defaults (Paycheck Properties tab). This button allows the user to save/archive the W2 information.
Preview
Click the Preview button (or use the shortcut key, ALT + V) to view the report before printing.
Click the Print button (or press ALT + P) to send the report to your default printer.
Export
Click the Export button (or press ALT + X) to export the report to a specified format. Reports may be exported to Adobe Acrobat (PDF), Excel, Comma-Separated Values (CSV), Grid View and E-mail (available for premise-based clients only).
The Electronic W2C file option (SSA or State) follows the specifications from the Social Security Administration. The SSA provides a testing platform called AccuWage, which can be used prior to uploading the W2C files. More information can be found at: http://www.ssa.gov/employer/accuwage/index.html
Note: Accuwage also is used to test W2 formats. You will want to make sure you utilize the correct Accuwage format when submitting W2C information.
Submitting State & U.S. Territory Information: Most states accept paper W2C copies. A few states do accept electronic W2C files and the format complies with the SSA publication EFW2C. When selecting the State Electronic File Option the applicable State Wage Records will be generated.
Note: TEAM Software recommends verifying with the states before submitting electronic files. Updates to state reporting systems may occur at any time throughout the year.
Tip: To easily correct an Employee’s name and/or Social Security number: Create a W2C tax adjustment, select the Federal tax code and enter $0.00 in gross and taxable earnings.
Tip: Remember the W2C must be SAVED or PDF’d in order to archive/snap down the information into the W2 table.

