What is the Separate Pay and Bill Feature?
The Personnel Scheduling Separate Pay and Bill feature allows you to pay your employees for every minute worked based on time punches yet keep your billing clean by continuing to round to the quarter hour (or whatever your contract with your customer dictates). You must be using Enhanced Reconciliation to enable the Separate Pay and Bill feature.
Important: You should only enable the Separate Pay and Bill feature after thorough planning, legal consultation, and employee and/or customer communication.
How Do I Enable Separate Pay and Bill?
Set Blackout Date
Use the SYS: Bulk Update for Jobs window to set a blackout date to turn off reconciliation for the jobs you want to use separate pay and bill.
- In the System menu, under the Tools sub-menu, open the SYS: Bulk Update for Jobs window and then click the Hours Rule tab.
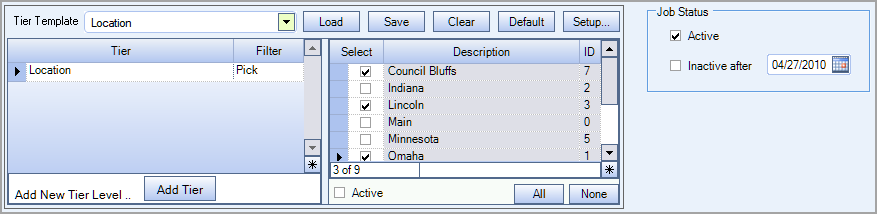
- In the Tier selection section, use the options to locate the jobs you want to put into a blackout period.
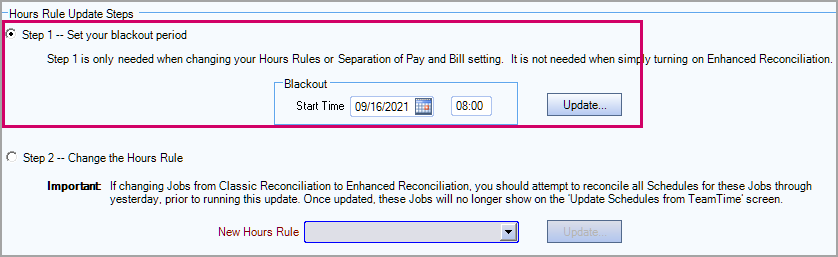
- In the Hours Rule Update Steps section, select the Step 1 button. In the Blackout section, enter a date and time to begin the blackout period. The date must be in the future. Use a 24-hour clock to enter times–for example, enter 5:00 pm as 17:00. Click Update. The blackout period begins with the date and time you enter and continues forward. During the blackout period the reconciliation service does not process records. This allows TeamTime records to still come into WinTeam but not be processed since this particular job will use a new Hours Rule.
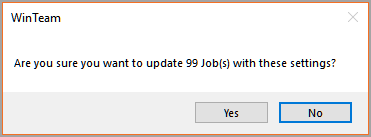
- A message box displays where you confirm the blackout period will be applied to the jobs in the tier you selected.
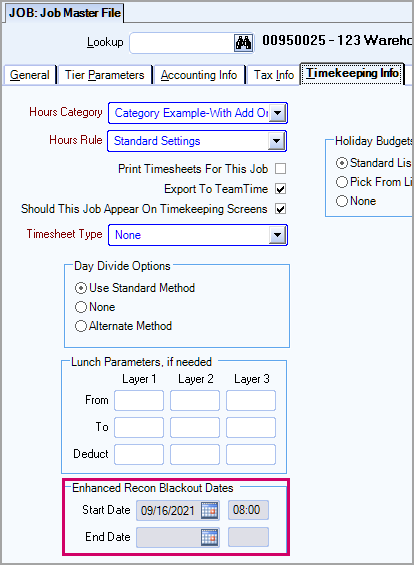
- You can see the blackout period information for a job on the Timekeeping Info tab of the Job Master File. Please note, the End Date fields are not used and will be removed in an upcoming WinTeam release.
Note: When a blackout period is set, the Reconcile This Job Now option in the PS Schedules windows is not available either.
Tip: If you realize you entered the wrong date or time after clicking Update, clear the date/time fields and click Update again. The same message box displays, but in this case is confirming the blackout period will be removed from the records.
Create an Hours Rule
Use the JOB: Hours Rule window to create a new hours rule that uses separate pay and bill.
- In the Job Costing menu, open the Job Master File window and then click the Timekeeping Info tab. Double-click in the Hours Rule field to open the JOB: Hours Rule window.
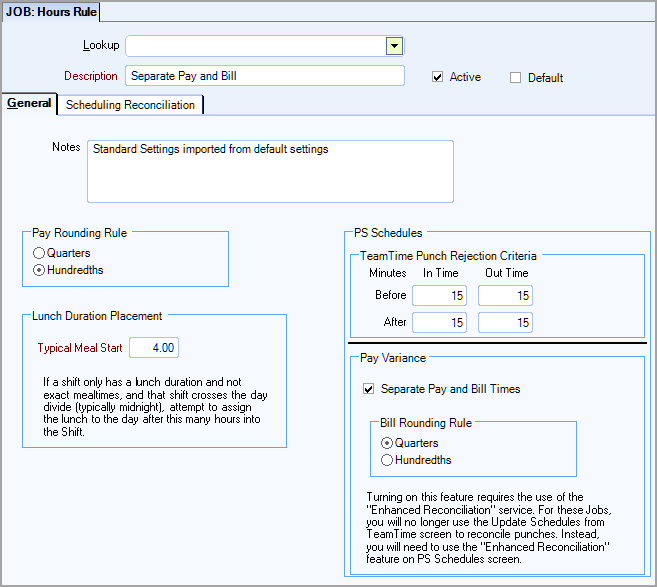
- In the Description field, enter a name to identify the separate pay and bill rounding rule.
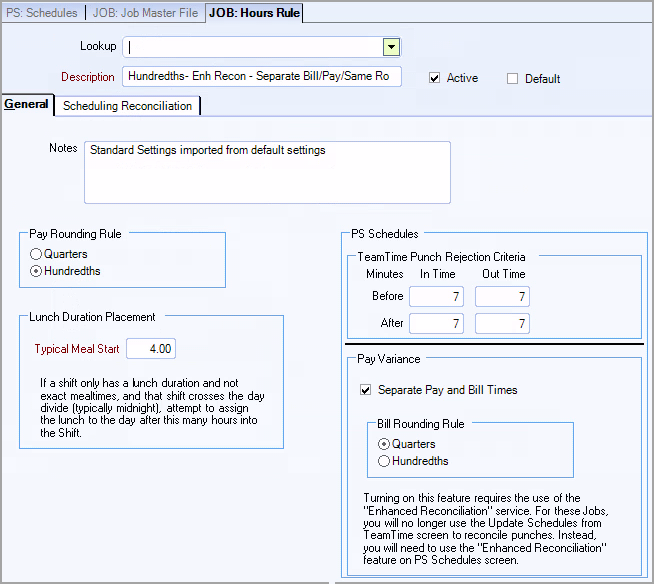
- In the Pay Variance section, select the Separate Pay and Bill Times check box. When this check box is selected the Bill Rounding Rule options are available (under the check box) and the Rounding Rule options are re-labeled Pay Rounding Rule (to the upper-left of the check box). This allows you to enter a different rounding rule for pay and bill times. The system rounds using decimals.
- Click Save in the tool bar to save the Hours Rule.
Quarters–Select this option to round the hours to the nearest quarter of an hour.
Example:.25 = 15 minutes after the hour
.50 = 30 minutes after the hour
.75 = 45 minutes after the hour
Hundredths–Select this option to round the hours to the nearest hundredth of an hour. The system rounds to the nearest hundred of an hour using decimals.
Example:12:00 to 08:00 is = 480 minutes divided by 60 = 8.00 hours
12:01 to 08:00 is = 479 minutes divided by 60 = 7.98333333 hours (7.98)
12:02 to 08:00 is = 478 minutes divided by 60 = 7.96666666 hours (7.97)
12:03 to 08:00 is = 477 minutes divided by 60 = 7.95 hours
Note: For details about any of the other fields or options in the window, see JOB: Hours Rule.
Change the Hours Rule for the Separate Pay and Bill Jobs
Use the SYS: Bulk Update for Jobs window to switch the jobs from the current hours rule to the new hours rule after payroll and billing are completed for the previous pay period. When you change the hours rule, you must enter a cut-over date–this is the date when the reconciliation service will be turned back on (the date when the new hours rule will be used by the system).
After you complete this step, the system automatically updates the Working and Master Schedules and Post Setup. In the Schedules window you will see separate columns for pay and bill values and additional information in the Reconciliation footer (two After Accept fields and an Edit Pay button).
- In the System menu, under the Tools sub-menu, open the SYS: Bulk Update for Jobs window and then click the Hours Rule tab.
- In the Tier selection section, use the options to locate the jobs you want to use the new hours rule.
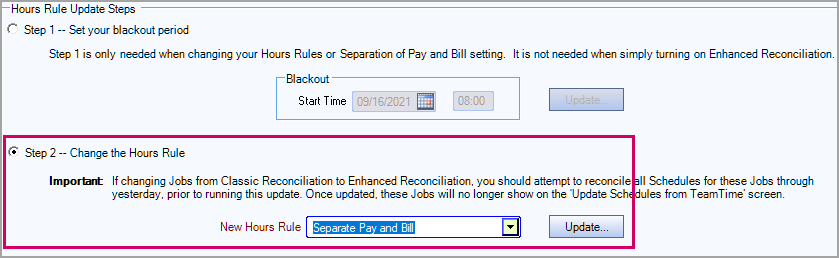
- Select the Step 2 button, select the New Hours Rule you created for separate pay and bill, and then click Update.
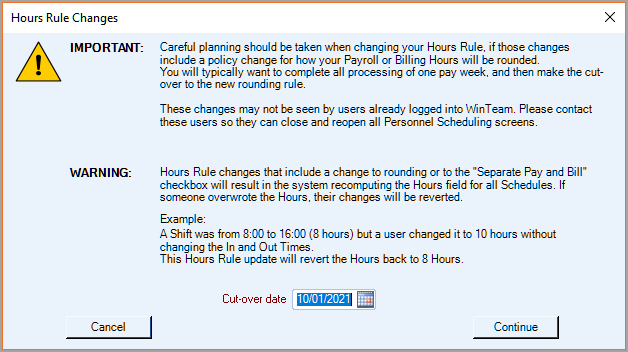
- The Hours Rule Changes window opens. Enter the Cut-over date and then click Continue.
- A message box displays where you confirm the new hours rule will be applied to the jobs in the tier you selected.
- A message box displays to confirm the success of the change.
Important: Be sure to select the same Tier/jobs that you selected when applying the blackout period.
Where Will I See Display Changes?
When separate pay and bill is enabled, you see separate fields/columns for pay and bill values in multiple windows and reports.
WinTeam
PS: Wizard (Preview Report and Show all Batches)
PS: Scheduling Activity Report
PAY: Daylight Saving Time Update
Meal and Rest Report
eHub
Shift Details Calendar
Schedule
What are Some Examples of Separate Pay and Bill Scenarios?
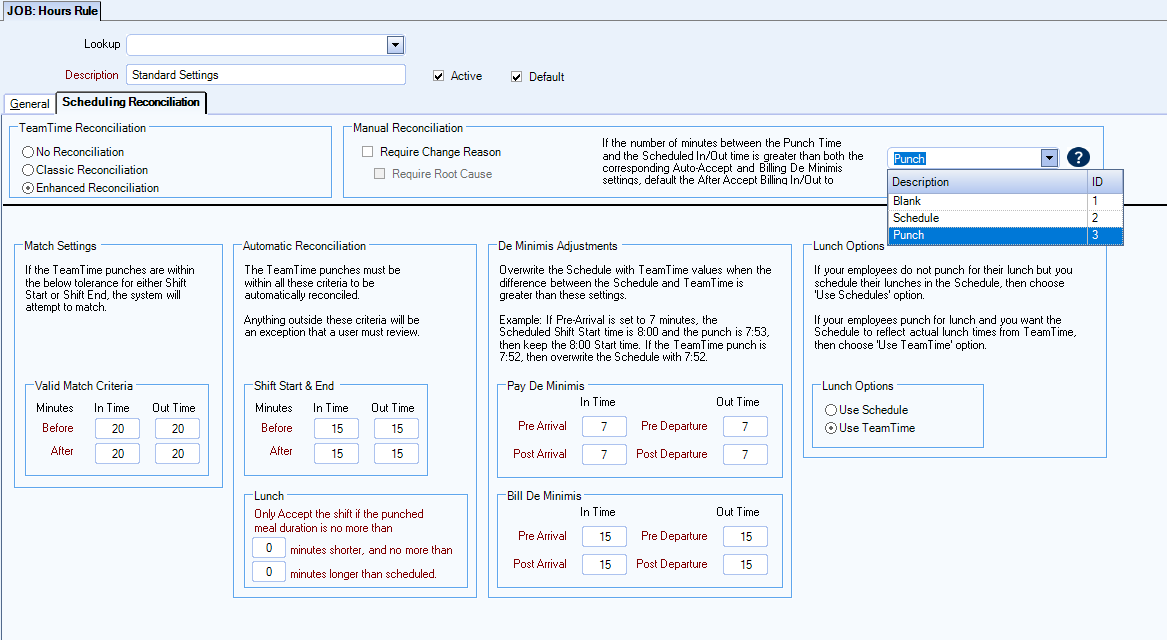
The following examples each use the Hours Rule settings seen below. In the General tab, the Separate Pay and Bill Times checkbox is selected, allowing for different rounding rules to be applied for paying and billing. The Pay Rounding Rule is set to Hundredths, while the Bill Rounding Rule is set to Quarters. In the Scheduling Reconciliation tab, notice there are separate Pay De Minimis and Bill De Minimis sections. The Pay De Minimis values are set to 0, while the Bill De Minimis values are set to 7. The Automatic Reconciliation values are also set to 7.
Tip: For details about these settings see JOB: Hours Rule
Example 1 – Auto Accept
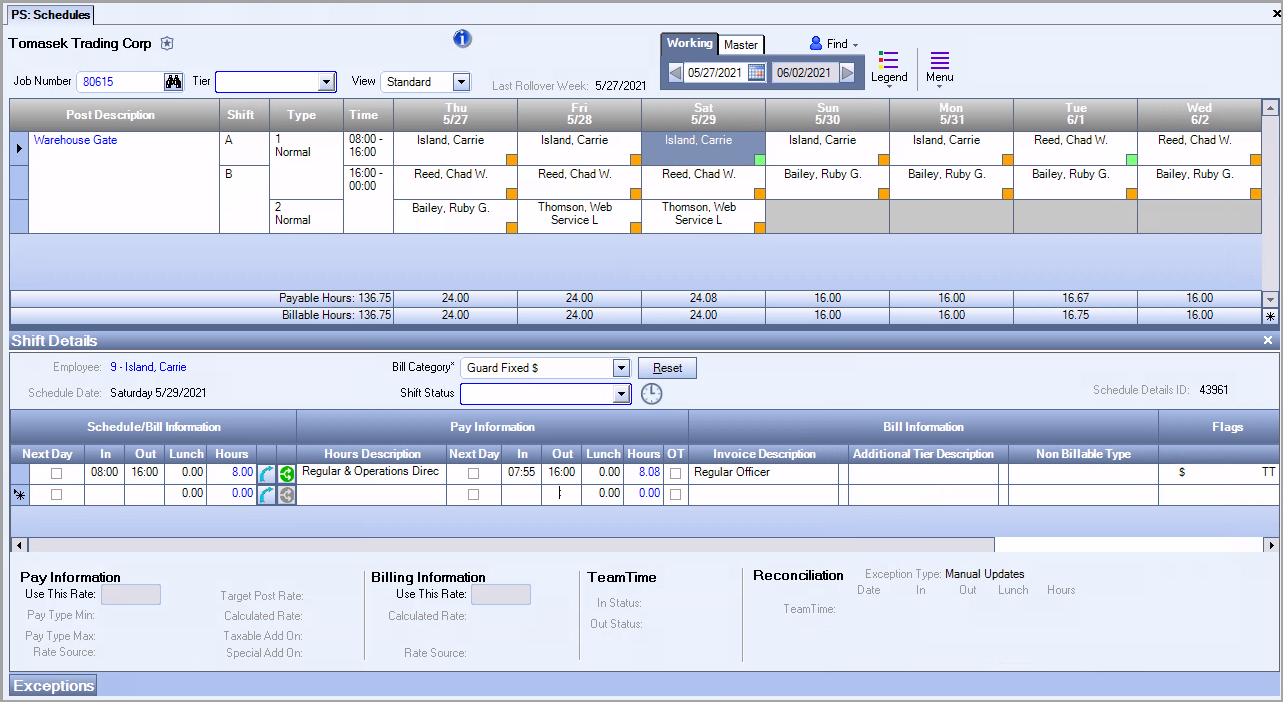
In this example, the shift indicator is green, meaning no action is required for the shift. The Reconciliation footer shows that the shift was automatically accepted because the TeamTime punches of 07:54 and and 16:02 are within the Automatic Reconciliation criteria set up in the Hours Rule settings.
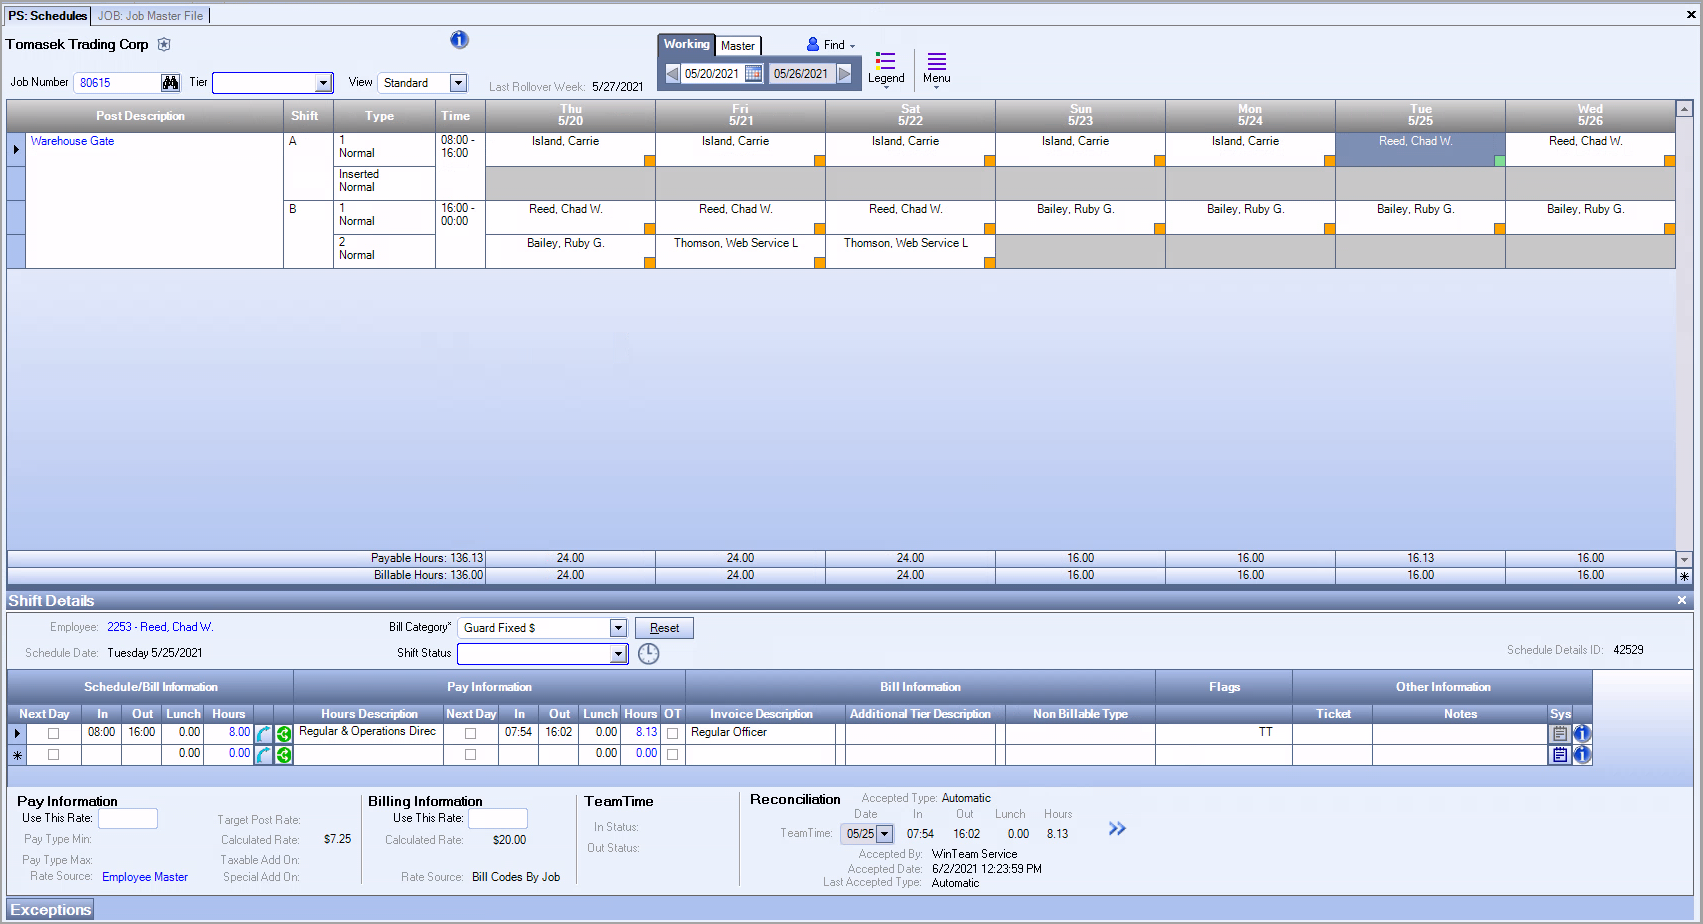
The Shift Details pane has two sets of hours: Schedule/Bill Information and Pay Information. This is because the job has been set up for separate pay and bill. As seen in Schedule/Bill Information, the employee was scheduled to work from 08:00 to 16:00 for a total of 8.00 hours. However, as seen in Pay Information, the employee actually punched in at 7:54 and punched out at 16:02, working for a total of 8.13 hours. This number is slightly different because the Bill Rounding Rule is set to Quarters, while the Pay Rounding Rule is set to Hundredths to reflect the actual time punches.

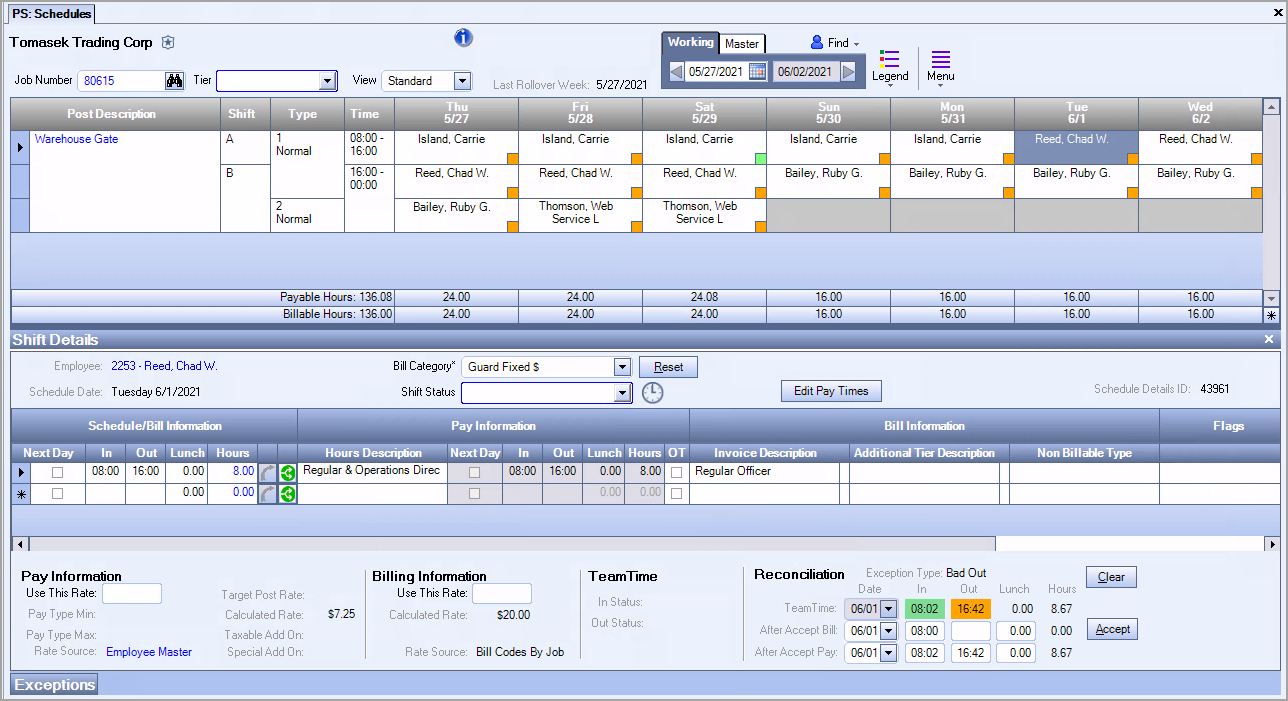
Example 2 – Exception (Orange Shift)
Note: The orange/green colors are used in our documentation and examples. You may be using other colors to identify these reconciliation conditions. See Enhanced Reconciliation for details.
In this example, the shift indicator is orange, meaning action is required due to one or more exceptions. The employee was scheduled to work from 08:00 to 16:00. The Reconcilation footer shows the TeamTime punches and two after accept lines, one for bill and one for pay. The After Accept Pay line reflects the TeamTime punches because the Pay De Minimis settings are set to 0, meaning the employee is paid for every minute worked. For the After Accept Bill line, the In time is populated using the time punched in and applying the Bill Rounding Rule of Quarters and Bill De Minimis settings. The Out time is blank because it falls outside the Bill De Minimis settings.
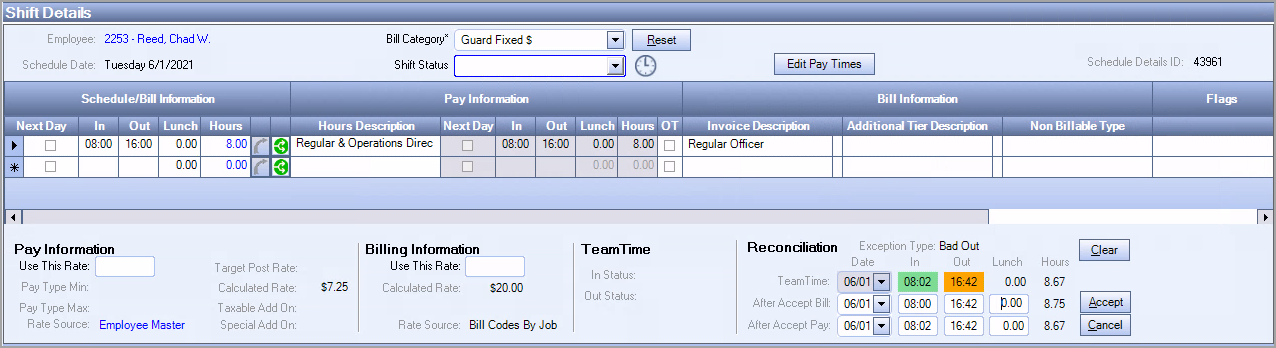
The action you take depends on company policy and/or contractual ability to bill for extra shift time. In this example, the extra shift time is billed for, and 16:42 is entered for the Out time. This changes the value of Hours in the After Accept Bill line to 8.75 because the Bill Rounding Rule is set to Quarters.
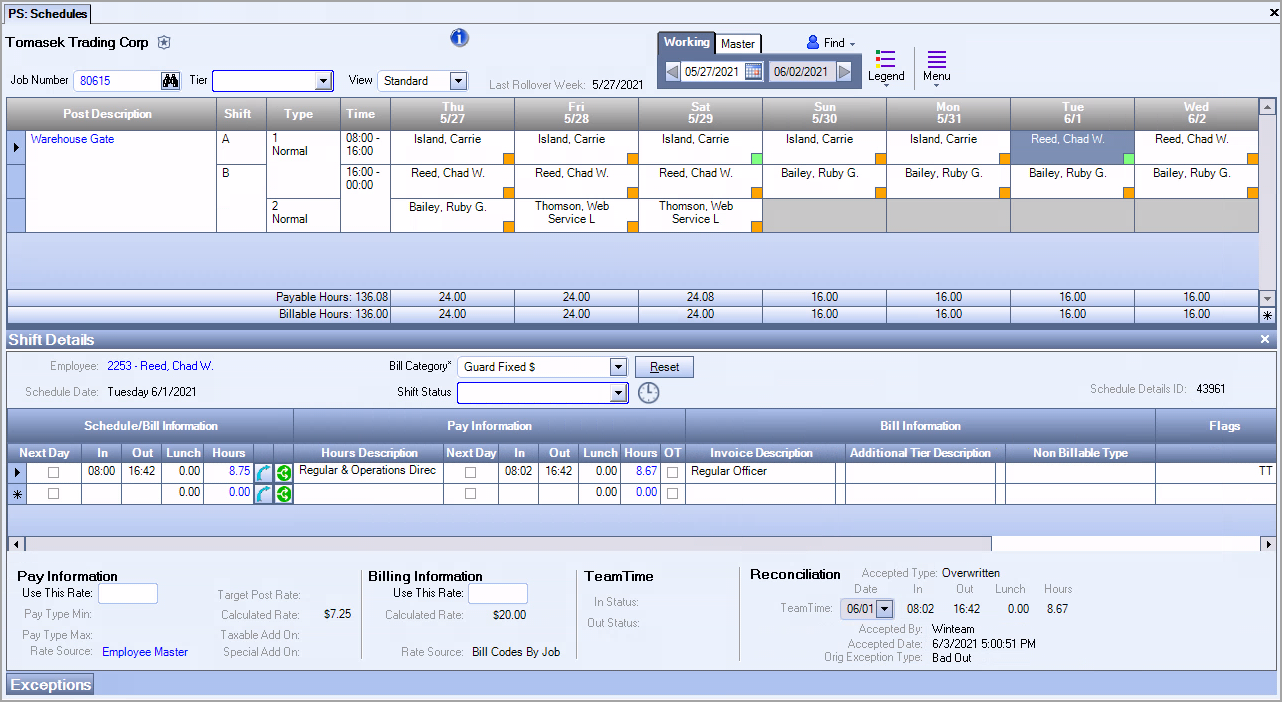
After clicking the Accept button, Schedule/Bill Information and Pay Information are updated, and the shift indicator changes to green.
Example 3 – Edit Pay Times – No Punches
In this example, the job site used paper timesheets to record times for the day because electronic Timekeeping was unavailable. As a result, no TeamTime punches appear in the Reconciliation footer for this employee.
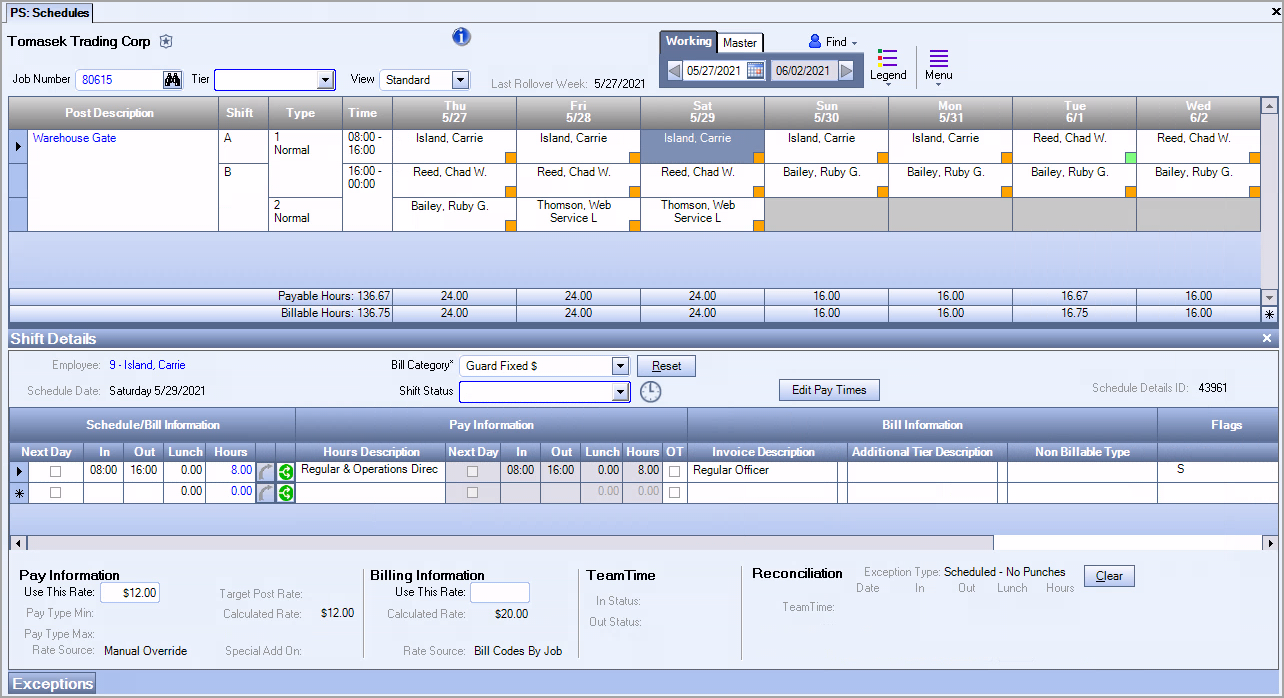
When you click the Edit Pay Times button, a warning appears, alerting you that changing the shift details before reconciling the shift will prevent the reconciliation process from finishing.
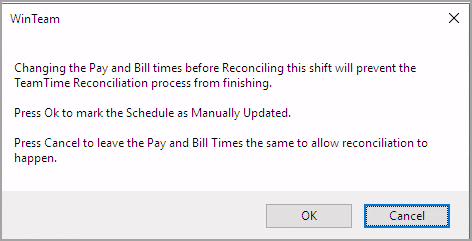
When you press OK, the shift indicator changes to green and is marked as Edit without Reconciliation, meaning the shift was manually updated without going through the reconciliation process.

The Pay Information section also becomes enabled, letting you make any necessary edits to the shift details. If necessary, you can also make changes to the Schedule/Bill Information section - independently from the Pay Information section.