To set up an Hours Accrual Benefit:
1. From the Human Resources Menu, click Benefit Setup.
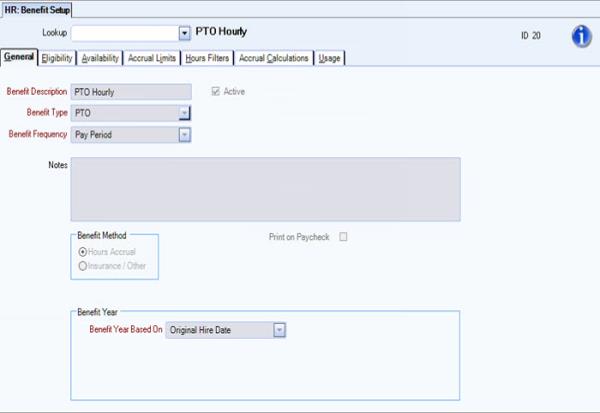
2. Enter a unique Benefit Description.
3. Enter the applicable Benefit Frequency. This is used to determine the frequency of the benefit.
a. Pay Period - Paycheck Frequency
Bi-Weekly and Bi-Weekly 2 - The Hours Date Range should always be corresponding with a pay week. In this case, the system will look at any paycheck whose week ending dates fall within the Hours Date Range specified for the batch. If it does not, it will not be included in the hours worked calculation.
Paycheck Frequency: Semi-Monthly - The Hours Date Range should always correspond to a semi-monthly pay period. In this case, the system will look at any paycheck whose pay period from and to dates fall within the Hours Date Range specified for the batch. If it does not, it will not be included in the hours worked calculation.
b. Monthly - Paycheck Frequency
Weekly, Bi-Weekly and Bi-Weekly 2 - Since the accrual period is a month’s time, the system will look for any pay week ending dates within the Hours Date Range to find the hours worked for the employee. If the pay week ending date does not fall within the date range, it will not be included in the hours worked calculation.
Paycheck Frequency: Semi-Monthly - The system will first determine that the monthly period coincides with a semi-monthly cycle, making sure that the From and To dates are consistent with a pay period beginning date and a pay period ending date. If it does, the system will include any paycheck whose pay period from and to dates fall within the Hours Date Range specified for the batch. If the From OR To date does not fall within this date range, it will not be included in the hours worked calculation.
c. Annually - Paycheck Frequency
Weekly, Bi-Weekly and Bi-Weekly 2 - Since the accrual period is a year’s time, the system will look for any pay week ending dates within the Hours Date Range specified for the batch to find the hours worked for the employee. If the pay week ending date does not fall within the date range, it will not be included in the hours worked calculation.
Paycheck Frequency: Semi-Monthly - The system will include any paycheck whose pay period from and to dates fall within the Hours Date Range specified for the batch. If the From OR To date does not fall within this date range, it will not be included in the hours worked calculation.
4. Select the Active check box.
5. Enter or select a Benefit Type. This is a User-defined field that allows for sorting and grouping of benefits for viewing and reporting purposes.
6. Enter any Notespertaining to this Benefit.
7. Select a Benefit Method. This is used to determine the type of benefit: Hours Accrual or Insurance/Other. Once a method is selected the system displays (or hides) other fields on the Benefit Setup screen.
8. If applicable, select the Print on Pay Check check box and enter a Description to print on Paychecks.
10. Select Benefit Year Based On from the drop down list. This field is used to select the Date the benefit will begin and is very important for Carry Over purposes for Hours Accrual type benefits.
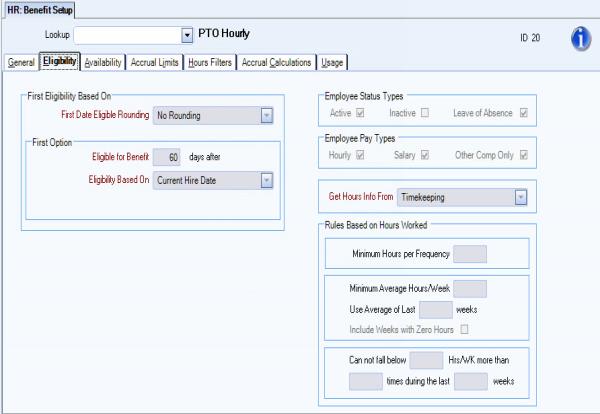
11. Click the Eligibility tab.
12. Select the First Date Eligible Rounding, which is used to determine what the Date First Eligible should be for an employee and benefit.
13. Enter applicable eligibility options. Explanations of these options:
a. First Option: Eligible for Benefit # Days After - Is used to indicate the number of days after the Eligibility Based-On date that an employee would become eligible for this benefit.
b. Eligibility Based On - There are nine different options from which to choose. Five of these dates are the same dates as what we looked at on the General Information screen except now we are using them to allow the system to figure when the employee is eligible for the benefit.
c. Second Option - Eligible for Benefit # Days After - Used to indicate the number of days after the
d. Eligibility Based On date that the employee would become eligible for this benefit.
e. Eligibility Based On - Used to further define what date to use to determine if the employee is eligible for this benefit. If the employee does not have the First Option’s date in their master file, the system will use this option instead.
f. Third Option - Works the same as the Second Option area and is based upon the date selection made for the Second Option. This allows the selection of a third and final date option.
14. Select Employee Status Types: Active, Inactive or Leave of Absence, eligible for this benefit
15. Select Employee Pay Types: Hourly, Salary, or Other Comp, eligible for this benefit.
16. Select Get Hours Info From: Timekeeping or Payroll Checks-Wages. This determines where the system will get the hours information from to calculate the hourly accruals and usage.
17. Select Rules Based on Hours Worked.
Minimum Hours per Frequency - Is used to indicate how many hours that an employee must work within the benefit frequency to be considered for the benefit.
Minimum Average Hours/Week - Indicates the amount of hours the employee must have averaged in order to be eligible for the benefit.
Use Average of Last # Weeks - Indicates the number of weeks for the system to look at to AVERAGE the amount of hours worked.
Include Weeks with Zero Hours - If selected will indicate whether weeks the employee earned NO HOURS are to be included in the average hours worked calculation. If this option is not desired, leave this unchecked. If this option is desired, check this check box. Normally this box would be checked since if an employee earned no hours during one week, this should be taken into consideration when determining whether the employee meets the Minimum Average Hours/Week rule.
Cannot fall below # Hrs/Wk. More than # Times during the Last # Weeks box to indicate the rules to use when someone’s hours have fallen below these standards. This gives added flexibility to those who have more complicated rules of eligibility.
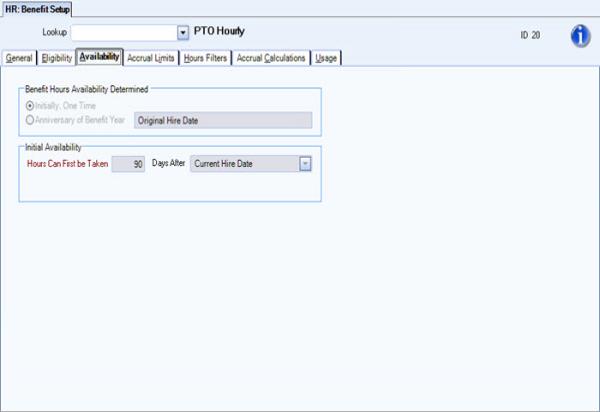
18. Click the Availability tab
19. Select Benefit Hours Availability Determined. The system uses this option to select when hours can be available for usage. The two options are:
a. Initially, One Time - If selected, the system will start to accrue the hours but the hours will not be available to the employee until a specified time period determined in the Hours Can First Be Taken and Days After box which is used to enter the number of days after a particular date that the employee can start taking the hours they have accrued.
b. Anniversary of Benefit Year - If selected, the benefit hours will be accrued but the availability date will be based on the next Anniversary of the Benefit Year. This indicates that the employee cannot take vacation they are earning THIS year until the NEXT Anniversary Date of the Benefit Year.
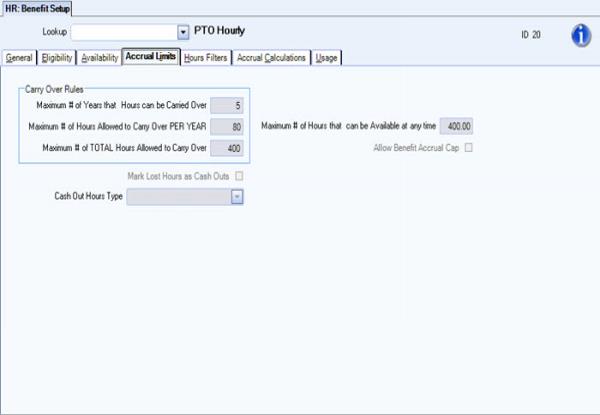
20. Click the Accrual Limits tab.
21. Select the desired Accrual Limits. See explanation below:
a. Maximum # of Years that Hours can be Carried Over - Enter the number of years the company allows hours to be carried over.
b. Maximum # of TOTAL Hours Allowed to Carry Over - Enter the maximum hours the company allows to be carried over from prior years.
c. Maximum # of Hours Allowed to Carry Over PER YEAR - Enter the maximum number of hours the company allows per year.
d. Maximum # of Hours that can be Available at any time - Enter in the maximum number of hours an employee can have available for this benefit at any given time. If there is not a Maximum # of Hours limit leave this box blank. Do not enter in a zero, as this would mean no hours could be accrued for this benefit.
Note: If a custom setting is applied (CalcMaxAvailByPercent), a value of 1-9 would be a percentage of the max # of hours available. If either the Max Hrs Per Frequency or Benefit Hrs Per Frequency field has a value (Accrual Calculations tab), that value(s) will be used to determine max # of hours on which the percentage will be based. For more information see Benefit Setup (Accrual Limits tab).
22. Click the Hours Filters tab.
23. Select applicable Hours Types for the system to look at to determine whether the employee has met the requirements listed under Rules Based On Hours Worked.
24. Select applicable Jobs for the system to look at to determine which hours worked for which jobs will be looked at for consideration for the benefit.

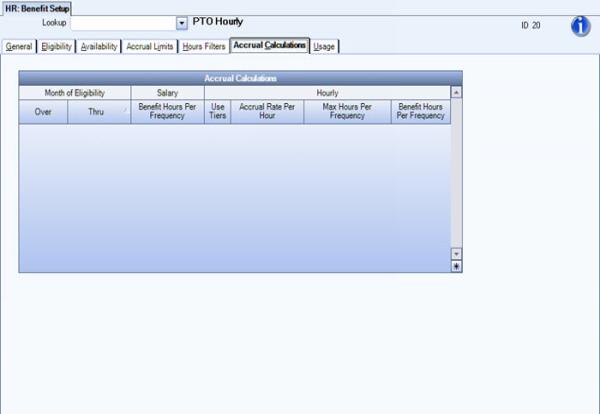
25. Click the Accrual Calculations tab.
26. Enter desired Month of Eligibility, which is used to set up the parameters for accrual calculations.
27. Enter desired Over and Thru, which allow the setting up of accrual calculations for the system to use for this benefit. (NOTE: For an hourly employee, this can be done by setting up an Accrual Rate Per Hour or a flat Benefit Hours Per Frequency may also be selected. If this benefit is set up to include salaried employees, Benefit Hours Per Frequency may also be selected for accrual.
28. Enter desired Accrual Rate Per Hour, if applicable, this rate is the amount that will be calculated per eligible hour. NOTE: The calculation for the Accrual Rate Per Hour is the number of vacation hours divided by annual hours of 2080 for example: One week’s vacation is 40 hours of vacation divided by 2080 annual hours for an accrual rate of .01924 per hour.
29. Enter Max Hours Per Frequency, if using the Accrual Rate Per Hour option; use this field to cap off the maximum number of hours an employee could accumulate per benefit frequency.
30. Enter Benefit Hours Per Frequency as a flat amount of hours per frequency for Hourly employees only. If this option is used do not enter an accrual rate per hour.
Additional information on Accrual Calculations
The Use Tiers option allows for further flexibility when company policy has a different accrual rate depending upon the amount of hours worked. If this option is used, the following fields must be completed:
Hours Worked At Least - Indicates that the employee is eligible for the accrual line if they have worked AT LEAST the stated number of hours. The At Least column is not accessible. It will be automatically calculated by the system based upon the previous line hour’s amount.
Hours Worked Under - Indicates what the start of the next Tier should be for Hours Worked. If the employee’s hours worked are lower than this amount, the accrual calculations set up on this line will be used. If the employee works this amount of hours or over, the next line’s accrual calculations will be used.
Accrual Rate Per Hour - Enter the amount that will be calculated per eligible hour.
Max Hours Per Frequency - Use if need to put a cap on what the system should accrue when using an Accrual Rate Per Hour. If there is no cap, leave blank.
Benefit Hours Per Frequency - Enter the flat amount of hours per frequency for Hourly employees only.
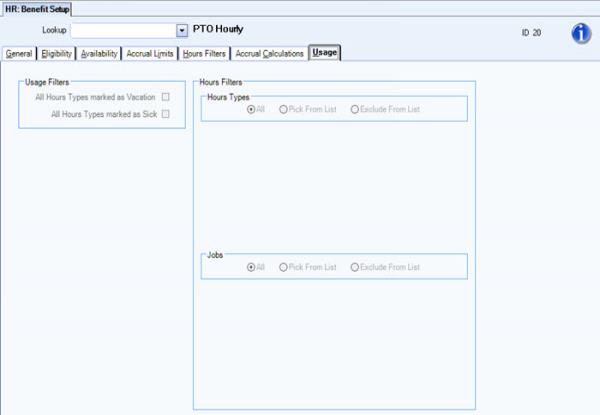
31. Click the Usage tab.
32. Select desired Hours Type for the system to use when determining Usage for this benefit. There are three options to choose from:
a. All Hours Types marked as Vacation will only include the types that have Are these hours considered to be Vacation" marked as the properties in the hours type screen for this benefit.
b. All Hours Types marked as Sick will only include the hours types that have "Are these hours considered to be Sick" marked as the properties in the hours type screen for this benefit
c. If neither option is selected, system will display the Hours Type option boxes on the Usage screen. Hours types can then be chosen or excluded from the Pick From List to be considered for Usage.
31. Select the Jobs the system will look at to determine hours for calculating usage for this benefit. For this option group, the system selects All by default.