The Cash Flow Report Format is used to assign General Ledger accounts that effect cash receipts and cash payments resulting from investing, financing, or operating activities.
You may want to review the following topics before setting up your Cash Flow Format.
Since the majority of account information can be found using your Balance Sheet, Financial Report Format, please print it out so it will be easy to add all the appropriate GL Numbers to your GL: Cash Flow Report Format.
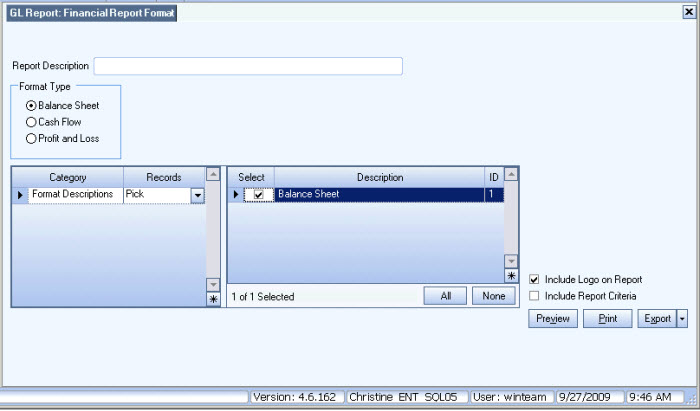
Go to Financial Report Format, and print your Balance Sheet format.

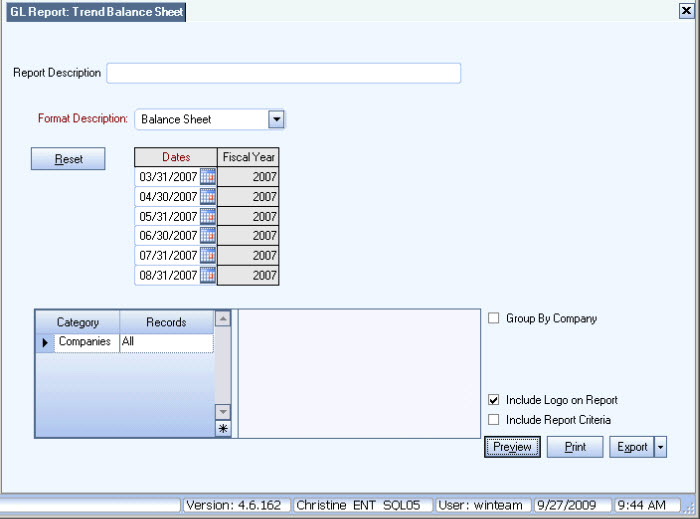
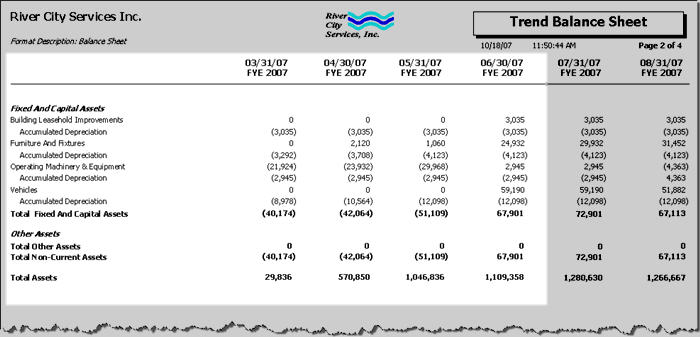
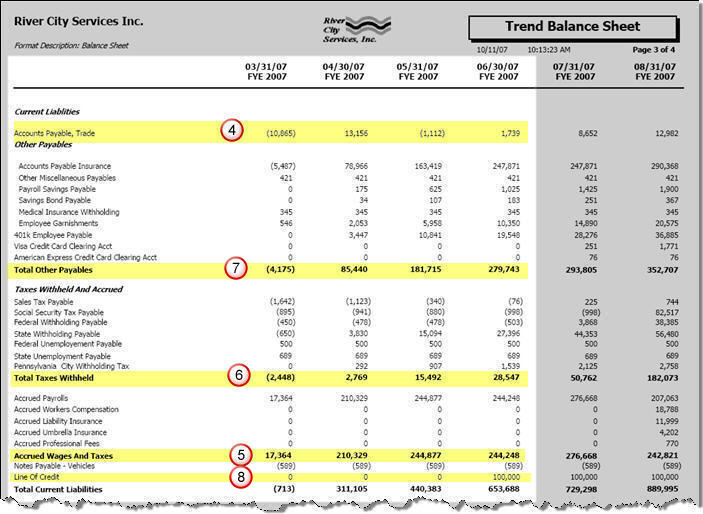
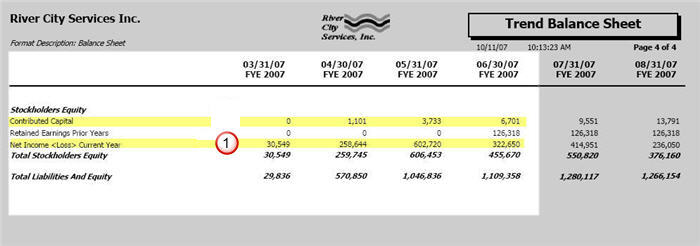
You will also need to print out your Trend Balance Sheet to cover the same period you are preparing your Cash Flow Statement for.
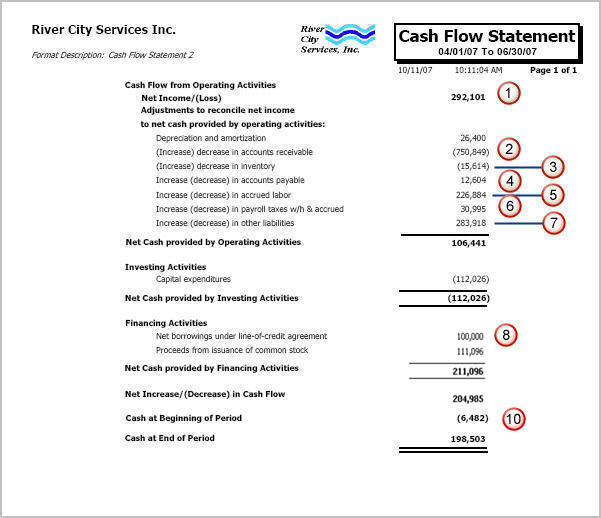
In our example, we will be preparing a Cash Flow Statement for 04/01/07 through 06/30/07.
We will run our Trend Balance Sheet beginning from 03/31/07. We will not be using the data for the last 2 months of the report.
Be sure to select the appropriate Format Description for the Balance Sheet.
With these documents in hand, you are ready to create your Cash Flow Report Format.
From the General Ledger Options menu, click Cash Flow Report Formats.
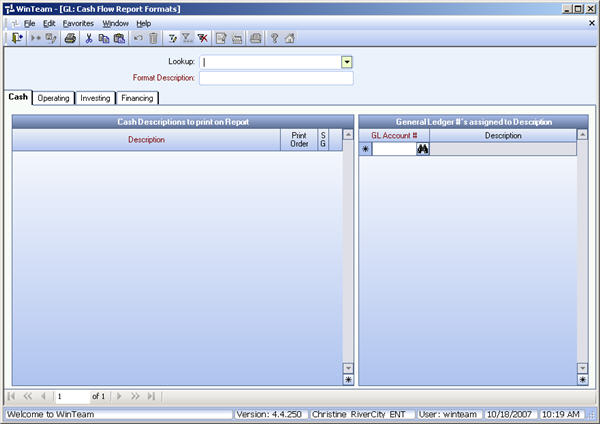
Enter a Format Description, and then press Tab.
Now click Save in the toolbar.
Once you save the format, the system will populate the Descriptions to print on Report grids (on each tab). >These pre-populated Descriptions make it easier to know the types of items that should be included in each tab. These are designated with the SG (System Generated) check box selected. You can add new Descriptions to all tabs, with the exception of the Cash tab.

We will use the right side to enter General Ledger Numbers to go with the selected Description on the left side.
Using your Financial Report Format (Balance Sheet), enter the Accounts that correspond with cash.


Once again, using your Financial Report Format (Balance Sheet), you will want to add each GL Number to the appropriate tab. If you attempt to use a GL Account # that is already used in your format, you will receive a message, and are not able to use the same GL Account # in the same format.
You may find that you need to add a Description to a tab to accommodate your company's format and accounts. You can add new Descriptions to all tabs, with the exception of the Cash tab.
For instance, take a look at our Financing tab.
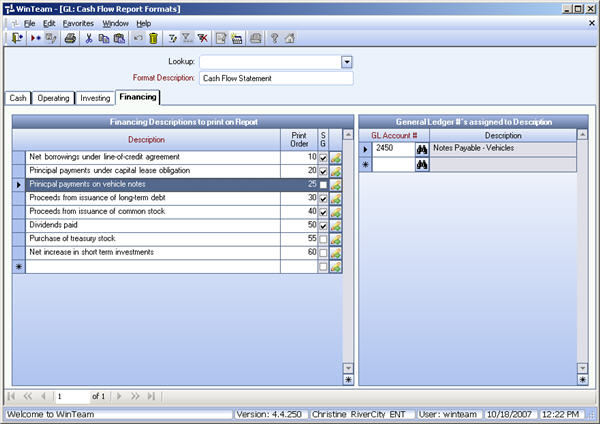
We added a Description of Principal payments on Vehicle Notes and assigned our Notes Payable - Vehicles account to it. We also gave it a Print Order of 25.
Notice that the SG check box is NOT selected. This tells us that the Description was not system generated.
Go through each item on each tab and enter the corresponding GL Accounts.
When you are finished, save the Cash Flow Report Format.
You are ready to run the Cash Flow Statement.
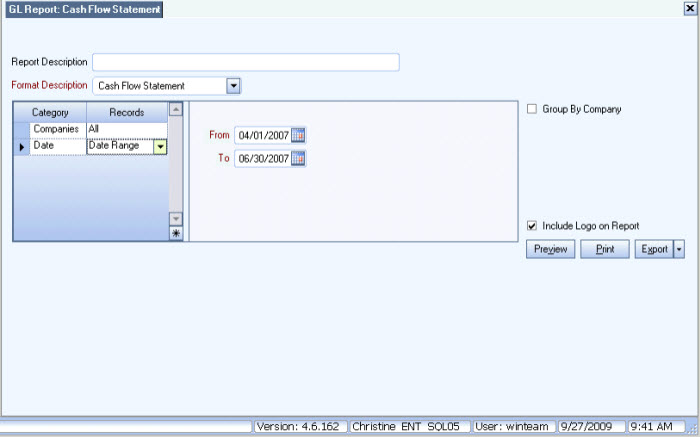
From the GL Reports Menu, click GL Report: Cash Flow Statement.
Select the Format Description and enter the Date Range for the report.
In our example, we will use 04/01/07 to 06/30/07.
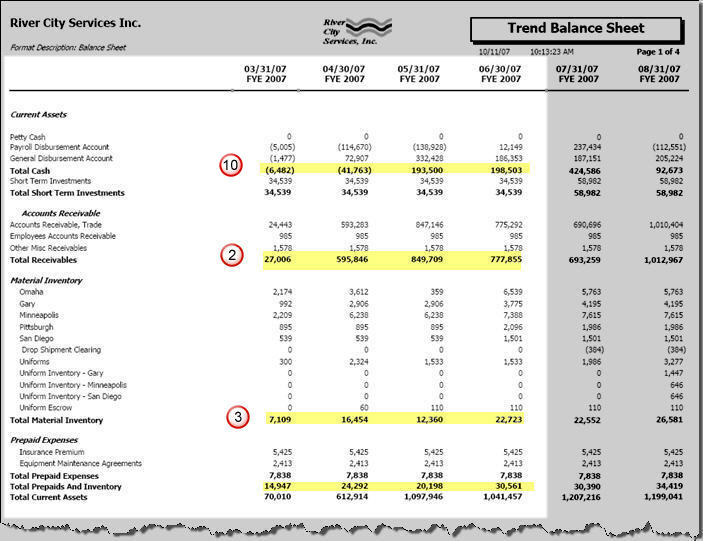
You can tie back the majority of the items on the Cash Flow Statement back to the Trend Balance Sheet.