
Use this procedure to clear (not reconcile) Accounts Payable and Payroll checks from a file created by your bank. This GL Check Clearing Utility is used in conjunction with the GL Bank Reconciliation program.
You may want to review the following topics prior to importing cleared checks:
To import cleared checks:
- Verify that a valid Check Clearing File Format has been created.
- From the General Ledger Menu, select the Check Clearing Utility.
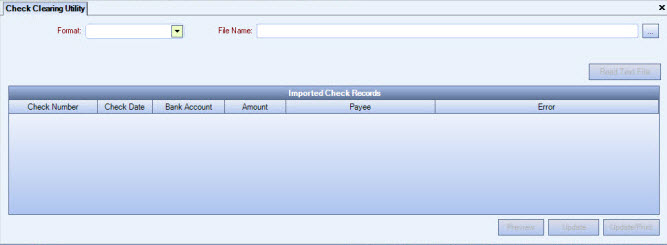
- Select the Format you wish to use. The Format must have been set up in the Check Clearing File Formats.
- Enter the location (path) to the file you wish to import. This information can be stored in a Custom Setting.
The next time you run this utility your location (path) will default. For more information, see Learning about Custom Settings.
Custom Setting
This setting is derived from the path entered on the GL Check Clearing Utility screen. This entry will default the next time the utility is run.
Section Item Value GLCheckUtility FilePath X:\BankofAmerica.txt
- Enter the Bank Statement Date (if the file format requires it).
- Select the Cash Account you want to clear checks from (if the file format requires it).
- Once all required fields are entered, click the Read Text File button. The system reads the file, verifies all parity checks (specified in the Check Clearing File Format)(Fixed Width Only), and creates records in a temporary table. In addition, the system records any information in the text file that does not have good data and records that data in a temporary table in order to generate exception reports.
- Once the system creates the temporary table, the Preview or Update options become available.
Click the Preview button to preview a list of checks that will be cleared. - Verify the report, and then click Update or Update/Print.
- Once you click Update (or Update/Print), the system performs the parity checks and then "good" checks will be marked as "Cleared". A Cleared Date, Cleared User Name, and Bank Statement Date will be added to the record. The account is now considered "partially" cleared (same as starting a reconciliation, and clicking the Finish Later button).
To verify clearing of checks
- From the General Ledger Menu, click Check Register and Reconciliation.
- Select the Account Number.
- Since you have "partially" performed a bank reconciliation by "clearing" some checks from this account, the system displays a message that a reconciliation was started but not finished, prompting you to complete the process.
- Click OK.
- From the Reconciliation screen, click the Checks tab.
You will see the Cleared check box selected for each check you imported using the Check Clearing Utility.