
Managing your money is easy with Team's Cash Transfer program. Record the transfer of funds from one cash account to another, or from a Line of Credit or Investment account.
If you are printing a physical check to transfer funds, see Performing Cash Transfers Using a Physical Check.
Once the Cash Transfer record is saved, an Accounts Receivable Payment record is created for the To Account. This is reflected in the Check Register as a Deposit.
When you update the Cash Transfer record to the General Ledger, an AP Payment record is created for the From Account. This is reflected in the Check Register as a Payment.
You may filter for information by the GL Cash Account, the From Date, and the To Date.
As a security feature, you will only see records for which you have the proper access to as setup in User Security.
Set up Cash Accounts for Transfers
- From the WinTeam Menu, click Defaults, and then click Cash Accounts.
- Lookup an existing record (or create a new one).
- Under Used For, select Transfers.
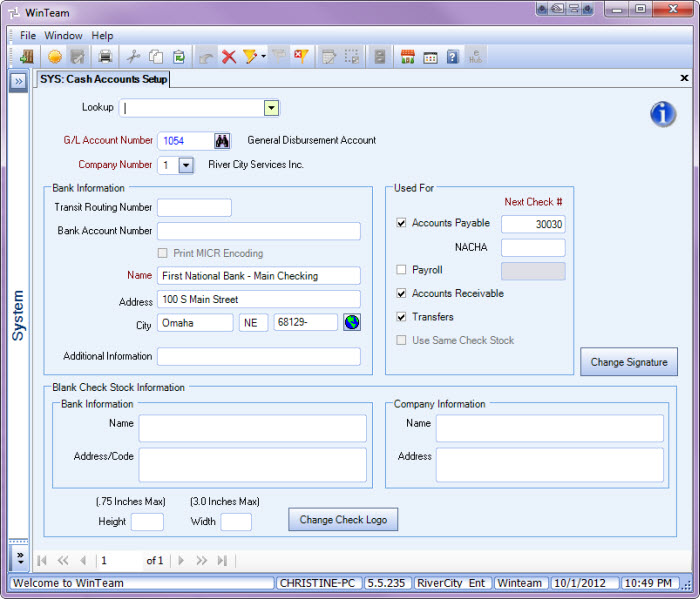
- Save the record.
- You will need to do this for each account that will be part of a Transfer.
- Click Close to save the record.
Enter a Cash Transfer
- From the WinTeam Menu, click Accounts Receivable, and then click Cash Transfers.
- Enter the date the transfer is to occur, or use the Date Control to select a date. You must enter a date that falls within the AR Valid Dates for data entry (from the Fiscal Year Setup screen).
- Select the account to transfer the funds From.
Only the accounts set up in Default Cash Accounts as Used for Transfers are available in this list.
Once you select an account, the Description displays below this field. - Select the account to transfer the funds To.
Only the accounts set up in Default Cash Accounts as Used for Transfers are available in this list.
Once you select an account, the Description displays below this field.
If you attempt to enter the same account in both the From Account and To Account fields, you will receive an error message. - Enter the Amount of the transfer.
- Include any Notesthat are pertinent to this Transfer.
- Click Close to save this record.
![]()
Update Transfers to the General Ledger
- From the Accounts Receivable Main Menu, click General Ledger.
- Select Transfers.
- You may filter your update by User Names, Companies (if applicable), and Transfer Dates.
If you select User Names, only the Users with the proper security rights and that have unposted transfers will display in the User Name Pick From List. - Click Preview to verify the information you are about to update.
- Click Close to close the preview screen.
- If the information is correct, click Update or Update/Print to complete the update process.
- Once the update is complete, the system creates an entry in AP Payments for the From side of the transaction. This amount also reflects on the Bank Register as a Payment. The To accounts reflects on the Bank Register as a Deposit.
Verify Results
- From the Accounts Receivable Main Menu, click Cash Transfers.
- Lookup the Transfer record. Only Posted Transfers display in the Lookup list.
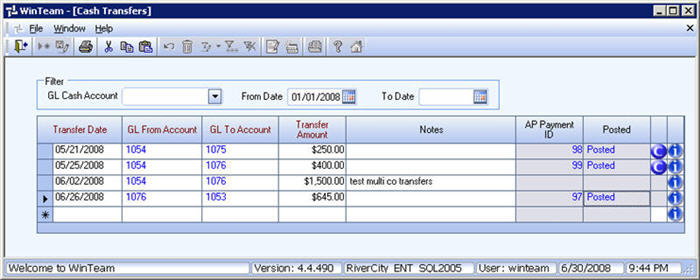
Since this record has a Posted status, all fields are locked and you are unable to edit the information.
- Verify that the record is Posted.
You may double click on "Posted" to find the GL Log #.
- Notice the gray box between the Posted column and the Change Info icon. This is where the Bank Info icon displays. You can hover over the bank info icon to see User Cleared, Date Cleared, User Reconciled, Date Reconciled, and Bank Statement Date provided the payment has been cleared or reconciled. If the record has not been cleared or reconciled, the field will be grayed out. If there is a R in a blue circle
 , the payment has been reconciled. If there is a C in a blue circle
  , the payment has been cleared, but not reconciled. These will update when the cash transfer record has been cleared and reconciled in the To Account’s Bank Statement. This does not reflect information related to the From Account. Instead, the From Account information is stored with the Accounts Payable payment record.
 - Notice the AP Payment ID field. You may double-click in this field to bring up the AP Payment record.
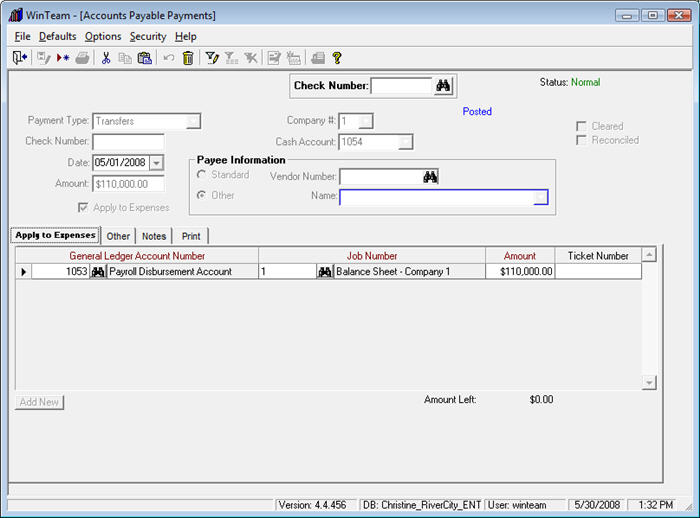
- Notice the Payment Type of Transfers for the Accounts Payable Payments record.
- The Cash Account field displays the account the transfer came from.
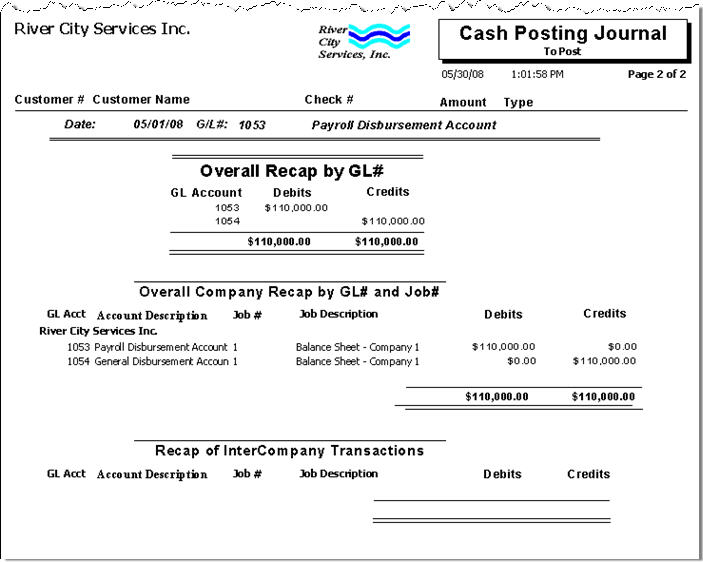
- On the Apply to Expenses tab, the General Ledger Distribution displays the account the funds were transferred to and the Job Number. You would use the Balance Sheet Job Number for where the "To" account belongs to.
- The Other tab is not used for Transfers.
- The Notes tab is populated from the Cash Transfer screen and is read-only.
- The Print tab is not used for Transfers.
- Notice the Posted status again (also on the Cash Transfer screen after updating to the General Ledger). Since this record is Posted, you cannot delete this record. You may double click on "Posted" to find the GL Log #.
- Click Close to return to the Cash Transfers screen.
- Click Close again to return to the Account Receivable Main Menu.
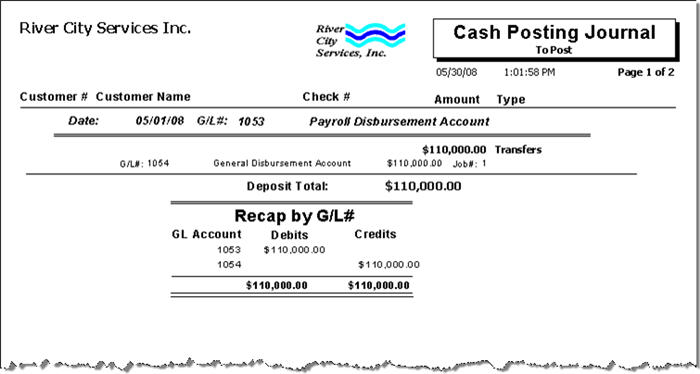
Verifying the General Ledger reference
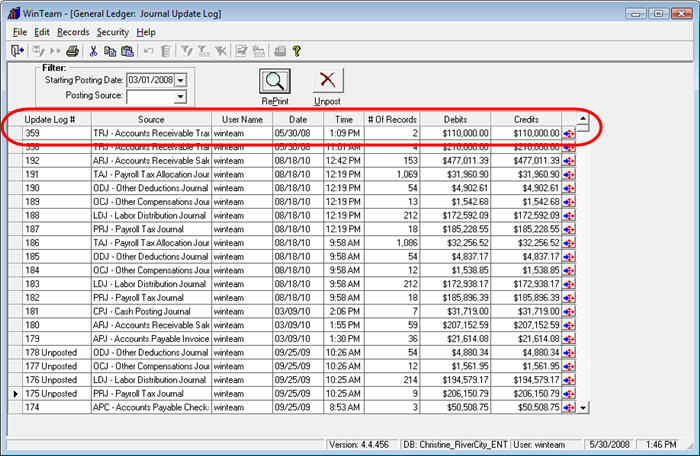
The General Ledger reference for both sides of the entry will be Cash Transfer. The Posting source is TRJ.
- Click General Ledger, then click Journal Update Log.
- Locate the Update Log #. The Journal Update Log will look similar to this:
- To view the Transactions Details, click the Detail button
 .
.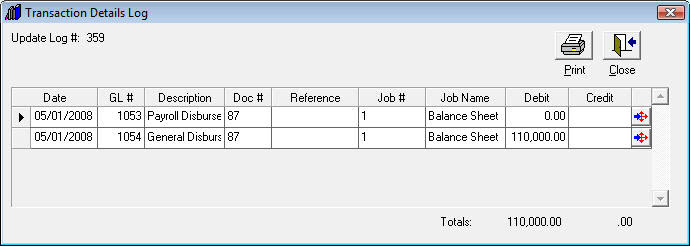
- Click the Detail button on either the Debit or Credit line to display the Cash Transfer screen.
Note: You cannot drill down on a log that has been "unposted". You will receive a message if you attempt to do so.
- Close all screens.
Payment Report
- Click Accounts Receivable, and then click Reports.
- Select Payments.
- Select Transfers from the Payment Type category/records.
- Click Preview or Print.