
WinTeam has three options for invoicing Work Tickets that have been completed and are marked as Billable:
- Importing line items into an existing invoice
- Creating new Invoices for each Customer, Job, and Sales Representative
This option creates one invoice for the same Customer and Job - Creating new Invoices for each Work Ticket for the same Customer and Job (this option creates separate invoices for each Work Ticket).
Tip: Do not depend solely on the Unbilled Work Tickets screen to give you a list of ALL billable work tickets, since the possibility exists that a Work Schedule could be marked as billable, but the scheduling detail record not be marked as billable.
To Invoice Unbilled Work Tickets for each Customer, Job and Sales Representative:
- From the Accounts Receivable Menu, click Invoice Entry.
- Enter the Customer Number.
- From the Go To menu, click the Unbilled Work Tickets.
The Unbilled Work Tickets screen displays filtered for the Customer you are creating the invoice for.
If you do not see a Work Ticket listed that you think should be here, see Viewing Unbilled Work Tickets. - Select the Select to Invoice check box for each Work Scheduling Record you want to invoice.
- Enter the Default Item Number.
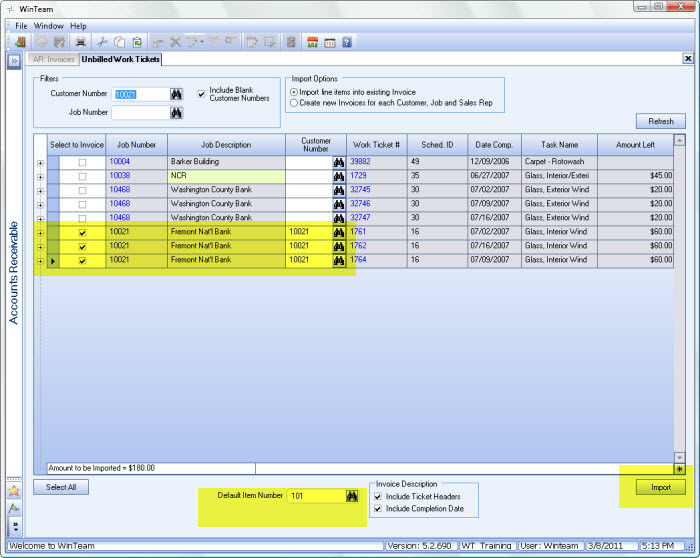
- Click the Import button.
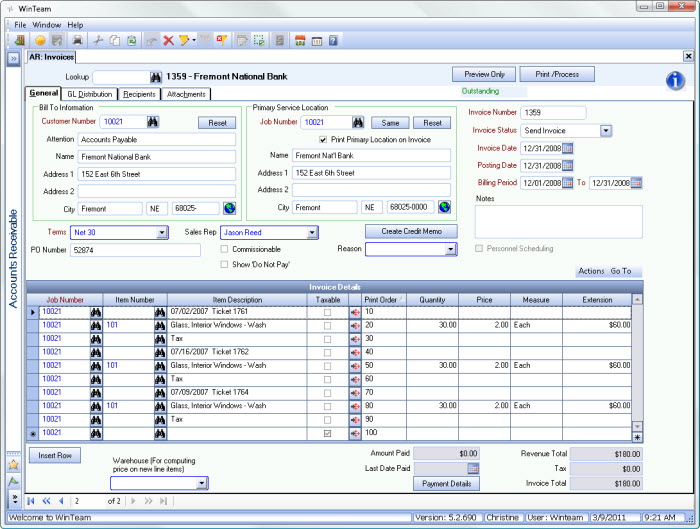
- The Work Tickets Details populates the Invoice Details grid on the AR: Invoices screen.
- Click Close to save the record.
- Continue with Invoice Processing.
To invoice Unbilled Work Tickets and create separate invoices for each Work Ticket for the same Customer and Job:
- From the Accounts Receivable Menu, click Invoice Entry.
- From the Go To menu, click the Unbilled Work Tickets.
If you do not see a Work Ticket listed that you think should be here, see Viewing Unbilled Work Tickets. - Under Import Options, select Create new Invoices for each Work Ticket.
- Filter invoices by Customer Number or Job Number, if applicable.
- Select the Work Tickets you want to invoice.
- Enter a Default Item Number.
- Click Import.
- WinTeam then creates a separate invoice for each Work Ticket.
- Continue with Invoice Processing.
The invoice details include the work ticket date and the associated work ticket number in the Item Description.
